You can preview and pre-fill a request before sending it to your client.
Previewing is a good opportunity to double-check your request before sending it off, while prefilling information that you already know makes the process easier for your client.
Previewing requests
To do this, click the Preview option at the top of your dashboard.
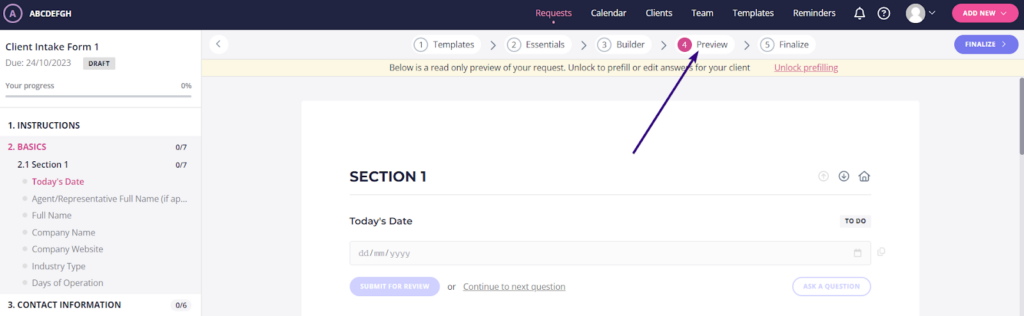
| Note: This preview looks slightly different to what your clients see. Your clients only see the actual form, and not the navigation bars at the top. |
Another way to see a true preview from your client’s perspective is to send the request to yourself. However, you cannot use the email address you signed up for Content Snare with to create a new client. You also cannot create a client with the same email as one of your team members.
Instead, you’ll need to do this using a secondary email address of your own. When you are publishing a request, create a new client using a given secondary email address.
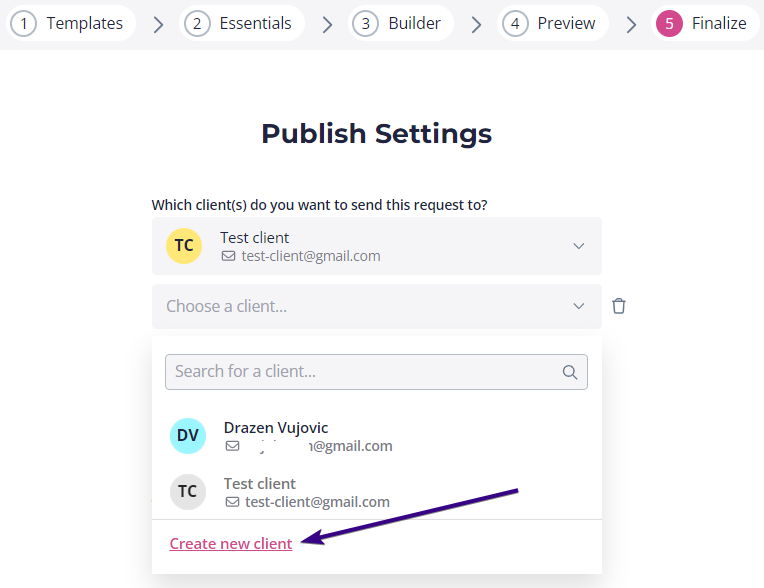
That way, you’ll receive the emails just as a client would so you can test out your client’s experience.
| Pro tip: If you’re using Google Suite or Microsoft 365, a secondary email address isn’t actually necessary in order to successfully send a request to yourself. Instead, when creating yourself as a client, you could simply add “+test” onto your current email address (e.g: “[email protected]“) and Content Snare will allow you to use it. When receiving the email to your inbox, Google will ignore the “+” and everything after it, delivering the email to your original email address (in this case “[email protected]“). |
Thirdly, you can view request templates even if you don’t have a Content Snare account. To do that, go to our Templates library and click any template from the list to see how it looks.
Prefilling content for your client
If you already know some details about your client (such as contact info), you can prefill this information. This helps both you and your client because they’ll complete the request faster.
| Pro tip: Some companies use the prefill functionality to begin filling out the request during a client meeting. They then send the partially completed request for the client to finalize any items that couldn’t be completed during the meeting. |
To prefill information, go to Preview and click Unlock Prefilling:

Once done, you’ll see that Prefilling or editing answers for your client is active.
Any changes you make prefilling will be visible to the client. If you’re going to prefill content, we suggest explaining it to your client in request instructions. For instance, you can include a few sentences like this:
“I’ve pre-filled certain fields to save you some time. If any pre-filled information is incorrect, feel free to make changes. If not, just submit those fields as they are. Thank you!”
| Pro tip: Bear in mind that you can’t test request conditions without actually prefilling answers. Read this article to learn how to use conditional logic. |