A reminder schedule is a set of rules that determines when Content Snare sends reminders.
You can access schedules from the Reminders tab on the main dashboard:
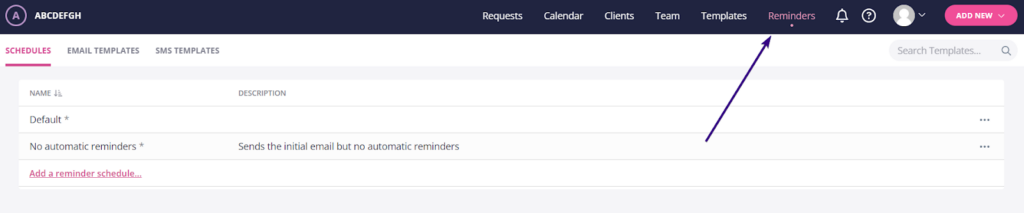
There’s a Default reminder schedule in Content Snare, but you can also choose the No automatic reminders schedule to send the initial notification only.
In addition, it’s possible to create as many of your own reminder schedules as you need.
Editing the default reminder schedule
You can create your own reminder schedule from scratch or edit the default version. For now, let’s edit the default reminder schedule.
| Note: We suggest duplicating the original to use a reference later or in case you make a mistake. To copy the default reminder schedule, click the dotted area next to its name and then choose Duplicate. |
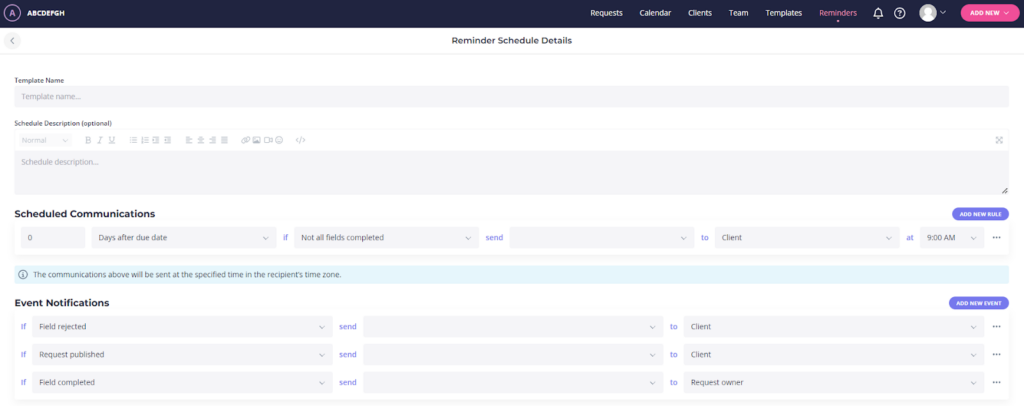
The default reminder is based on a few simple rules:
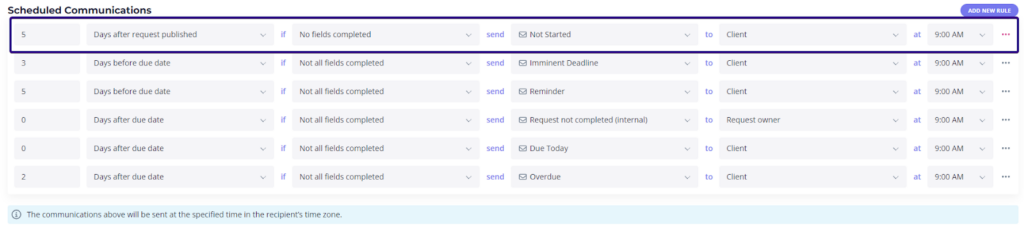
Let’s analyze the first rule from the screenshot above:
- 5 days after the request is published
- If no fields have been completed
- Send the “Not Started” email
- To the client
- At 9 AM
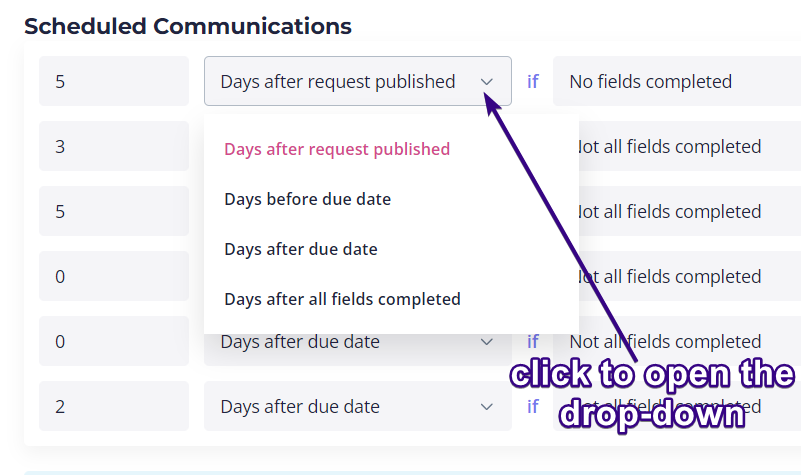
You can change each of these elements by choosing a different option from the drop-down menu:
| Note: The system sends reminders at the specified time in the client’s time zone. This can be changed by editing the client. |
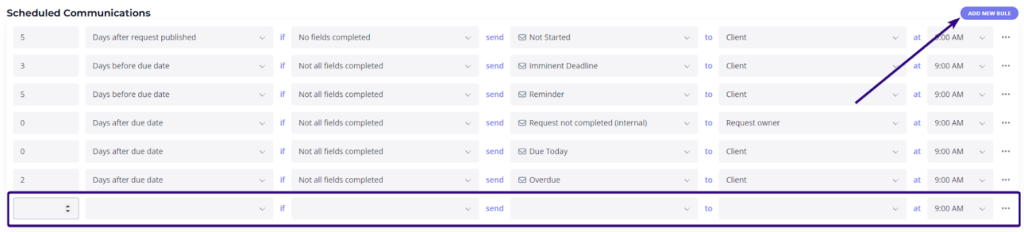
If you want to delete a rule, click the dotted area on the right and then Delete. If you want to add another rule, click Add new rule and a new line will appear at the bottom of the list. Fill it in to set your own conditions for the new email:
Event notifications
Further down, you’ll see Event Notifications. These are not time-based emails, but rather action-triggered notifications. For example, when the request is first published, the system will send the New Request/Client Sign Up email to your client.
By default, your client will also receive an email in these events:
- Filed rejected
- Field completed
- All fields completed
- Rejected field completed
- Request completed
If needed, you can delete some events or create new ones by clicking Add new event:

Once done, click Save in the upper-right corner of the interface to save the edited version of the default reminder schedule.
Create your own reminder schedule from scratch
You can also create a reminder schedule from scratch by clicking Add a reminder schedule at the bottom-left corner of the Schedules tab. This opens a new page with reminder schedule details, so you’ll need to fill it in:
- Schedule template name
- Schedule description (optional)
- Scheduled communications
- Event notifications
From there, you can add as many rules and events as you see fit. When you’re done creating it, click Save in the upper-right corner and your tailored reminder schedule will appear in the Schedules tab.
Assign a reminder schedule to a request
You’ll need to assign a reminder schedule to a request before publishing it. Do it from the drop-down menu in Publish Settings:
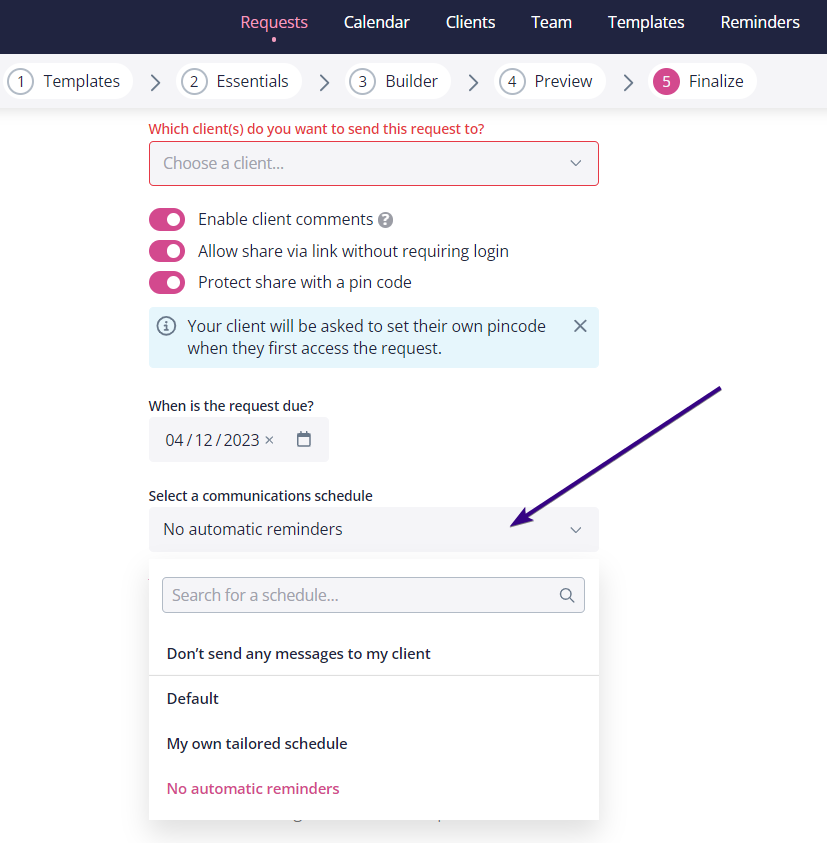
From there, you can choose:
- The default reminder schedule
- Don’t send any messages to my client (this means your client won’t receive any emails whatsoever)
- No automatic reminders (they will only receive the initial email)
- One of your own reminder schedules (if you have any, they will be shown as options in the drop-down menu)
All emails due to be sent out are then shown on the calendar view.