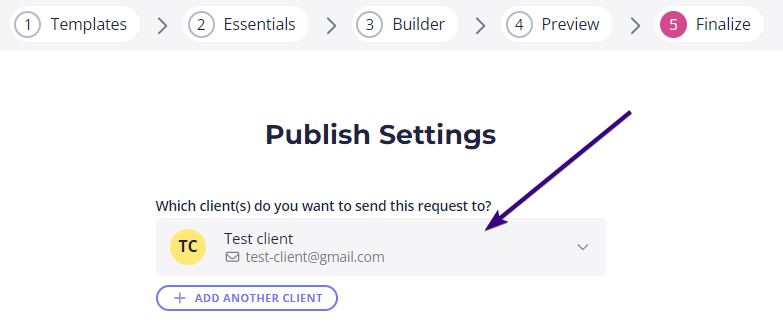
The last step is to finalize your request. To do that, you need to set up a few details in Publish Settings.
First, select a client to send your request to from a drop down menu.
| Note: You can pull client lists from third-party apps so you don’t need to re-create them in Content Snare. Learn more about Content Snare integrations. |
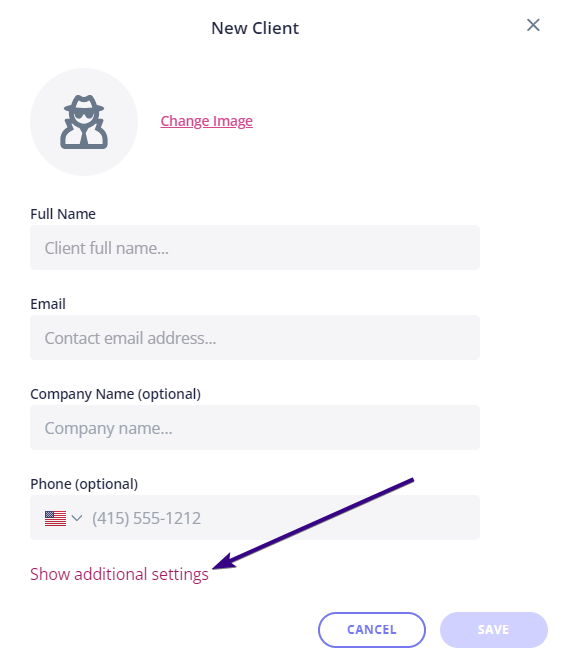
If you’re sending the request to a new client, click Create new client in the drop-down. Once done, you’ll see a new client pop-up inviting you to fill in client-related information. Your client’s name and email are mandatory fields, but you can also include:
- Image
- Company name
- Phone number: This is required if you want to use SMS reminders. If SMS reminders are enabled and you don’t provide a phone number, your client won’t get them.
You can also change dates, languages, and time zones (used for reminders) by clicking Additional settings at the bottom of the pop-up window.
When you fill in the client info, click Save to add them to the list of your clients in Content Snare.
Sending a request to multiple clients
You can send the same request to more than one client. After selecting the first client, click Add another client and select an extra client from your list.
| Note: Bear in mind that adding multiple clients to a request won’t create a separate request for each client. Instead, it allows them to work collaboratively on the same request. Every client who is added to a single request will be able to see the answers added by others. |
Additional settings
You can customize the request with additional settings. Firstly, you can enable client comments to allow your client to ask questions about each field.
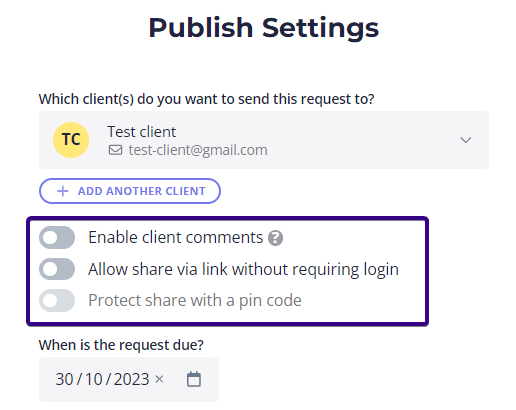
Secondly, you can Allow share via link without requiring login. This allows your clients to access the request via the link even if they don’t have a Content Snare account. But if you disable this option, your client will have to register before accessing the request.
| Note: Read this article to learn about access and security settings. |
Thirdly, you can Protect share with a pin code. In this case, your client will be asked to set their own pin code when they first access the request. They’ll need to re-enter the code every time they access your request.
Due date and a reminder schedule
You must also set a due date before sending requests. The system will automatically assign one, but you can change it.

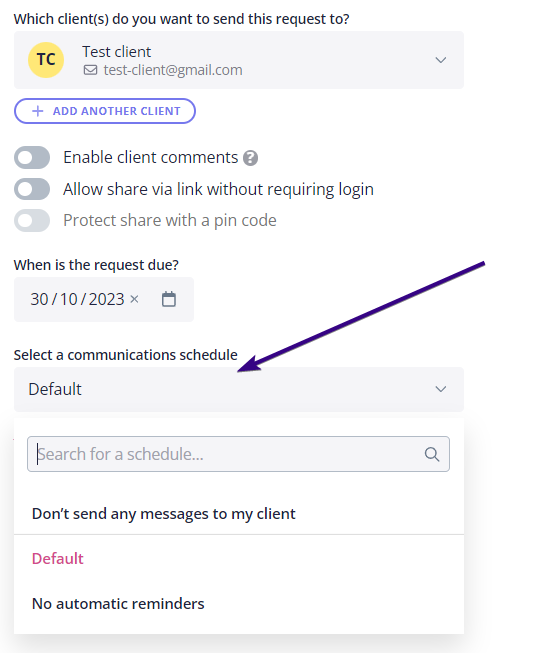
When publishing a request, choose the reminder schedule you’d like to use from the drop-down menu. A reminder schedule is a set of rules that tells Content Snare when and under what circumstances to send emails or SMS to your clients. This is how we remind your clients of deadlines and let them know that they need to provide answers.
There is a default reminder schedule when you first sign up to Content Snare, but you can also create your own. Once done, choose the preferred option via Select a communications schedule.
Alternatively, you can select No automatic reminders if you don’t want to send any reminder emails to the client. In this case, your client will only receive notifications like the initial email and rejected field emails.
The last option is Don’t send any messages to my client. This disables ALL emails and SMS notifications. In this case, you’ll be responsible for all communications (including sending the link to the request).
When you choose a reminder schedule, you can also click Show client communications to see the list of messages that the system will send to your client:
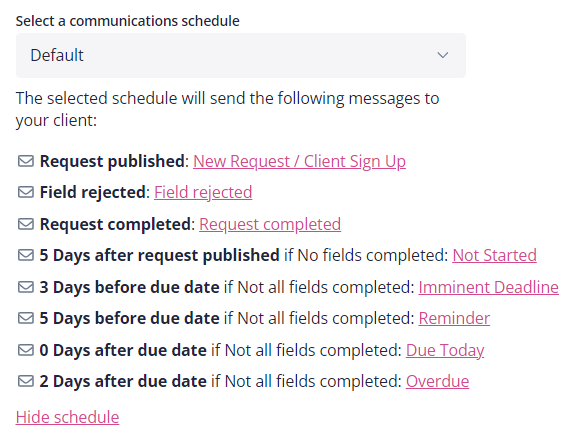
Clicking each message will show a preview, but you cannot edit them here. Click Hide schedule at the bottom to hide the client communications list.
| Note: You can view all scheduled emails on your entire account with the calendar view. |