You can edit a request after sending it and the system will automatically save changes. Go to the Requests tab and find the one you’d like to modify.
Click the dotted area in the upper-right corner of that request and choose Edit from the drop-down. This takes you to the request Builder (step 3) from where you are free to make as many changes as you see fit. You’ll also see this notification at the top:

If you want to stop seeing this message when editing published requests, just click Don’t show this again.
Change due dates and reminder schedules of edited requests
You may wish to change the due date when you modify a request or add new fields.
Go to Finalize (step 5) when editing the request. Then go to the due date, click on it, select a different date from the calendar, and scroll down to Update settings at the bottom:
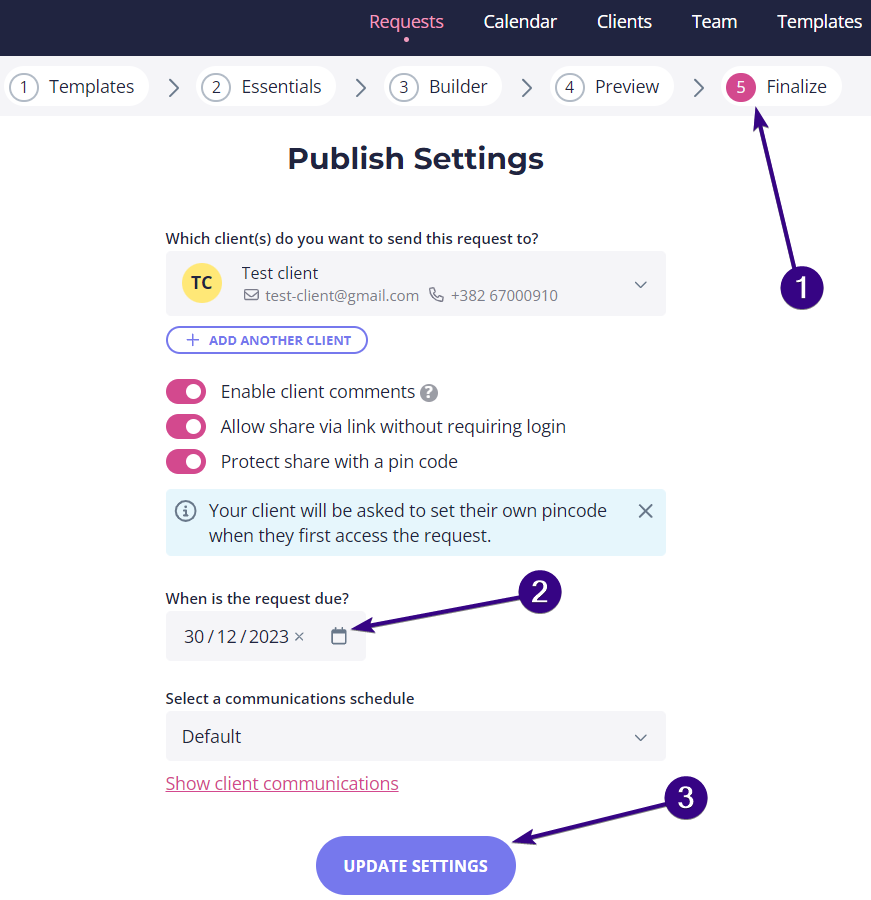
| Note: You might also want to update the communication schedule or simply turn off notification emails for this request. |
Will the client see the updated version?
Yes, they will see the updated version. The request is automatically updated as soon as you modify it, so the changes and/or additions will be there the next time your client opens it.
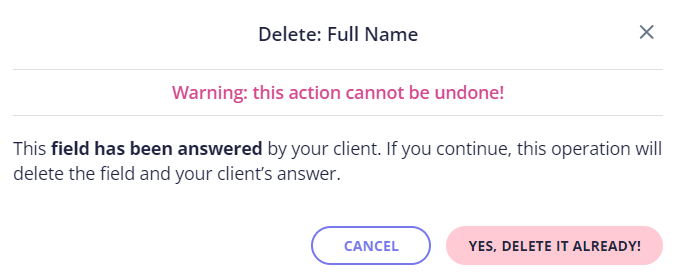
The only thing to be careful of is deleting, as you could potentially delete a field with data in it. In this case, a pop-up will appear warning you that you will delete your client’s answer:
Keep your client informed
We also recommend notifying your client that you made changes to the request. Should you wish to do that, it is practical to create an email template that you can use in such situations.
The subject line could be something like the following: “We have added some questions to your request”. From there, you can send this email template manually each time you add new fields to a client’s request.