Hi there!
In this short post, we will guide you through the process of submitting your information through Content Snare.
Content Snare makes it easy for you to see what information you still need to provide, and which parts are complete. If you submit everything through the portal, it will make things much easier for you. Back and forth email tends to get messy and confusing, so please avoid sending information via email.
Everything you type in or upload in Content Snare is automatically saved. That means you can pop in and out of your portal (we call it a “request”) at any time and your progress won’t be lost!
Now, let’s begin.
First, you’ll be getting an email that looks something like this:
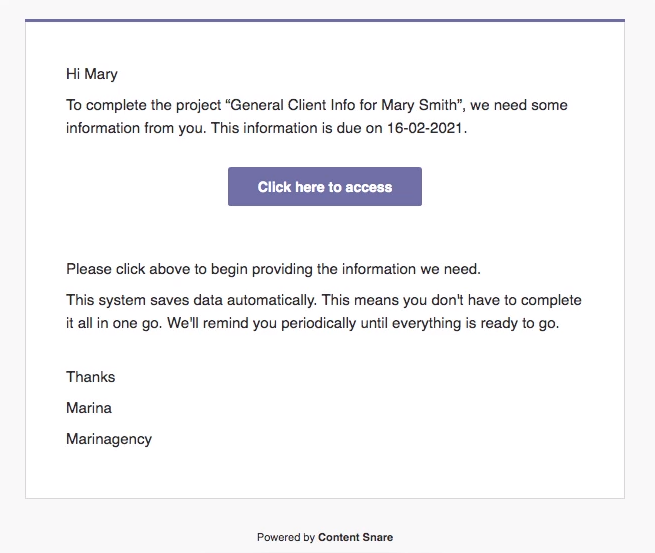
This will be your way to enter the request to provide all of the information we need from you.
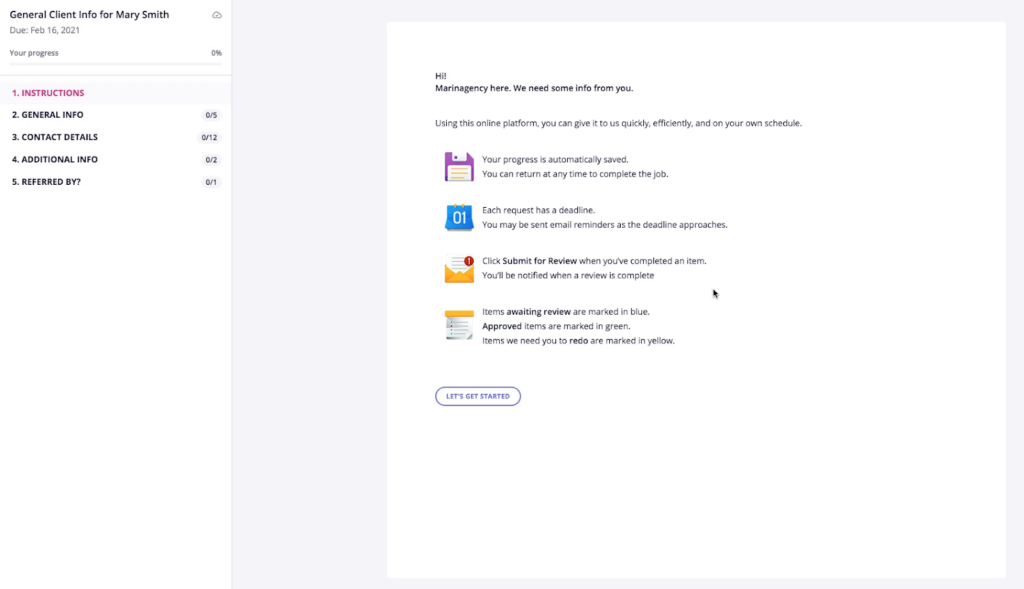
Once inside the Request, you’ll see something similar to this:
In a Request, there are two main areas.
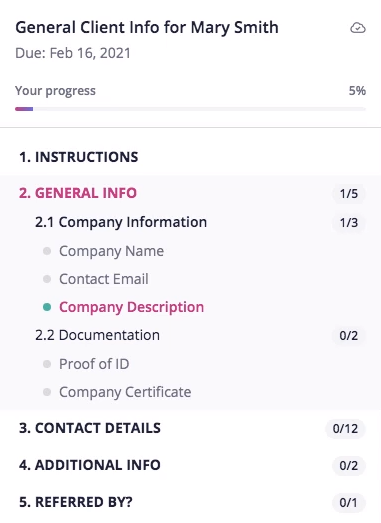
1. The Navigation
You’ll find this on the left of the screen.
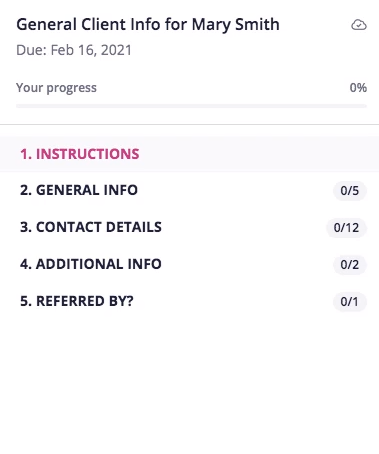
Here you’ll see how many questions are remaining, your overall progress, and the due date.
2. The Request
This is the main panel on the right of the screen. When you first open the Request, you’ll see our instructions. They look something like this:
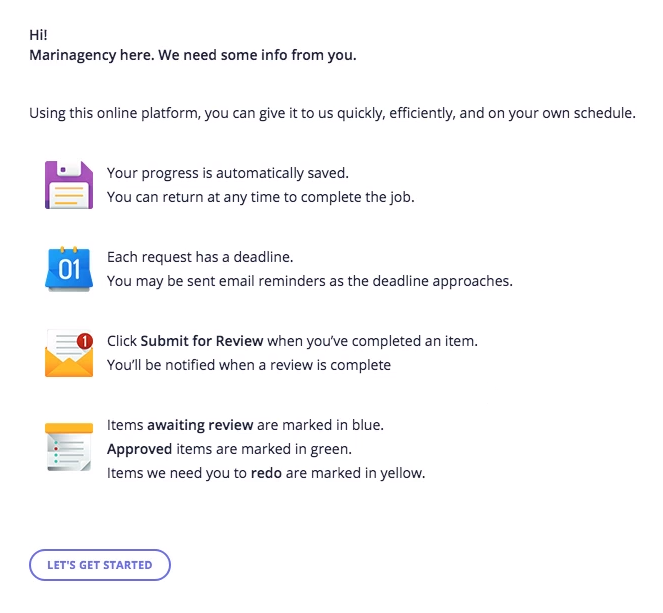
Here you’ll see a quick introduction to the request and a few words from us.
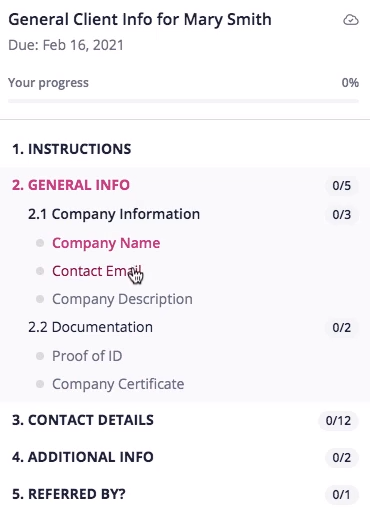
Now, let’s dive inside the first page of the Request. Click the “Let’s Get Started” button to begin
How to answer questions and upload files
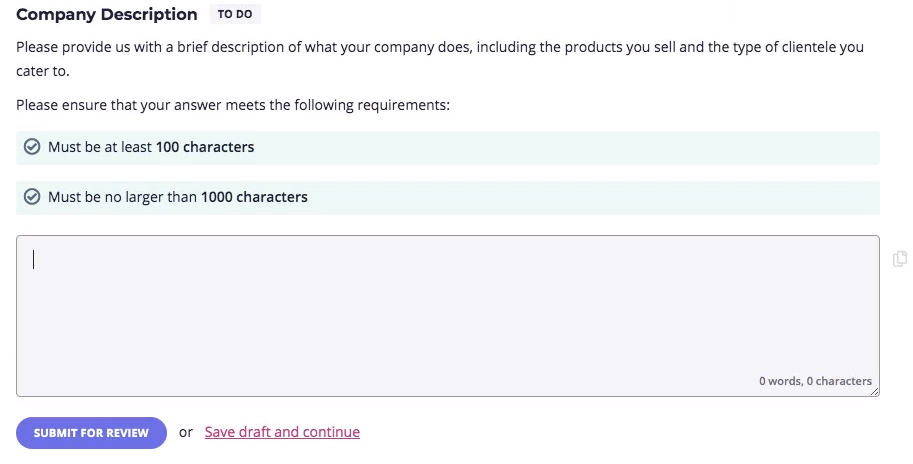
The request is made up of a series of questions. Some will ask you to type or paste in information. Some will ask you to upload files. They look like this:

As shown in the image above, “Name” describes the name of the question.
There are 3 types of status:
- To Do: This means that you haven’t submitted an answer yet.
- Done: You’ve submitted an answer
- Redo: This means that we have reviewed your answer and have requested changes.
Below the question name and the Status are the instructions.

Here, you’ll find details and specifications that will help you answer the question.
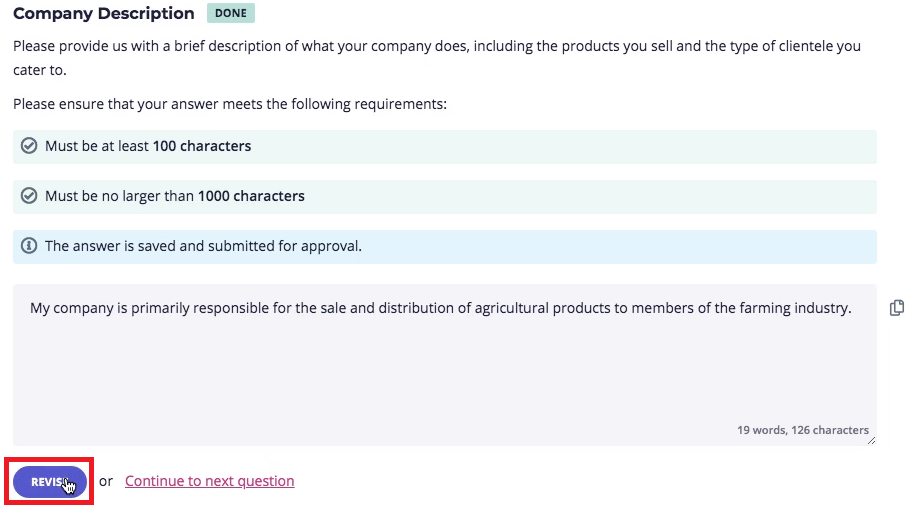
Let’s take a look at an example of a question with special requirements
Unless your answer meets the requirements, the system will not let you submit your answer.
Once you’ve finished answering the question, click the button to submit your answer for it to be reviewed.
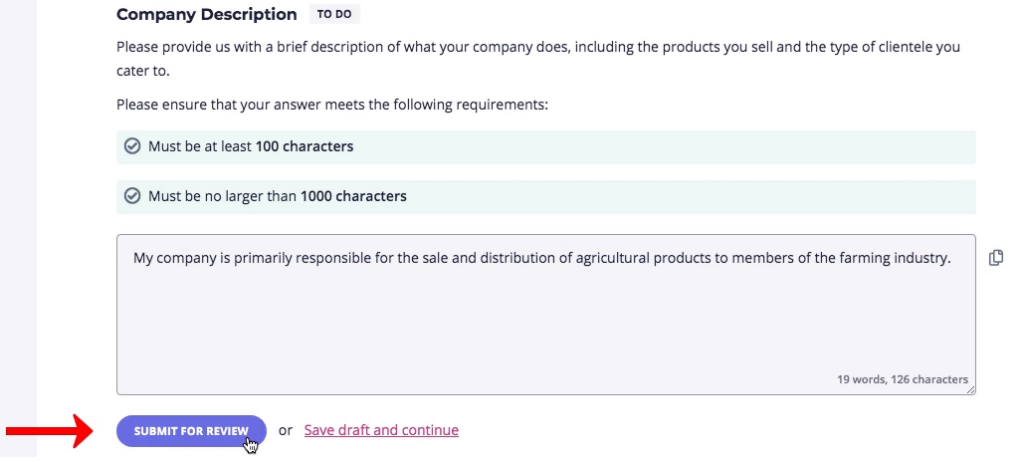
Submitting an answer for review will automatically move you to the next question.
When you submit an answer, the status changes to “Done,” the item is marked off in the sidebar, and the progress bar will update.
If you want to make some changes to your answers, you’ll need to click on the Revise button.
Please keep in mind that if we’ve approved the answer, you won’t be able to make changes.
At the bottom of each page in the Request, you can instead submit all of the answers in one go by clicking on Submit Page For Review

When we request changes
After we review your answers, sometimes we may need additional information or changes to what you provided.
On the off chance that happens, you’ll receive an email from us that looks like this:
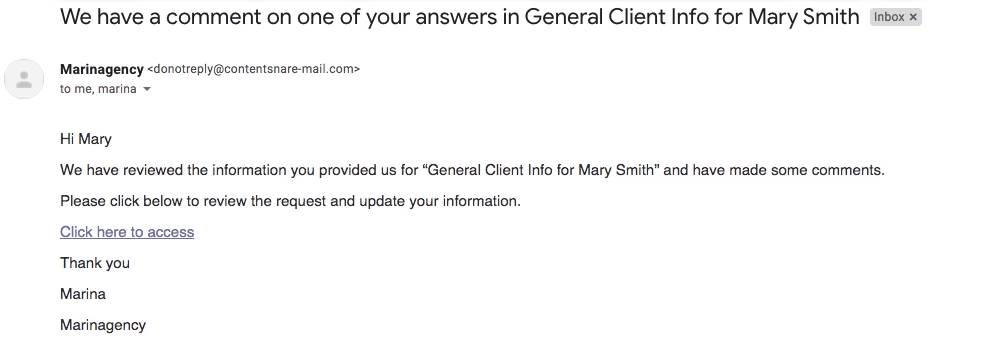
Click the link in the email to come back to the Request.
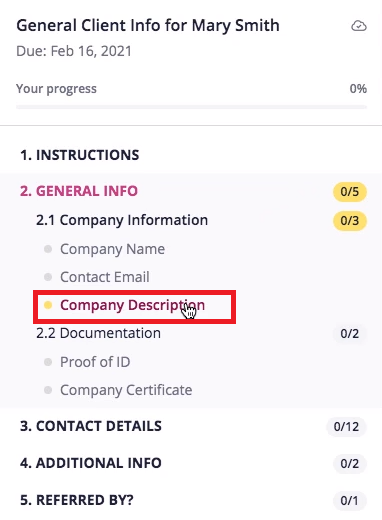
You’ll notice on the Navigation bar that some of the fields are highlighted in yellow. This means that the status of the field has changed to Redo.
When you get to the field that we want you to change, you’ll see a little comment from us at the bottom of the answer with some insight into what you can change for us to approve it.
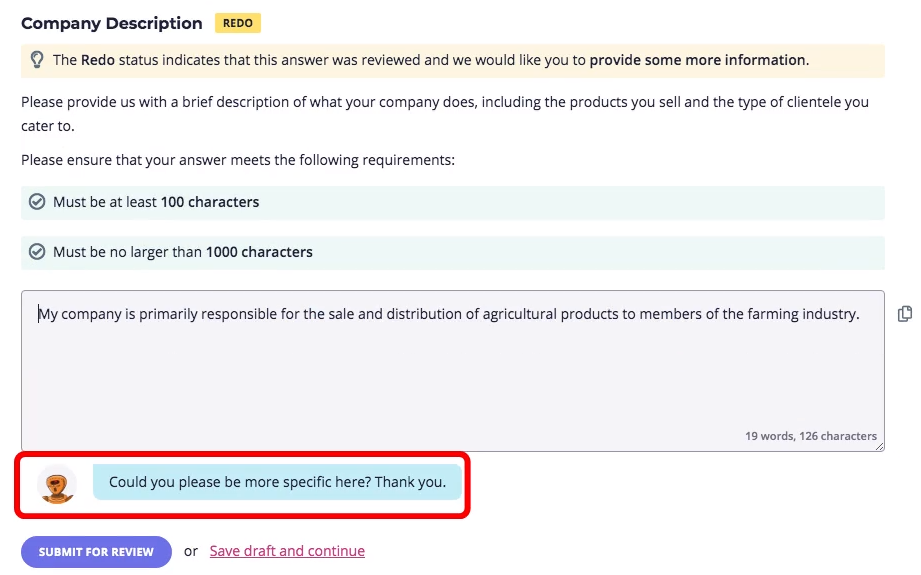
Make adjustments as necessary and click the submit button again.
If you get stuck
That’s all there is to it!
If you have any questions or troubles with the system, please reach out to the person that sent you the request with your questions.