
Content Snare can send SMS reminders and notifications to your clients. By connecting your own Twilio account, those messages send through Twilio instead of using your plan’s SMS credits, and you get to send from your own phone number.
This guide walks you through setting up a Twilio account and connecting it to Content Snare.
Before you start
You’ll need a Twilio account. If you don’t have one yet, sign up at twilio.com. It’s free to create, and you only pay for the messages you send.
Setup is three steps:
- Grab your Account SID and Auth Token from Twilio
- Buy a phone number with SMS capability
- Connect Twilio in Content Snare and pick your number
1. Find your Account SID and Auth Token
In the Twilio Console, your Account SID and Auth Token are on the main dashboard under the Account panel. Click the eye icon to reveal the Auth Token, and use the copy buttons to grab each one.
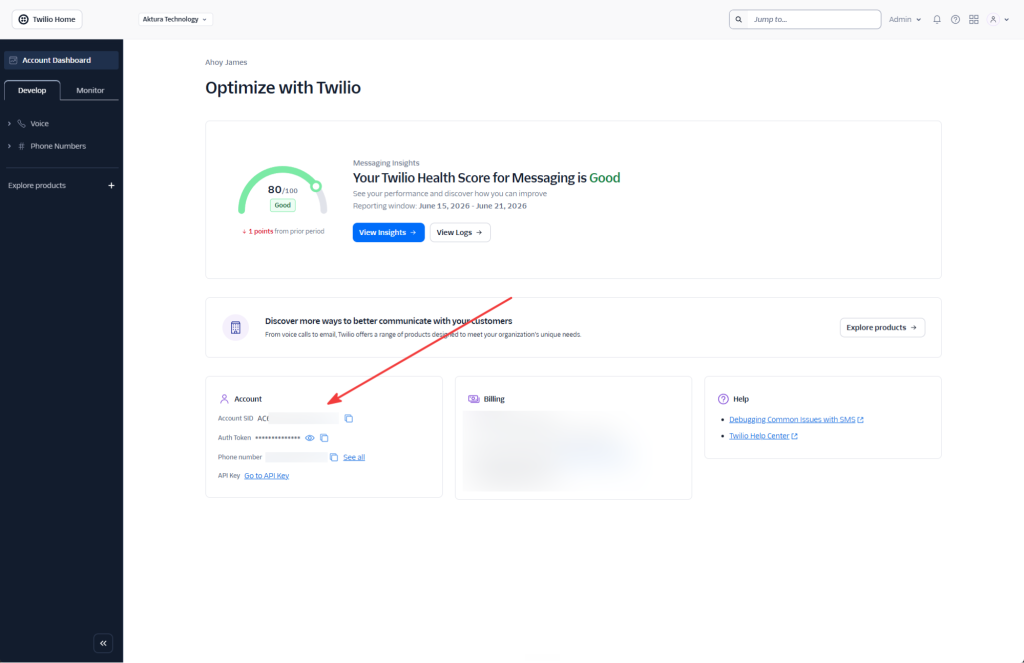
Keep these private. Anyone with both has full access to your Twilio account.
More detail from Twilio:
2. Buy a phone number with SMS capability
In the Twilio Console, go to Phone Numbers > Manage > Buy a number. When searching, make sure the SMS capability is ticked so you only see numbers that can send texts, then buy one.
Twilio’s full walkthrough: How to search for and buy a Twilio phone number.
3. Connect Twilio in Content Snare
In Content Snare, go to Integrations > Applications and find the Twilio card. Click Connect Twilio.
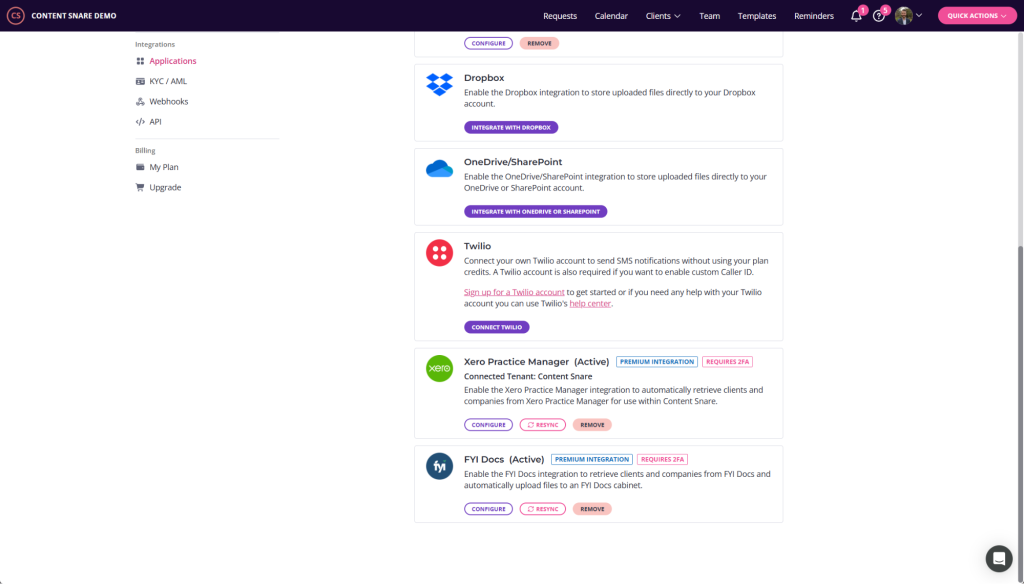
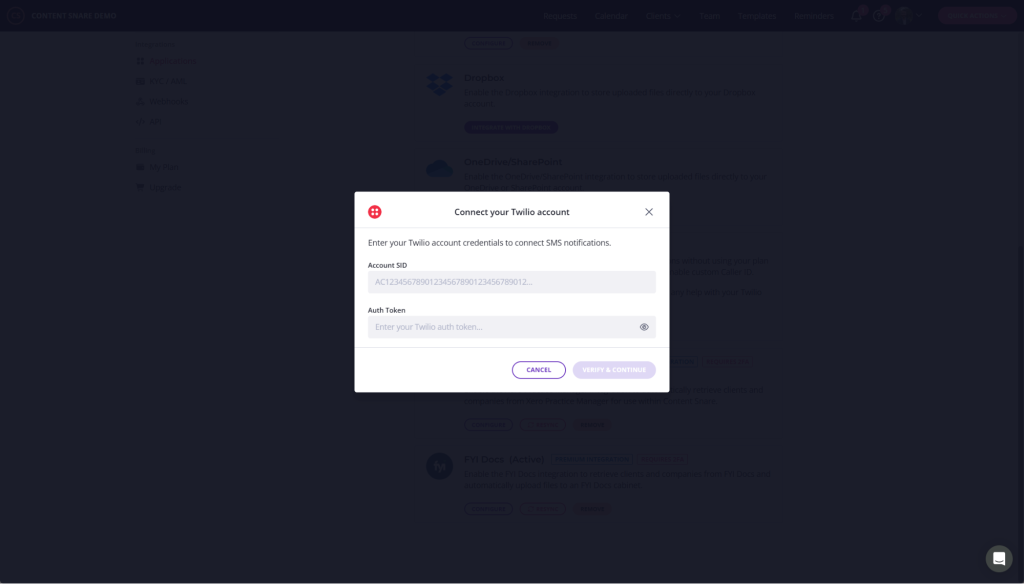
Paste in your Account SID and Auth Token from step 1, then click Verify & Continue.
4. Select your phone number
Once connected, choose how SMS is sent. Select Phone Number, pick the number you bought in step 2 from the dropdown, and click Update.
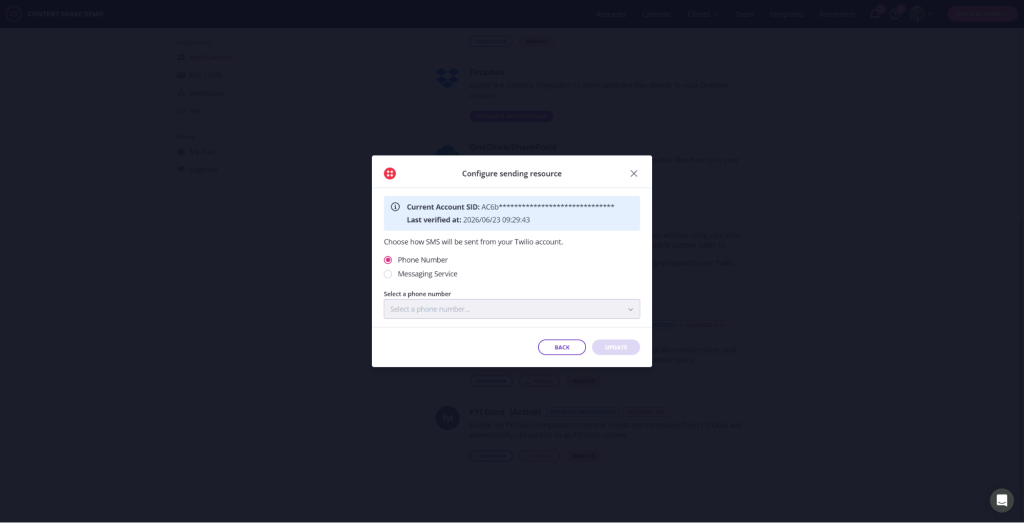
That’s it. Content Snare will now send SMS through your Twilio account.
Optional: Send through a Messaging Service
Instead of a single phone number, you can send through a Twilio Messaging Service. A Messaging Service is a pool of senders (phone numbers, and optionally Sender IDs) that Twilio picks from automatically, choosing the best one for each message.
This is handy even without a Sender ID. If you message clients in more than one country, you can buy a number in each, add them all to one Messaging Service, and Twilio routes each message through the right number. And if you’ve registered a Sender ID for a country, it’ll use that instead.
Set it up in Twilio
- Create a Messaging Service in the Twilio Console
- Add your phone numbers (and any Sender IDs) to its Sender Pool
Use it in Content Snare
Back in Content Snare’s Configure sending resource screen (step 4 above), choose Messaging Service instead of Phone Number, then select your Messaging Service from the dropdown.
Note: The section below covers sending from a branded Sender ID. In Content Snare this works through the Messaging Service above, rather than by selecting a Sender ID directly. It’s an advanced setup.
Optional: Register a Sender ID (advanced)
This is an advanced setup. It involves extra Twilio configuration and, in many countries, a verification process. If you just want SMS working, the steps above are all you need.
A Sender ID (Twilio calls it an Alphanumeric Sender ID) lets your messages show up from your brand name, for example CSnare, instead of a phone number. It looks more professional and is instantly recognisable to your clients. Sender IDs are a maximum of 11 characters.
Pros and cons
Pros
- Messages appear from your brand name, not an anonymous number
- More trustworthy and recognisable for clients
- Can reduce the chance of messages being filtered as spam
Cons
- One-way only. Clients can’t reply to a Sender ID
- Not supported everywhere. The USA is not supported, and availability varies by country
- Requires registration and, in many countries, a verification process before you can use it
It can be involved
Sending from a Sender ID sits inside a regulatory framework that varies country to country. Some countries let you start sending straight away, while others require you to register the Sender ID and submit business details and documents for verification (in Australia, for example, Twilio registers it with the ACMA). Depending on where you’re sending, this can take time and paperwork, so factor that in.
Check your country is supported
Sender ID support depends on the destination country. Confirm yours is on the list before you start: International support for Alphanumeric Sender ID. The USA is not supported.
Set it up in Twilio
Register your Sender ID in the Twilio Console under Phone Numbers > Manage > Alphanumeric Sender IDs.
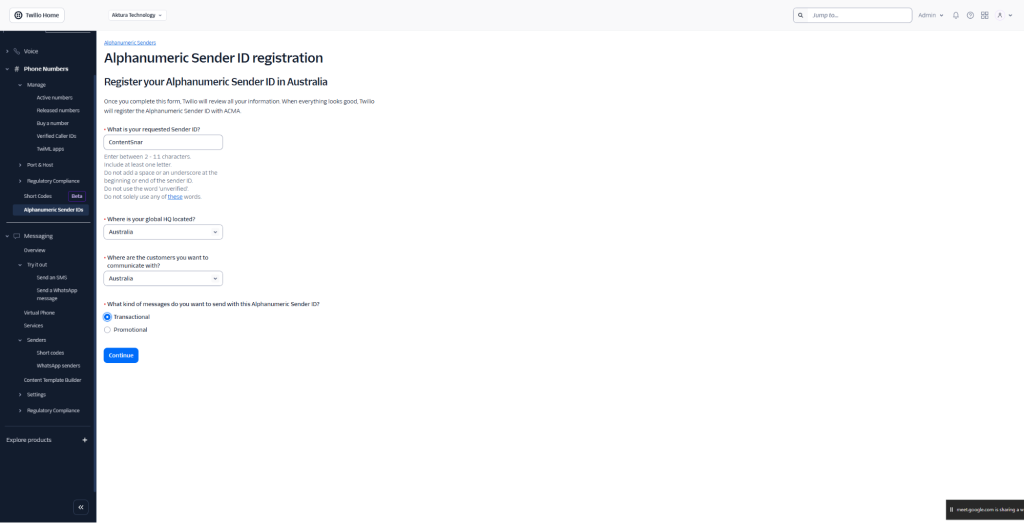
Then add it to your Messaging Service’s Sender Pool (see the Messaging Service section above) and select that Messaging Service in Content Snare.
More Twilio documentation:
- Alphanumeric Sender ID for Twilio Programmable SMS (overview)
- How to register an Alphanumeric Sender ID
If you get stuck connecting Twilio to Content Snare, reach out to our support team and we’ll give you a hand.