In this article, you’ll learn how to send emails from your own domain.
By default, Content Snare will use the domain contentsnare-mail.com for sending emails. It still shows up as coming from your own name, and if your client replies, it goes to your email address. However, the “from” address is from Content Snare.
If your plan allows custom branding, you can send it from your own domain.
Note: This setup requires technical knowledge of DNS. You may wish to forward these instructions to the person that manages your domain or website.
There are 3 records you need to add:
- DKIM
- Return-Path
- SPF
Step 1: Add your domain
To get started, go to Settings -> Branding. Scroll down to the Email section.
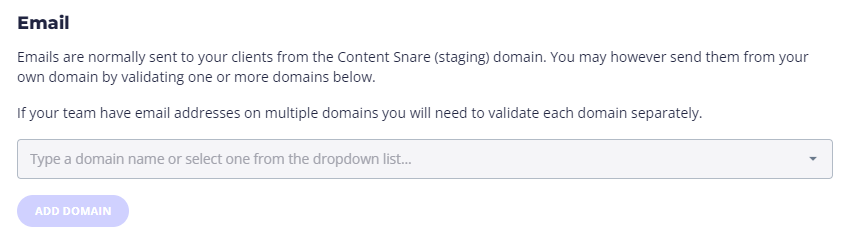
In the box, either type the domain that you want to send from or choose it from the list. We automatically detect any domains you’ve set up for your team members.
Step 2: Add a TXT record to your DNS for DKIM
This popup will be shown.
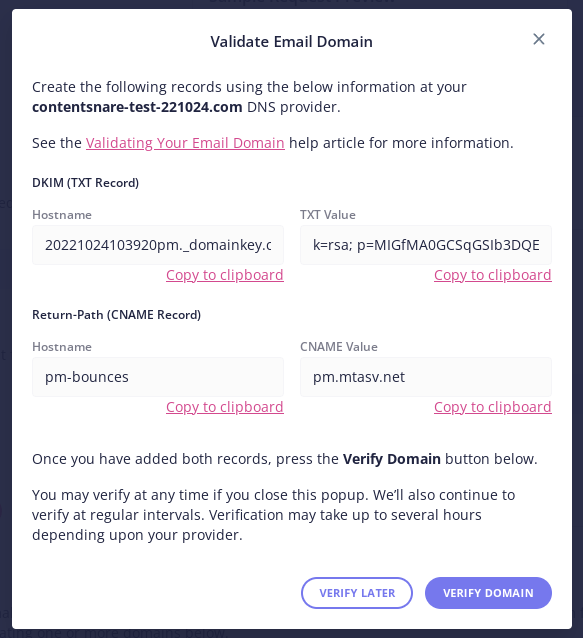
Log in to your DNS provider and add a TXT record. If you do not know how to do this, forward these instructions to the person who manages your website and the information below.
TXT Record Name: Add the text from the first box. Note that depending on your DNS provider, you may only need to add everything up to and including “domainkey” (remove your actual domain)
TXT Record Content: Copy the full text from the second box.
TTL: Any value.
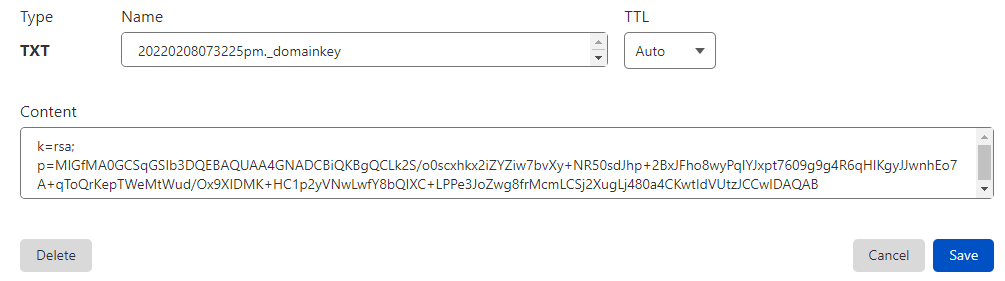
In Cloudflare, this would look something like this:
Step 3: Add a CNAME record to your DNS for Return-Path
Next, create a CNAME record at your DNS.
Name: pm-bounces
Target: pm.mtasv.net

Step 4: Add an SPF record (optional but recommended)
SPF is optional, but improves deliverability when you send email to your own domain from Content Snare. For example, if your email is bob@example.com, and you set your custom domain example.com. When you email someone on your team from Content Snare, emails may be rejected if you do not set SPF.
Important: First, check if you have an existing SPF record. If you do, do NOT add a new one. You will need to combine them. More info on this below. To find out if you already have one, look for a TXT record that starts with v=spf1
Creating a new SPF record
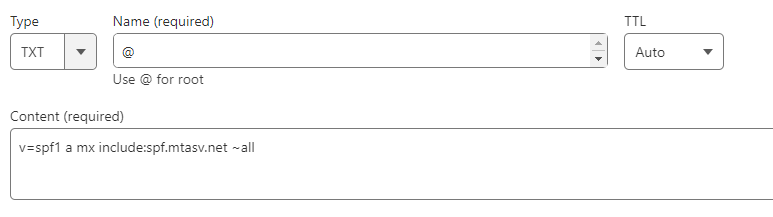
If there is no SPF present, add this record:
Type: TXT
Host: @
Content: v=spf1 a mx include:spf.mtasv.net ~all
Combining with an existing SPF record
If you already have an SPF record, you’ll need to combine them. So just take the “include:spf.mtasv.net” part and add it into your existing record before the ~all
For example, if you use Google Suite, you may have an SPF record like this
v=spf1 include:_spf.google.com ~all
You would need to update this to be
v=spf1 include:_spf.google.com include:spf.mtasv.net ~all
Step 5: Verify your domain
Then go back to Content Snare and click the “Verify domain” button.
You should see that your domain is “Verified”.
Note that it can take up to 48 hours for DNS to propagate, so if it doesn’t work right away, come back and try again later.
Step 6: Troubleshooting domain verification
If your domain does not verify or was previously verified and now shows as “Not verified,” it usually means one of the DNS records is missing or has been changed. You might see an error like this:
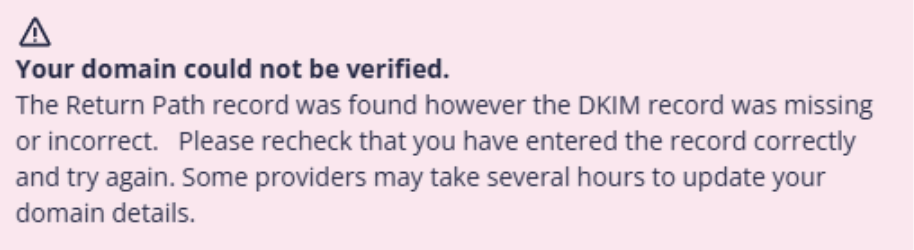
DNS records such as CNAME and TXT must remain active in your domain’s DNS for verification to stay valid. If any required record is removed, your domain will show as unverified again.
How to check your DNS records
You can verify that your DKIM and Return-Path records are set up correctly using a free tool like whatsmydns.net.
| Note: Make sure you include your domain at the end of the record name. For instance, type in “_domainkey.example.com” and not just “_domainkey” with no domain at the end. |
Step 1: Go to whatsmydns.net
Step 2: In Content Snare, go to Settings → Branding → Email Address
Step 3: Check your DKIM record (TXT)
- In Content Snare, open the email setup popup and click the copy icon under the DKIM (TXT record) name
- Go to whatsmydns.net and paste the record name into the search box
- From the dropdown, select TXT
- Click Search
You should see green checkmarks with values that match the ones shown in Content Snare:

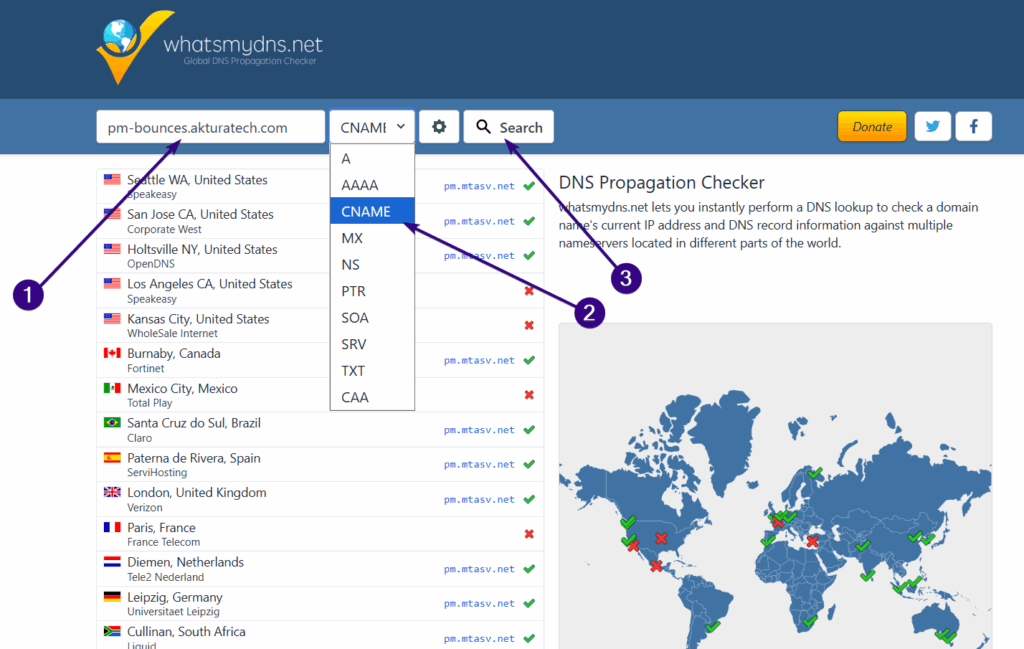
Step 4: Check your Return-Path record (CNAME)
- In Content Snare, open the email setup popup and click the copy icon under the Return-Path (CNAME record) name
- Go to whatsmydns.net and paste the record name into the search box
- From the dropdown, select CNAME
- Click Search
You should see green checkmarks with values that match the ones shown in Content Snare:
If the values match and you see green ticks, your DNS records are correct. Verification should complete automatically once DNS propagation finishes, which may take several hours.
| Note: You may still see a few red crosses in search results. This just means some DNS servers haven’t updated yet, which is normal during propagation and should resolve within a few hours. |