Tables in Content Snare give clients an organized layout for providing information.
They are designed to work in a similar way to spreadsheet applications that you are already familiar with. That includes many of the same keyboard shortcuts you are used to.
Customizing tables
Tables are one of many field/question types in Content Snare. When you add a table to the request, you can customize it as you see fit.
Adding rows/columns
Click into the final, empty row in the table and begin typing to add a new row.
Another option is to click the plus icon to create as many rows or columns as needed:
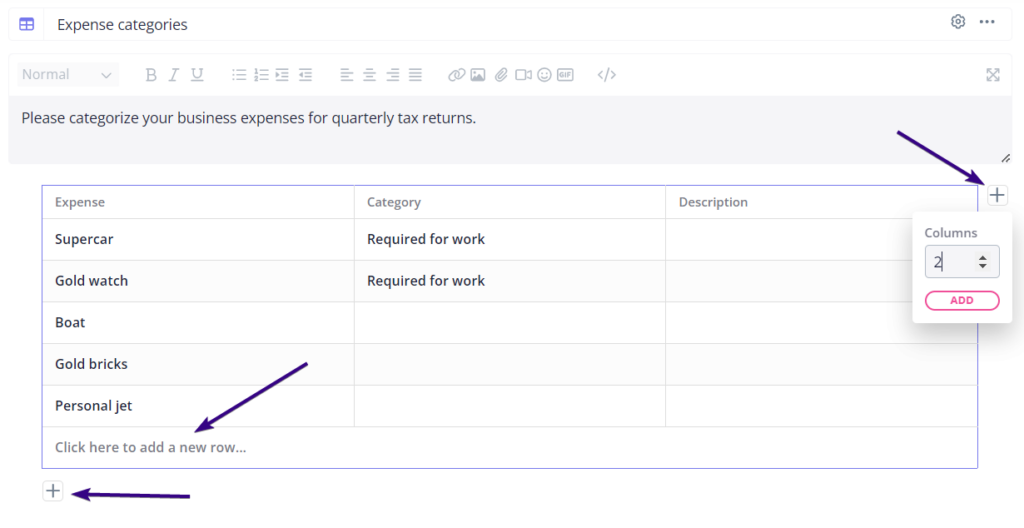
You can also paste in data. If what you are pasting is larger than the current table, it will automatically create new rows.
| Note: To allow clients to add new rows, you need to enable this option in Settings. |
Deleting rows/columns
If you highlight a range of cells and press Delete, it will clear the contents from those cells.
If you wish to delete a row, click the dotted area on the left and choose Delete Row from the drop-down menu:
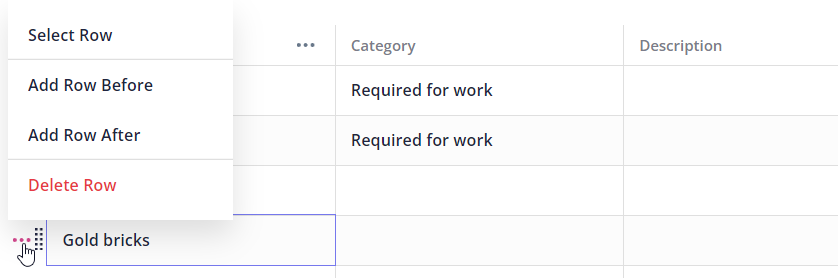
| Note: You can use the same drop-down to Select Row, Add Row Before, and Add Row After. |
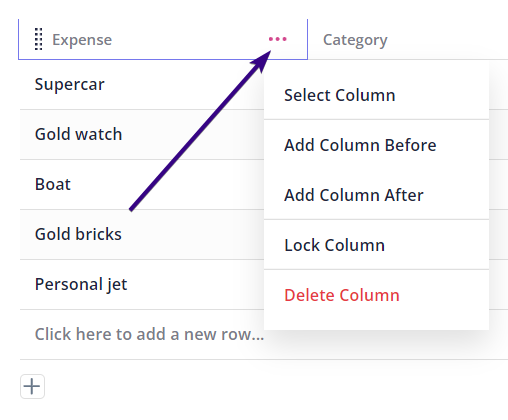
Columns have similar options that you can access by clicking the dotted area next to their name:
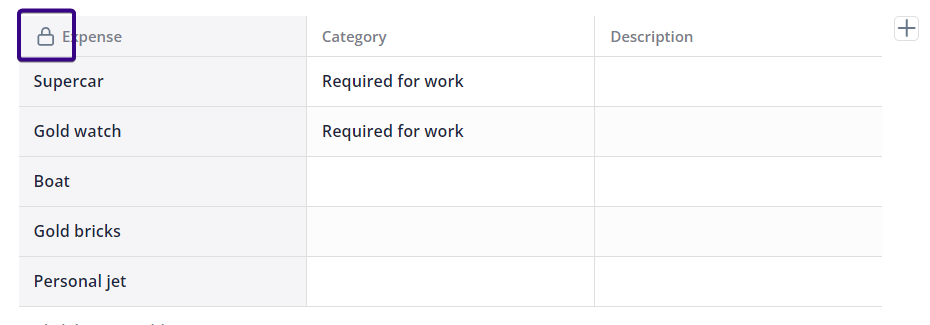
One extra option is to Lock Column. Locked columns are for information only and cannot be edited by your client. These are shown in gray with a padlock icon in the column header:
Undo
If you make a mistake entering data or accidentally delete content, press Ctrl+Z to undo.
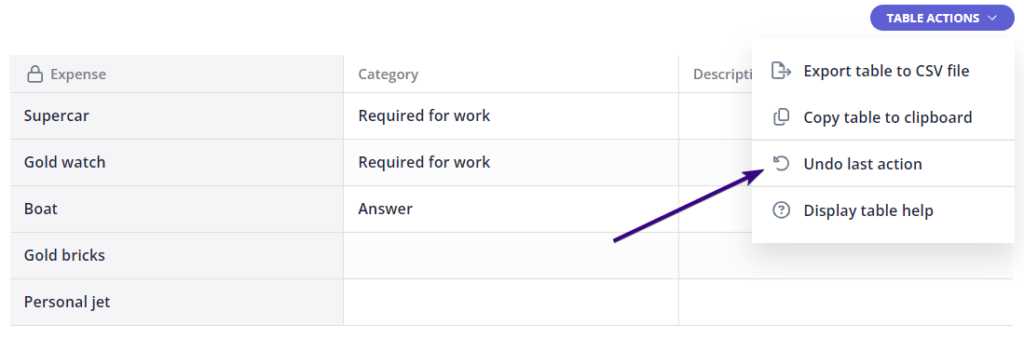
Your clients can undo actions in table fields using Ctrl+Z, but they can also do it through the Table Actions drop-down menu:
Copy and paste
If you have data that you would like to paste in from a spreadsheet, copy it from your source (Ctrl+C) and paste it into Content Snare (Ctrl+V).
You can also right click on a cell and select Paste.
If you highlight a range of cells and Paste, it will only fill the area that you have highlighted. To Paste everything that you copied, select only one cell.
Drag and drop rows/columns
Should you wish to change the order of rows or columns, do it using our drag-and-drop feature:
- Click the row/column you’d like to move
- Hover over the dotted area next to its name
- Drag the row (up or down) or column (right or left) to the new position
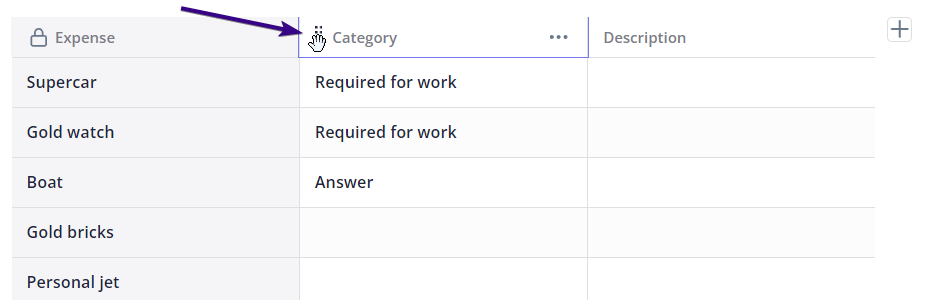
Table settings
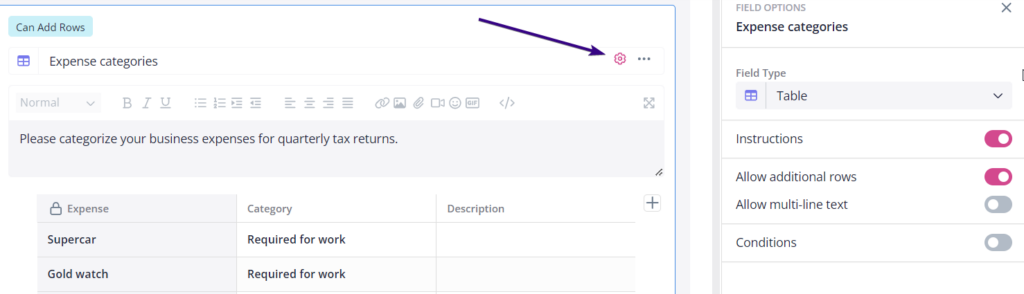
Click the Settings icon in the upper-right corner of the table to access the Settings menu. From there, you can use the toggle bar to enable or disable:
- Instructions
- Allow additional rows
- Allow multiline text
- Conditions
Keyboard shortcuts
Moving around the table
- Up/Down/Left/Right Arrows: moves to adjacent cells. Readonly cells are skipped
- Tab/Shift Tab: move to next/previous cell
- CTRL+Home/End: move to first/last cell
- CTRL+Left/Right: move to first/last cell in the row
- CTRL+Up/Down: move to first/last cell in the column
Selecting cells
- Holding SHIFT while using arrows, home, end, or CTRL+arrows/home/end: Select multiple cells
- CTRL+A: Select all. If a cell is being edited, CTRL+A will first select the cell contents and will select all when CTRL+A is pressed a second time
Working with table contents
- CTRL+Z: Undo
- CTRL+C: Copy current selection. If nothing is selected, copy the entire table
- CTRL+X: Cut selection
- DEL/Backspace: Delete selection
- CTRL+V: Pasted CSV delimited content. If some cells are selected, it will trim the data to fit in the selection. If nothing is selected, all data is pasted
- Ctrl+I then press R: insert a row below current row
- Ctrl+I then press C: insert a column to the right of the current column