
Content Snare’s FuseSign integration lets you send documents for digital signing directly from your requests. Your clients receive a signing link via email from FuseSign, and the signed documents are tracked within Content Snare.
With this integration, you can:
- Send your request’s PDF export to clients for signing through FuseSign
- Send uploaded files (PDF or Word documents) for signing through FuseSign
- Optionally lock a request after signing, preventing clients from changing their answers
Prerequisites
To use the FuseSign integration, you will need to:
- Have Administrator level access on your Content Snare account
- Have a FuseSign account (part of FuseWorks). The user connecting the integration must be a FuseSign Champion — standard FuseSign users cannot connect third-party integrations.
Step 1: Connect FuseSign
Navigate to Settings > Applications in Content Snare.
Find FuseSign in the list and click the Connect button.
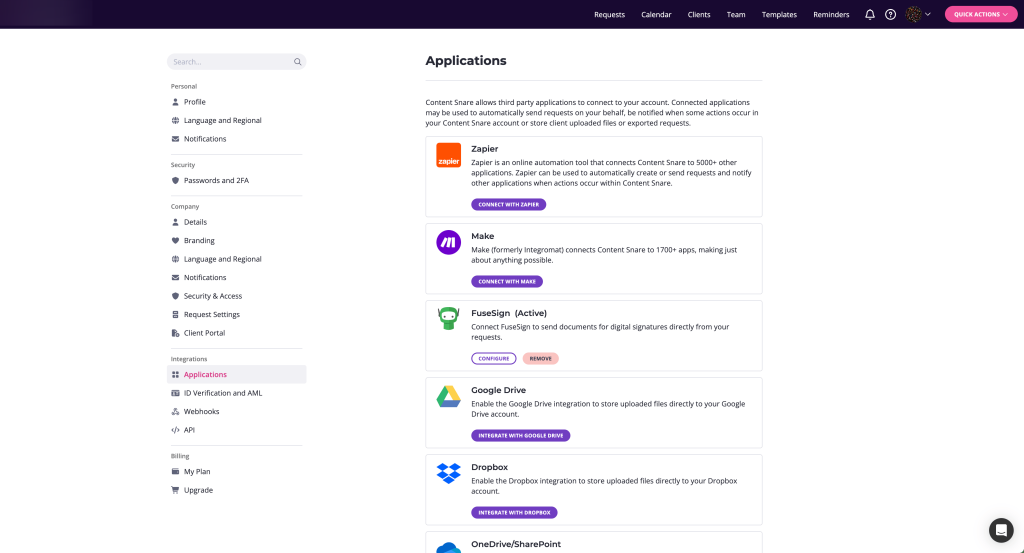
You will be redirected to FuseWorks to authorize the connection. On this screen, select the Target Business you want to connect, then click Authorize for Content Snare.

Content Snare will be granted permission to:
- Access all bundles and contacts on the account
- Access FuseSign contacts and bundles
- Draft and send new FuseSign bundles
Step 2: Configure the integration
After authorizing, you will see the Configure FuseSign Integration dialog.
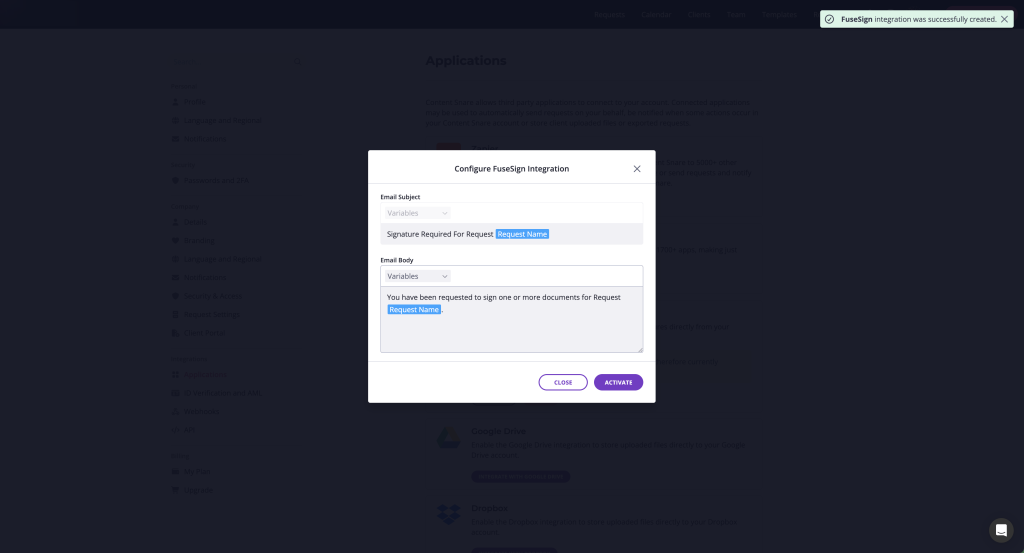
Here you can customize the email that FuseSign sends to your clients when a document is ready for signing:
- Email Subject – The subject line of the signing request email. Use the Request Name variable to include the name of the request automatically.
- Email Body – The body text of the signing email. You can also use the Request Name variable here.
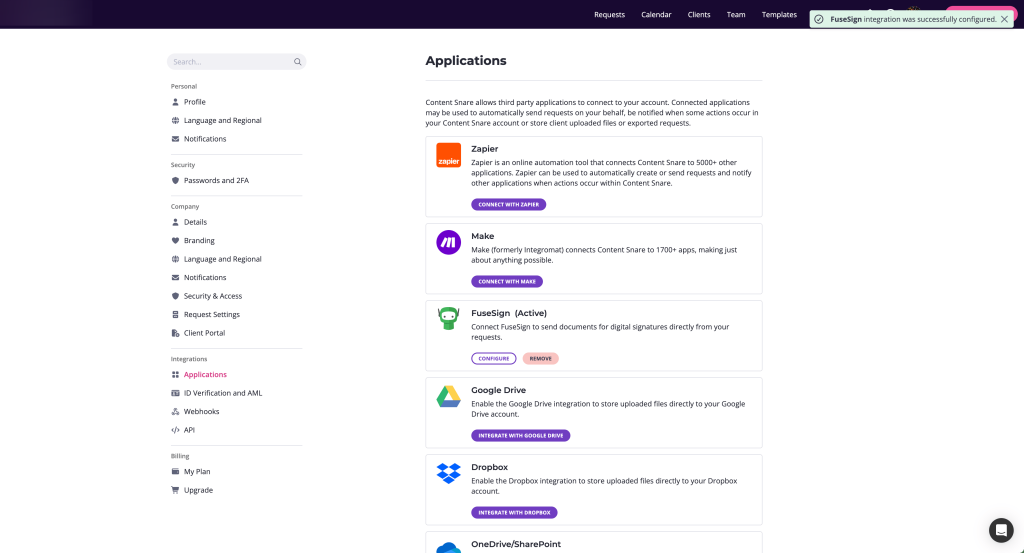
Click Activate to finish setup. You will see a confirmation that the integration was successfully configured.
Adding a signature field to a request
Once FuseSign is connected, you can add signature fields to your requests in the Builder.
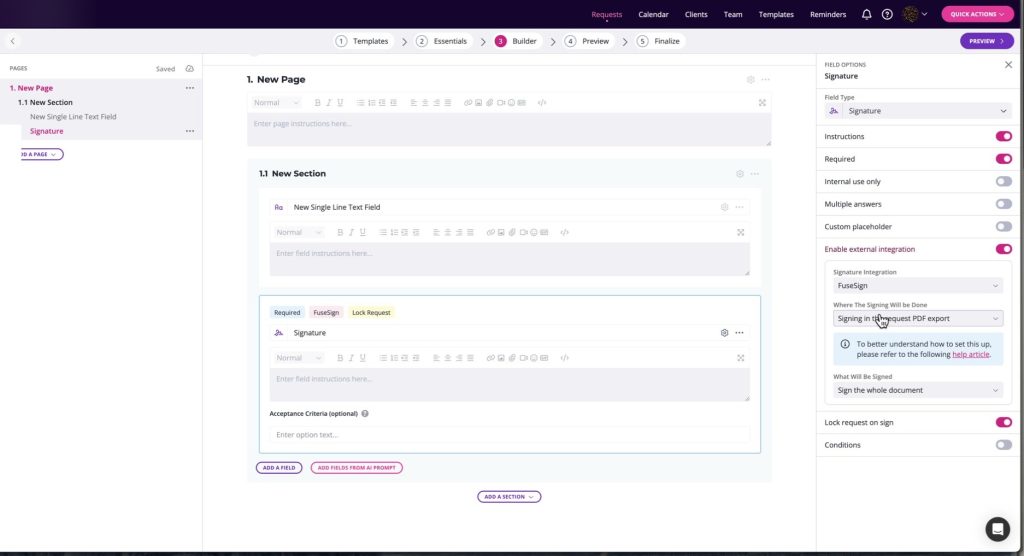
Enable the external signing integration
When you add or edit a Signature field, you will see the following options in the Field Options panel on the right:
- Add a Signature field to your request
- Toggle on Enable external integration
- Under Signature Integration, select FuseSign
Choose where signing will be done
Under Where The Signing Will be Done, you have two options:
Option A: Signing in the request PDF export The completed request is exported as a PDF and sent to FuseSign. This is useful when you want the client to sign off on all their answers as a whole.
Under What Will Be Signed, you can choose:
- Sign the whole document – The client signs the entire document
- Sign at specified placements in the document – You define exactly where signatures and related stamps should appear, using tags in your document

Setting up signature placements
When using Sign at specified placements, your uploaded document needs to include special tags where you want signatures and stamps to appear. FuseSign replaces these tags with the corresponding signing fields before showing the document to your client.
Available tags
| Tag | What it does |
|---|---|
STANDARDSIGNTAG | Adds a standard signature placeholder where the client signs |
WITHDATESIGNTAG | Adds a signature placeholder with the signing date automatically added below |
SIGNERNAMETAG | Automatically stamps the signer’s name (no client action required) |
SIGNEDDATETAG | Automatically stamps the date the document was signed (no client action required) |
Important: Every document must contain at least one STANDARDSIGNTAG or WITHDATESIGNTAG. Documents without either of these tags will be rejected by FuseSign.
How to add tags to your document
- Open your document in Word, Google Docs, or your PDF editor of choice
- Type the tag name (e.g.
STANDARDSIGNTAG) exactly where you want the signature or stamp to appear - Change the tag’s text colour to white so it’s hidden against the page background. If you leave the tag as black text, it will be visible in the final signed document alongside the signing field.
- Save the document and upload it to Content Snare
Example
Here’s a document with tags added (shown in black for visibility, but they should be white in your actual document):
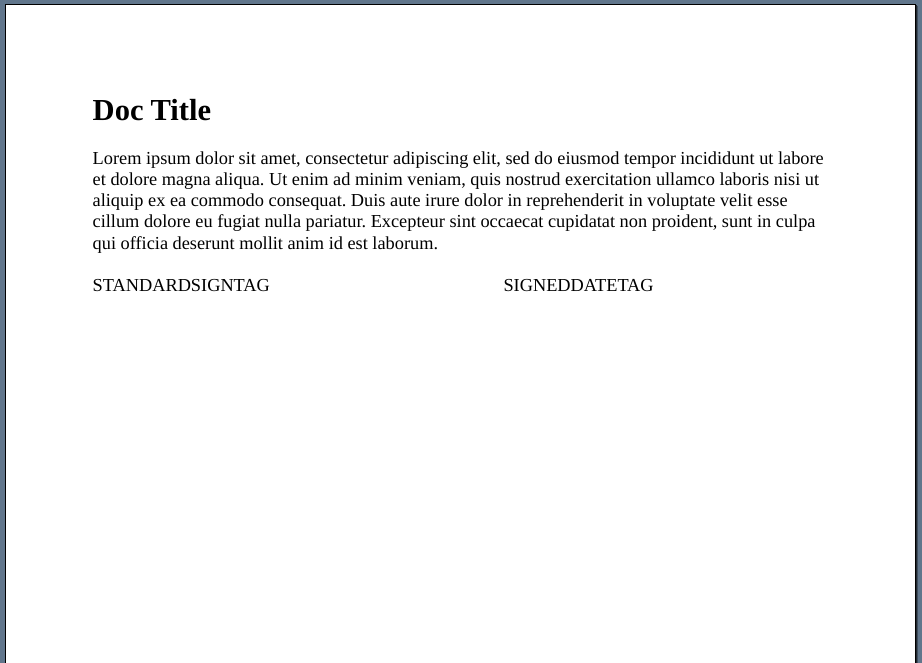
And here’s how the same document looks to your client in FuseSign, with the tags replaced by signing fields:
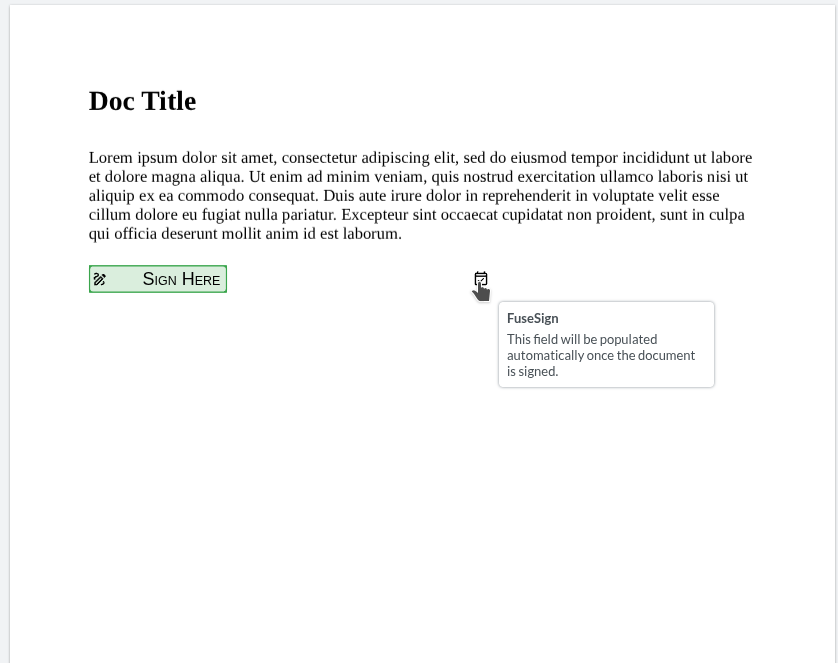
The STANDARDSIGNTAG becomes a “Sign Here” button the client clicks to sign. The SIGNEDDATETAG becomes an automatic stamp that populates once the document is signed.
For the full list of FuseSign placeholders and more detail, see FuseSign’s placeholders documentation.
Option B: Signing uploaded files The client uploads files, which are then sent to FuseSign for signing. Only PDF and Word (.doc) files are supported when using this option.
Lock request on sign (optional)
Toggle on Lock request on sign to lock the request after the client signs. When enabled:
- After the client signs, all other fields in the request are locked and cannot be changed
- A banner appears: “Request is Locked – This request is locked because it has been signed.”
- The client can click Unlock and revise or the Revise button on any field to make changes, but this will remove the signature and require them to sign again
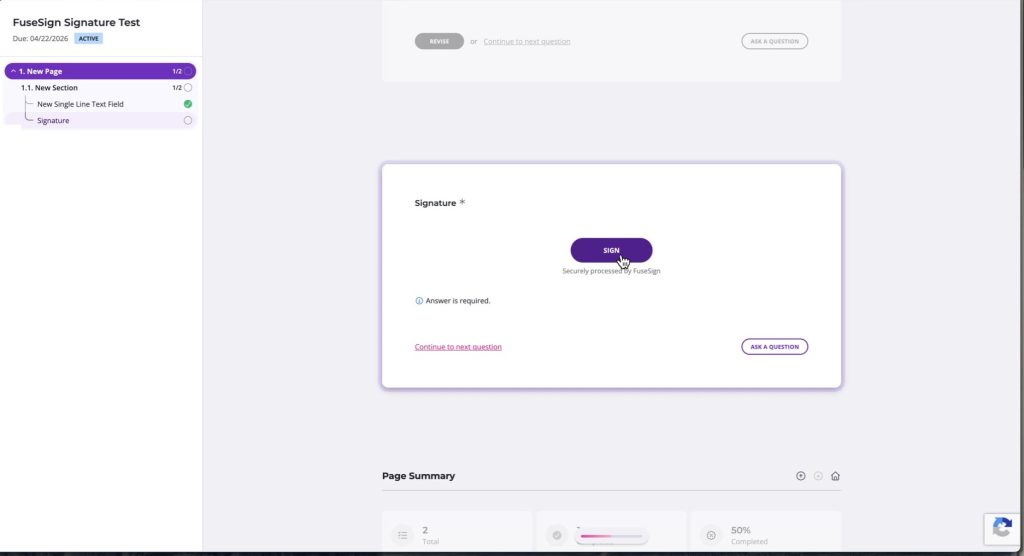
This setting is available on both FuseSign signature fields and Content Snare’s built-in signature fields.
What your client sees
Before signing
Your client fills out the request as normal. If the signature field is required, all other required fields must be completed before the client can sign.
The signing process
- The client clicks the signature field in the Content Snare request
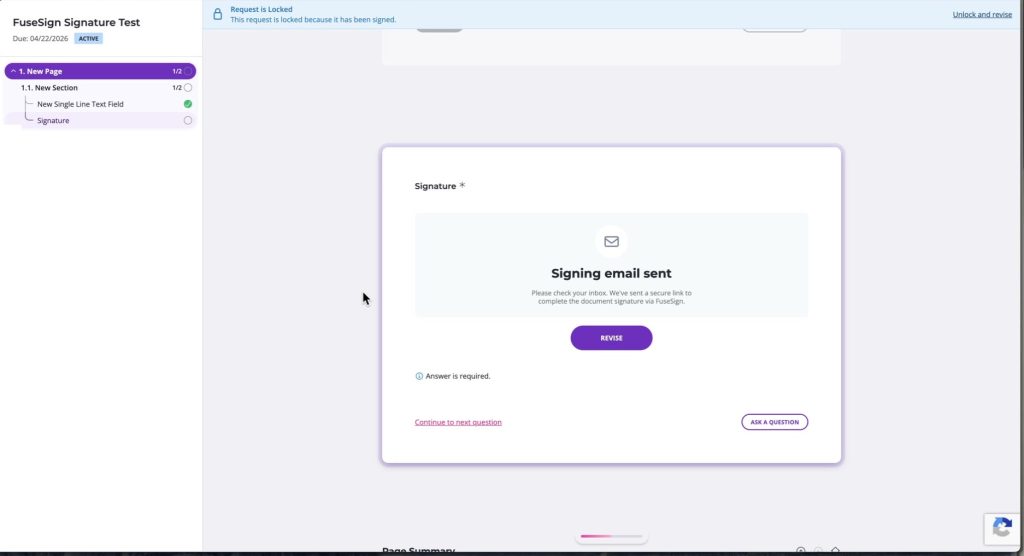
- Content Snare sends a signing request to FuseSign, and the client sees “Signing email sent” with the message: “Please check your inbox. We’ve sent a secure link to complete the document signature via FuseSign.”
- The client opens the email from FuseSign and is taken to the FuseSign signing interface
- In FuseSign, the client can review the document and choose to Type or Draw their signature

- Once signed, Content Snare automatically detects the completed signature and updates the field status
- If Lock request on sign is enabled, the request locks and a confirmation banner appears
If the request is locked
Once a request is locked after signing:
- The client sees a banner: “Request is Locked – This request is locked because it has been signed.”
- Answers cannot be changed
- To revise any field, the client clicks Revise, which will:
- Display a confirmation warning that they will have to sign again
- Unlock the request
- Remove the existing signature
- Allow changes to be made
- Require the client to go through the signing process again
Reviewing signed documents
As a team member reviewing the request:
- You will see “Signing complete!” with the message “All documents have been signed successfully.”
- A Documents section lists the signed documents with a green Signed badge
- You can Approve or Reject the signature, just like any other field in Content Snare
- The locked request banner will note: “This request is locked due to a pending signature. Rejecting a field will unlock it and require the client to re-sign.”
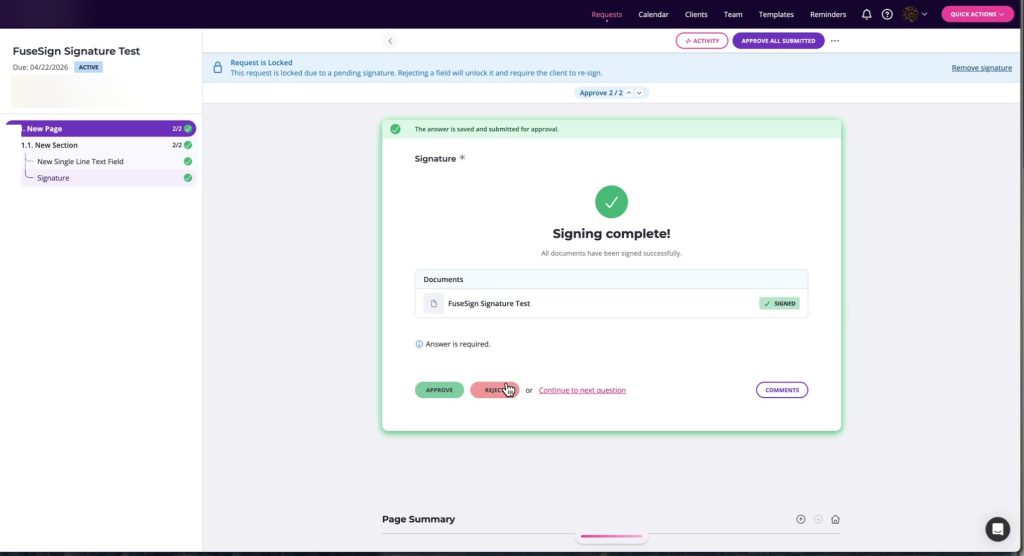
Note: You cannot sign on behalf of your client. When viewing the signature field as a team member, you will see a notice: “You cannot sign this field on behalf of the client.”
Rejecting a signature
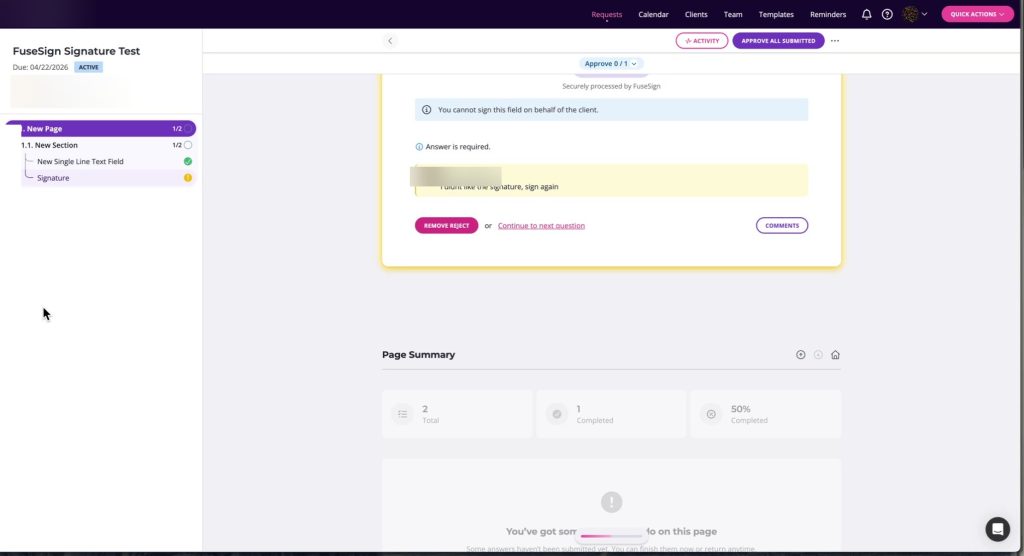
If you reject a signature on a locked request:
- The client is notified with your rejection comment
- The request is unlocked
- The signature is removed
- The client sees a Sign Again button with the message “Securely processed by FuseSign”
- Your rejection comment is displayed, so the client knows what to fix before re-signing
FAQ
Can I preview the signing experience as a team member? No. You cannot sign on behalf of your client. The signing email is sent to the client’s email address, so you will need to use a real client email to test the full signing flow.
What happens if my client needs to change an answer after signing? If the signature field locks the request, they can click Revise on any field or Unlock and revise at the top of the request. This unlocks the request and removes the signature, so they will need to sign again after making changes.
What file types can be signed? When signing uploaded files, only PDF and Word (.doc) files are supported. When signing the request PDF export, the export is generated automatically as a PDF.
How do I disconnect FuseSign? Navigate to Settings > Applications and click the Remove button next to FuseSign.
Where do my Content Snare bundles appear in FuseSign? Once your client starts the signing step, the bundle appears in your FuseSign bundle list alongside bundles created directly in FuseSign. Content Snare keeps these in sync automatically, so we recommend leaving them alone and managing everything from Content Snare. Retracting a bundle in FuseSign will cancel the signing step on your request, and your client will need to sign again.