To begin creating clients in XPM directly from Content Snare, you first need to connect them under Settings → Applications → Xero Practice Manager.
| Note: Read our article How to Integrate XPM with Content Snare for detailed instructions on how to do this. |
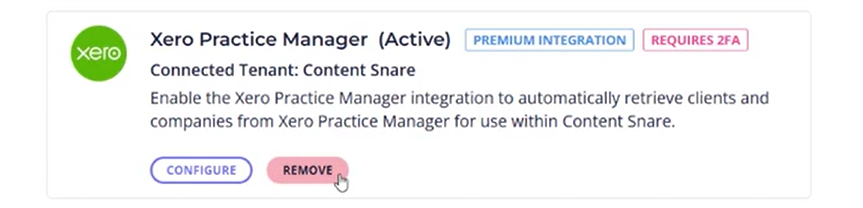
If you already have XPM connected, you need to remove and reconnect it to upgrade Content Snare’s permission to write into XPM.:
Once the integration is active, you can choose when new clients should be created in XPM. There are two options:
- As soon as request is completed: Clients are created in XPM when you mark a request as complete.
- Only when manually triggered: You control when the data is sent by clicking a button on the request to run the integration actions.
If you prefer a hands-off approach, the automatic option makes sure everything flows into XPM as soon as a request is finished. If you want more control and the ability to review the information first, the manual option allows you to decide exactly when the client is created.
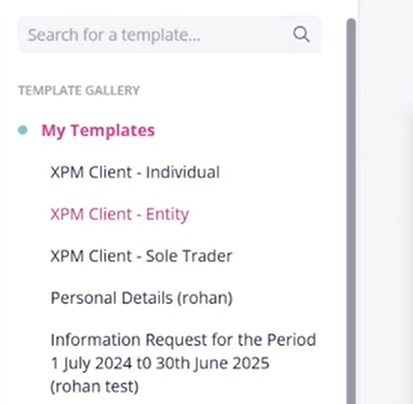
XPM page templates
Content Snare includes ready-made templates designed specifically for creating clients in XPM. These templates ensure that the questions in your forms are already mapped to the correct fields in XPM, so you don’t have to set up the mapping yourself. The three available templates are:
- Individual
- Entity (covers most structures other than sole trader or individual)
- Sole Trader
You will find these templates under the Accounting category in the page template library:
To use them, add the relevant pages to your request. For example, if you are onboarding a client who is an individual with a company, you would:
1. Add the Individual page template
2. Add the Entity page template and set the “Business Structure” to Company (more below)
| Note: If the client has additional entities, such as a trust or SMSF, you can simply add more templates that match those structures – more on that in Repeatable sections. |
You can rename the pages as needed, and each page will create a separate client in XPM.
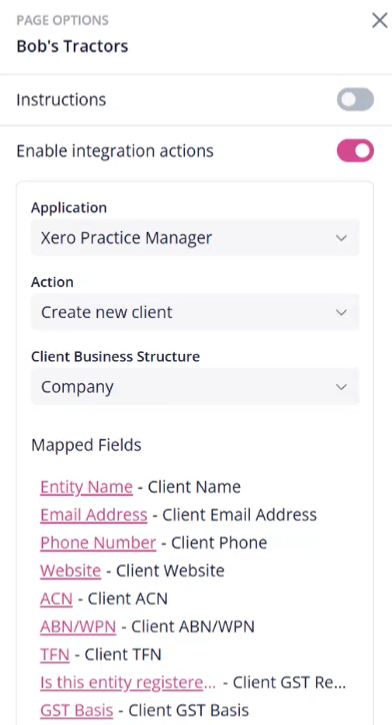
Bear in mind that the templates are pre-configured with the correct field mappings to match the standard XPM fields. For example, “Entity Name” is mapped to “Client Name” in XPM, and email addresses are mapped to the corresponding client email field:
Using pre-built templates is the fastest way to get started. They are designed to work out of the box, with minimal changes required. However, you can modify any of these templates to suit your preferences, such as renaming questions, removing them, or adding new ones.
Once updated, it’s best to save your version as a custom template for future use.
Modifying your existing templates
If you have existing templates that you want to integrate with XPM, here’s how you can do that.
First make sure that all the fields for a single client are on one page. For example, if you ask for an email address on one page and their name on another, these cannot be mapped to a single XPM client.
Think of one page in Content Snare being for one client in XPM. You can also do this on the section level, but we’ll keep it simple for now.
To set up the mapping into XPM:
1. Select the page in your request
2. Turn on Enable integration actions in the right-hand sidebar
3. Select the correct business structure (e.g. Company, Corporation, or Non-profit)
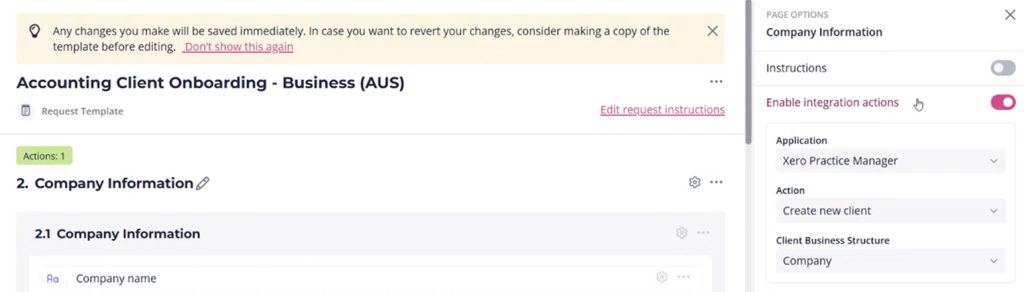
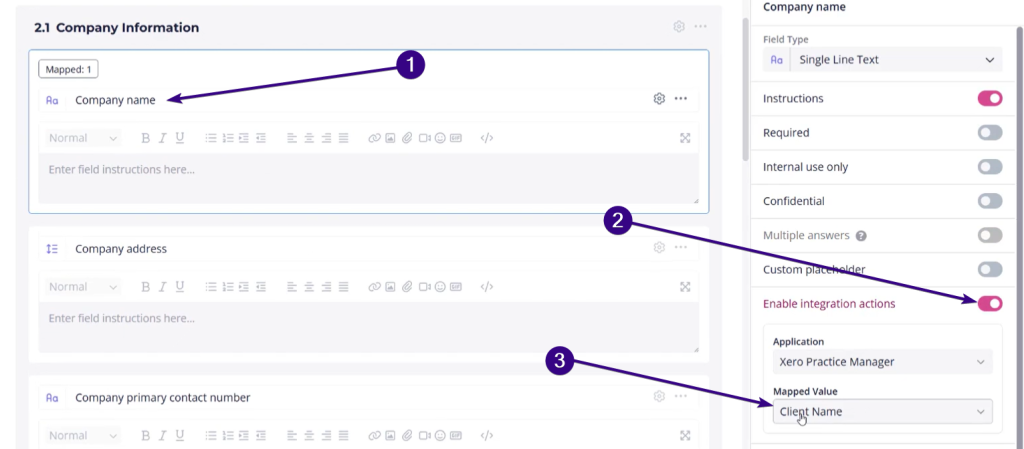
Once this is set, you can map each question on the page to a specific field in XPM.
For example, if you ask for “Company Name” in your form, you can map that to the “Client Name” field in XPM:
Here are a few more examples:
- “Company Email Address” can be mapped directly to the “Client Email Address” field in XPM
- “Company Primary Contact Number” can be mapped to “Client Phone”
| Note: Keep in mind that XPM requires physical addresses to be split into individual components (state, city, street, etc.). |
When setting up your own mappings, you’ll see a dropdown list of all the standard fields that XPM supports:
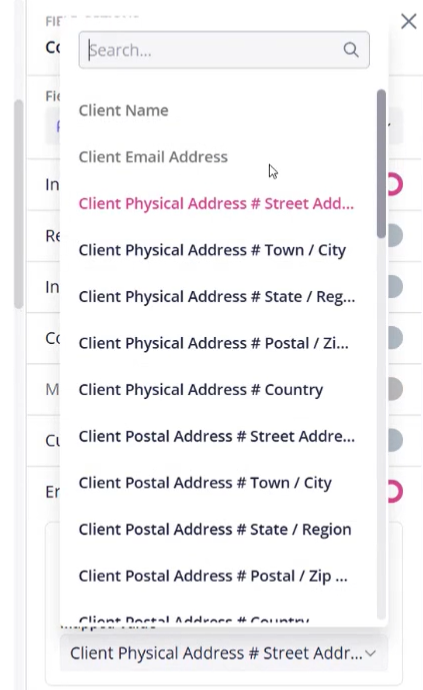
These fields cover everything from contact details to tax file numbers, so remember to choose the correct destination for each question.
Custom XPM Fields
When setting up mappings, you may notice that not all of your XPM custom fields appear in the dropdown list. If you don’t see a particular XPM field, it means the Content Snare field type you selected isn’t supported for that XPM field.
Here’s a breakdown of which Content Snare fields can map to which XPM custom field types:
| Content Snare field | Allowed XPM custom field types |
| Single Line text, Currency, Country, Task List, ABN/ACN verification | Text, Multiline text, Link, Heading, ContactLink, Value Link |
| Multiline text, Formatted text, Email, URL | Text, Multiline text |
| Single select (radio button) | Text, Multiline text, Checkbox, Dropdown list |
| Checkbox | Text, Multiline text, Dropdown list |
| Dropdown | Dropdown list, Checkbox |
| Date / Time | Date |
| Number | Number, Decimal |
Repeatable sections (Advanced)
Repeatable sections allow for very flexible requests where clients can create any number of entities.
For example, you could have a section called “Companies” that is mapped to a new client in XPM. The client can then “repeat” that section to create 10 companies, which all push into XPM.
| Note: Read our Repeatable sections article to learn more about this feature. |
To set this up:
- Create a section in your request (such as “Companies”)
- Enable integration actions for that section
- Make the section repeatable
- Map the fields to XPM (all in one section)
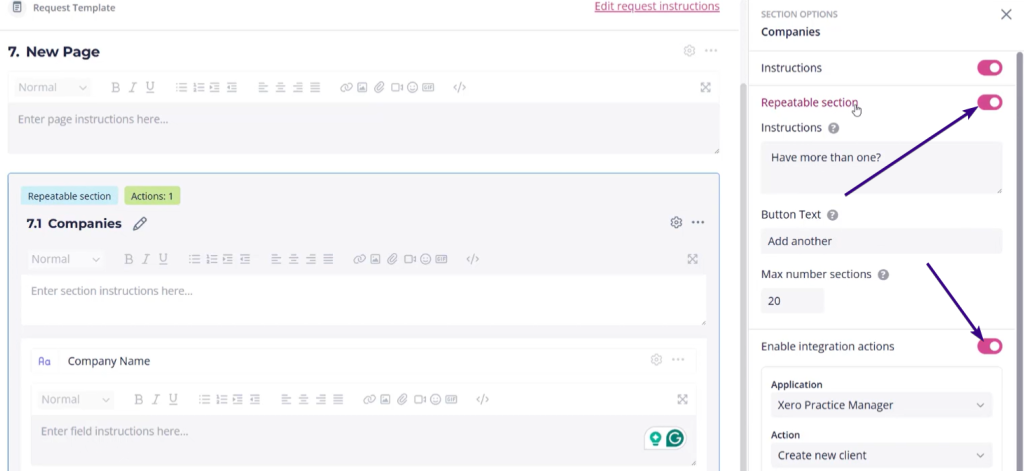
When the client completes the request, they will see an “Add another” button at the end of the repeatable section. This allows them to submit information for multiple companies, one after another. Each company they enter will be created as a separate client in XPM once the integration actions are run. Repeatable sections are useful when you don’t know in advance how many entities a client will need to add.
Combining repeating sections with conditions (Advanced)
Another way to add to the overall flexibility of your request is to use conditional logic.
| Note: Check out our Conditions article to learn more about using conditional logic. |
For example, you might add a simple Yes/No question like: Do you have more than one company? If the client answers “Yes,” an additional section appears that allows them to enter details for multiple companies.
This section can be set as repeatable, allowing the client to add as many entries as needed. Each entry is then created as a separate client in XPM.
So, instead of maintaining separate forms for every possible combination of entities, one dynamic request combining conditional logic and repeatable sections can adapt to whatever the client needs to provide.
To extend this to multiple entities, you might have a request consisting of the following sections:
- Initial questions
- Do you have 1 or more companies?
- Do you have 1 or more trusts?
- Etc
- Companies
- Repeating section of companies
- Conditionally displayed only if they answered “Yes” above
- Trusts
- Repeating section of trusts
- Conditionally displayed only if they answered “Yes” above
- And so on for other structures
Running the integration
Once the client has completed your request and you have reviewed the information, the final step is to transfer the data into XPM. How this happens depends on whether you chose automatic or manual integration when setting up the connection.
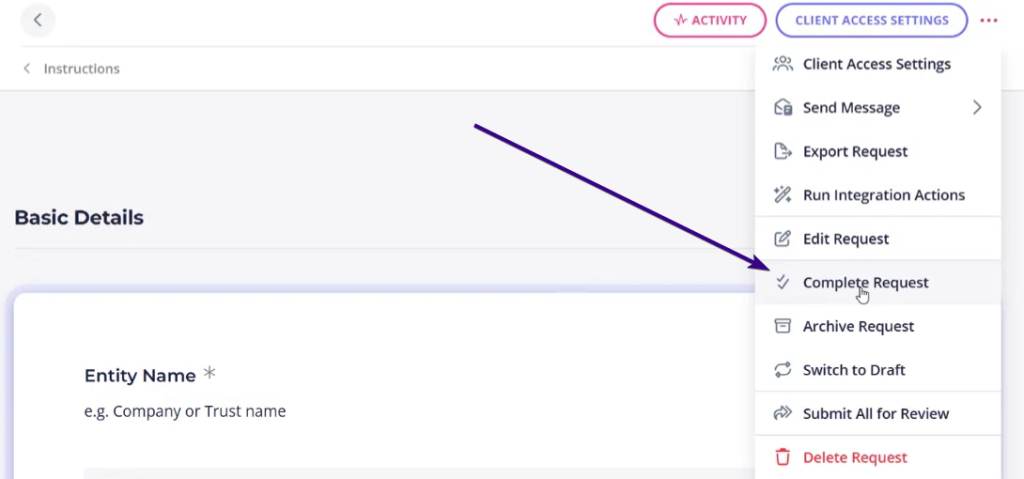
If you selected manual integration, new clients will be created in XPM when you click Run Integration Actions in the request menu:

After that, a summary box will appear showing how many new clients will be created, so you just need to confirm the action to push the data into XPM.
If you selected automatic integration, new clients will be created in XPM as soon as you mark the request as complete. No further action is required because Content Snare will push the data across immediately:
Manual integration is useful if you want to double-check the details before creating clients in XPM, while automatic integration saves time by handling the transfer in the background.
Next steps: