Integration actions can automatically add or update details in other apps, like your CRM.
Currently, this feature is available only to add new clients to Xero Practice Manager (XPM), but will be expanded in the future.
| Note: First, make sure you’ve enabled the XPM integration in your Content Snare account. Check out this article if you’re not sure how to do that: How to Integrate Xero Practice Manager (XPM) with Content Snare. |
First, choose when each action should be run by opening Settings -> Integrations -> Applications and clicking Configure on the integration you want to edit.
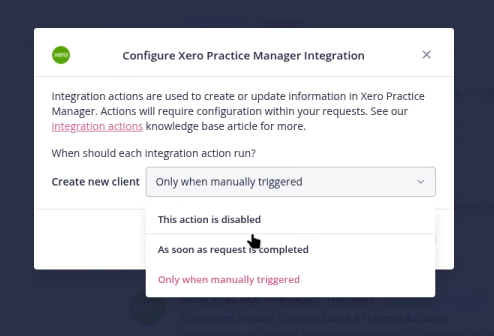
By default, actions are set to run Only when manually triggered. You can also run integration actions as soon as the request is completed or disable the feature.
Mapping fields to integrations
Next, you need to instruct which Content Snare fields will be sent to the integration.
There are two parts to this:
- Enable the action on a Section or Page
- Map the fields you want to send to the integration
Let’s illustrate this with an example.
Imagine you are adding a new client to your CRM. The action would be Create new client. We would want to send several fields to the CRM, like:
- Name
- Company
- Phone
- Etc
You would:
- Create a Page or Section
- Set that Section to Create new client
- Map fields from that Section to your CRM
Bear in mind that repeated sections will create multiple clients. The screenshot below shows how you would set a section to create a new client in your CRM:
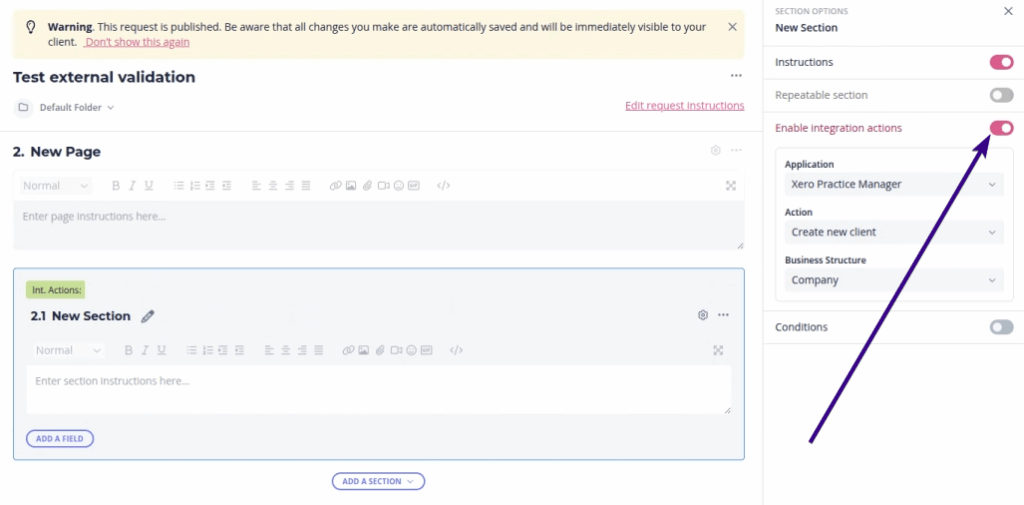
Now you can create new fields (e.g. “Name”) and activate the integration action for each. Then, link each field to the corresponding XPM field.
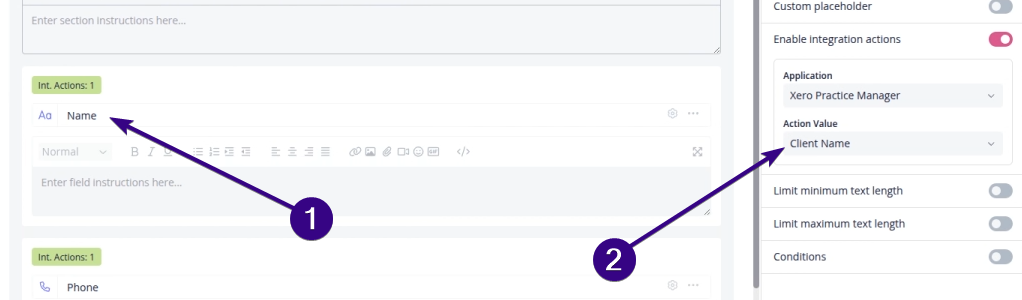
For example, link “Name” to the “Client Name” in XPM:
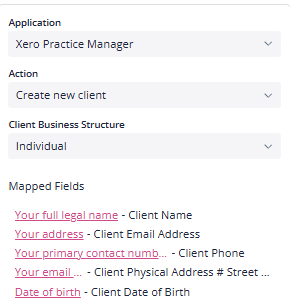
Pro tip: Take a moment to double-check that your fields line up correctly with XPM:
Running the actions
If you enable the option to run actions when a request is completed, they will run automatically when you mark a request complete.
If you would prefer to run them manually, you can do so in the menu for a request, as shown below:

Notes
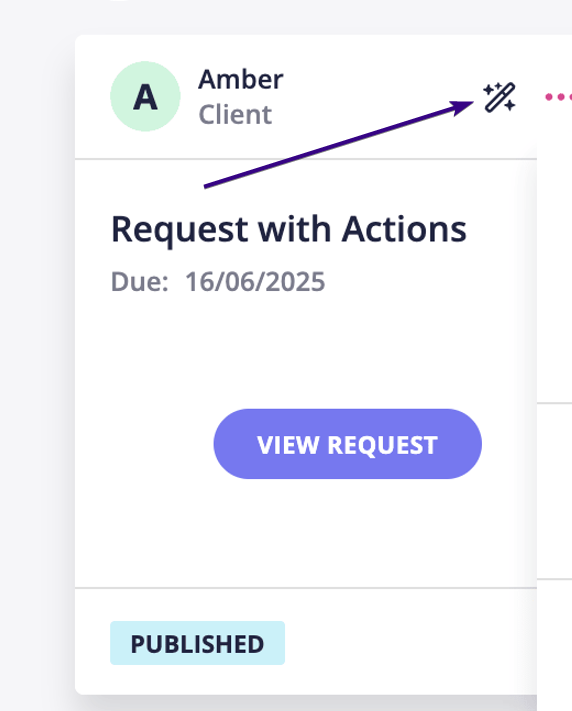
If a request has integration actions enabled, you will see this icon displayed on the dashboard:
| Note: You can save requests with integration actions as templates to reuse them quickly. When you apply the template in the future, all integration settings will remain intact. |
Next steps: