ID verification enables your clients to identify themselves within your request. They can do it by uploading government-issued documentation or providing biometric proof of identity.
Content Snare uses Stripe Identity as its document verification service. This service has robust controls for security and data access, and it can verify documents from 120+ countries.
Setting up ID verification
To set up ID verification, click the avatar icon in the upper-right corner and choose Settings from the drop-down menu. This opens a list of options on the left, so go ahead and click ID Verification to set it up:
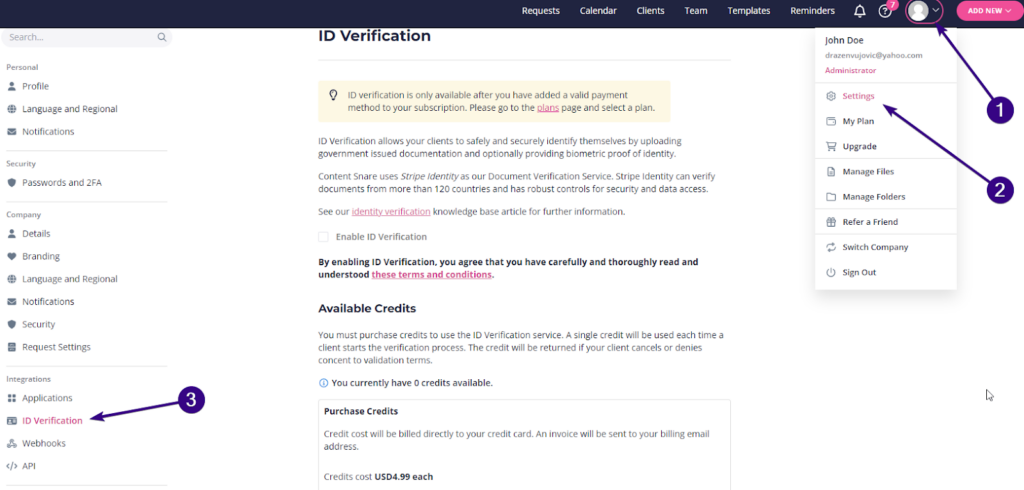
Alternatively, use the search box in the upper-left corner and type in “ID Verification” to find this feature.
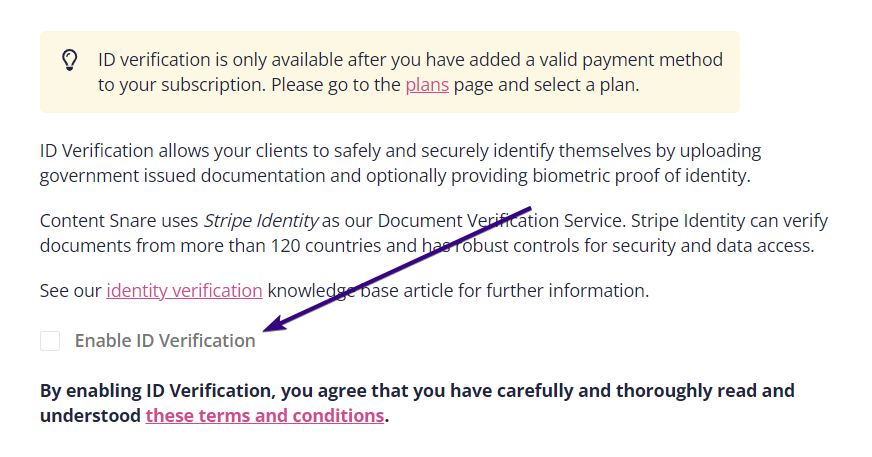
This option is disabled by default, so you’ll have to tick the Enable ID Verification box to activate it:
Preconditions for setting up ID verification
Activating identity verification is possible only if you fulfil these prerequisites. You need:
- A valid Content Snare account (not expired)
- A valid payment method added to your account
Credits
A single credit will be used each time a client starts the verification process. If your client cancels or denies consent to validation terms, the credit will be returned. Please note that it can take 24 hours for the credit to be returned to you!
A failed verification uses a credit.
If you don’t have any credits available, the system will display a warning and offer you to purchase credits:
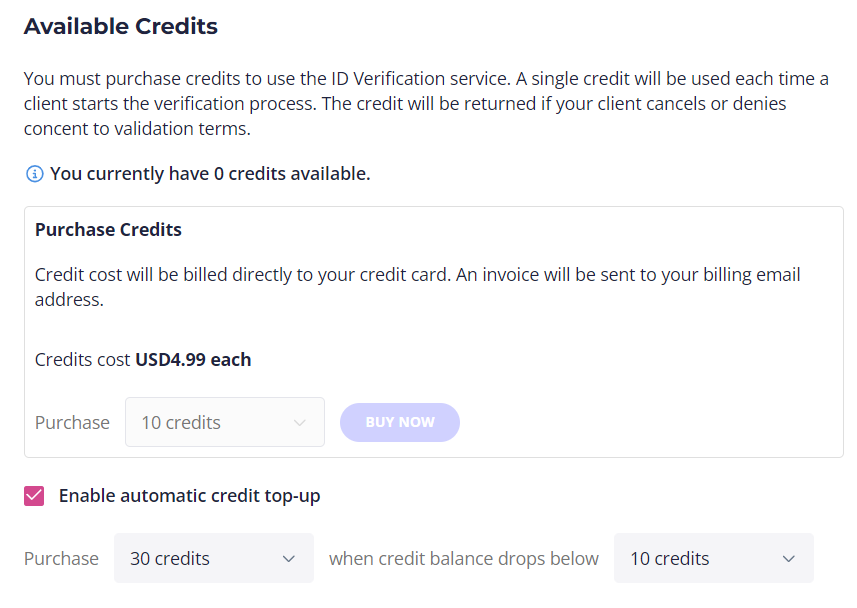
Another option is to Enable automatic credit top-up by ticking the corresponding box. That way, you can automatically purchase new credits when your credit balance drops below a predefined number.
Adding ID verification to a Content Snare request
ID verification is a field type in Content Snare. You can add it to the request just like any other:
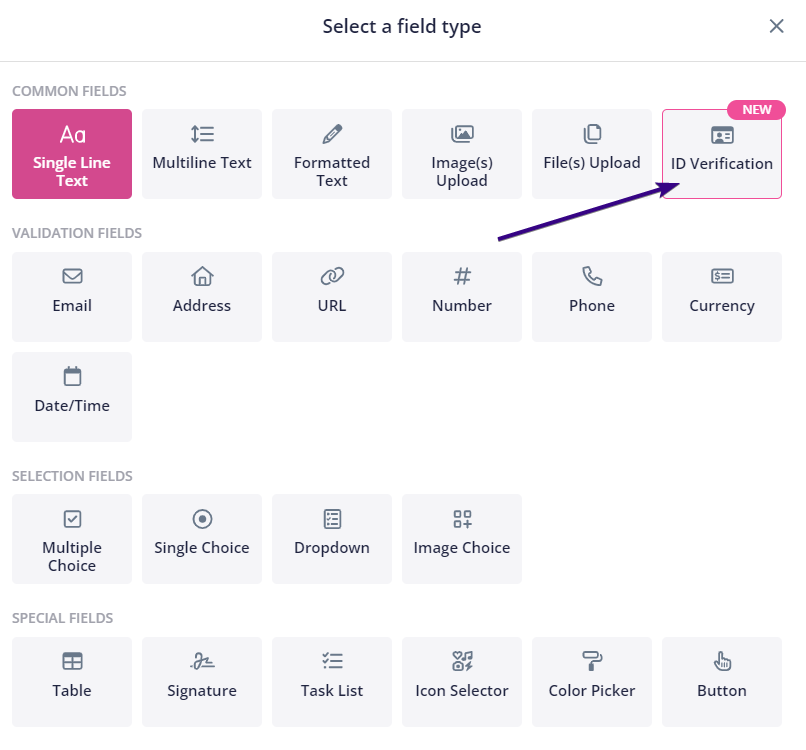
Apart from some of the standard field options, ID verification comes with a few extra settings:
- Require biometrics check: Enabling this option requires a client to take a selfie to compare it with their photo ID.
- Require live document capture: Activating this option requires a client to hold the document in front of the camera for scanning. If this option is disabled, they can upload a previously saved photo.
- Allow retry on failed verification: Enabling this option allows your client to try again if their verification fails. Note that this will use an additional credit. If you disable this option, you will have to reject the client’s answer before they can try identifying themselves again.
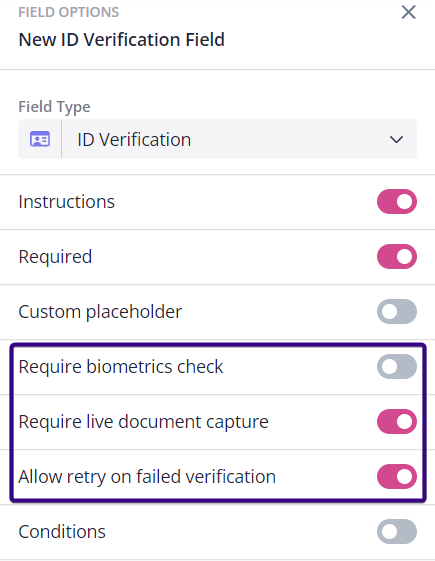
| Note: Stripe will charge you even if your client fails to verify their identity. Each ID verification attempt (success or failure) will cost you one credit. |
What does ID verification look like for your client?
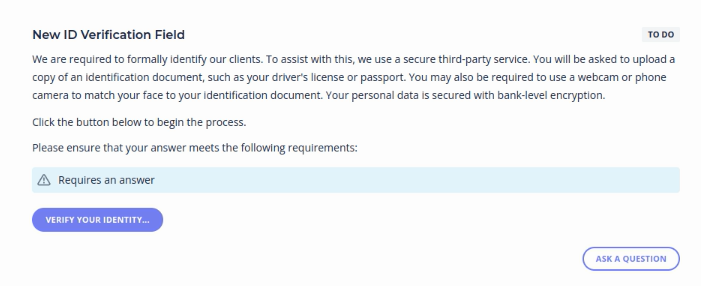
When you add an ID Verification field to the request, your client will see it along with general instructions on how to complete it:
Then, they need to click the Verify your identity button to start the verification process — the system will open up a photo ID scan window:
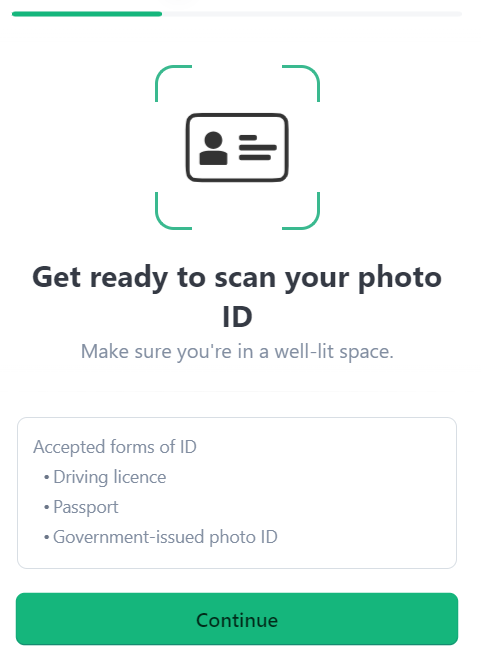
Once there, they just need to follow the instructions to complete the scanning process.
| Note: Your client will need to agree with Stripe Identity’s terms and conditions before scanning documents. If they deny consent, you will be notified. |
Video Demo
We also made a video demo on what your clients see when you add an ID Verification field to the request:
It’s also possible to do a live demo directly with Stripe.
Accessing restricted verification results
Once the ID verification has been completed, you will see the pass or fail status along with limited client-related information:
- Name
- Document type used for ID verification
- Document issuing country
- Issue date
However, it’s also possible to Allow access to the restricted verification results such as date of birth, document expiry date, and document copies. This should only be enabled if you have a legal requirement to retrieve this information. The results contain more sensitive personal information, so you must agree to some additional terms before you enable this feature:
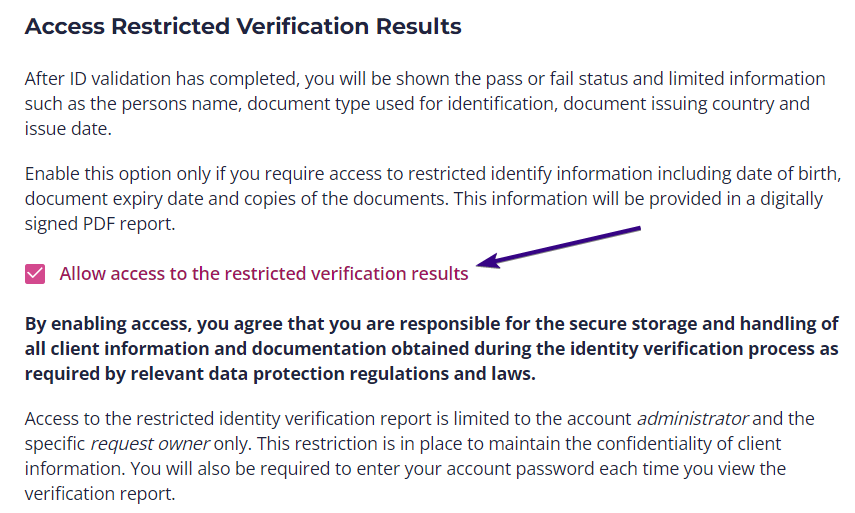
| Note: Bear in mind that, in most instances, you don’t need access to the restricted verification results. The basic information displayed is often sufficient to prove you verified a client’s ID, but you need local legal advice to be sure. |
In case you wish to access restricted verification results, do it by clicking View Identity Report under a given ID Verification field:

You will then have to re-enter your Content Snare password to view the PDF report. Should you wish to download it, click the Download button in the upper-right corner of the page.
Verification results
The ID verification process can have different results.
Pending
The system may take some time to complete the verification process. In this case, you will see a notification that your client’s identity is currently being verified:
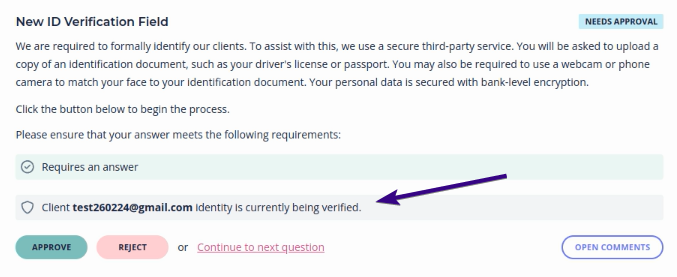
The process usually doesn’t take longer than a minute or so.
Success
The system verified a client’s identity. In this case, you will see the following notification:
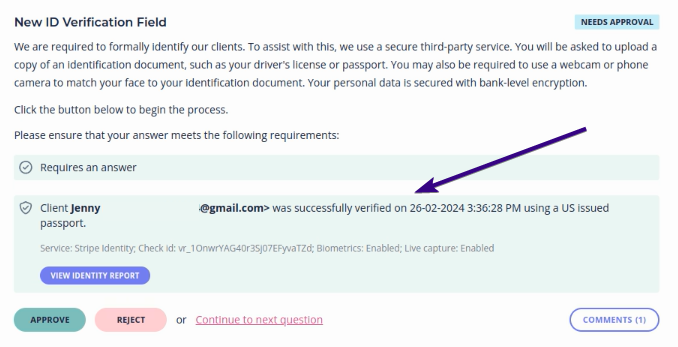
Record the information shown in the green box. In most cases, this should be enough to confirm your client’s identity.
Failed
The system did not verify a client’s identity. In this case, you will see the following notification:

If you haven’t allowed retry on failed verification, you will have to reject this answer before your client can try verifying their identity again.
Client denied consent
Verification record
To see a client’s verification record, click the Clients tab and go to the given client’s details. The verification record is shown at the bottom of a client page:
