You can approve or reject your client’s answers as they come in. You don’t need to wait until the entire request is complete. To do that, go to the Content Snare dashboard. You’ll see that the request has changed its status to Waiting for approval. It changes color from white to filled in to indicate this state.
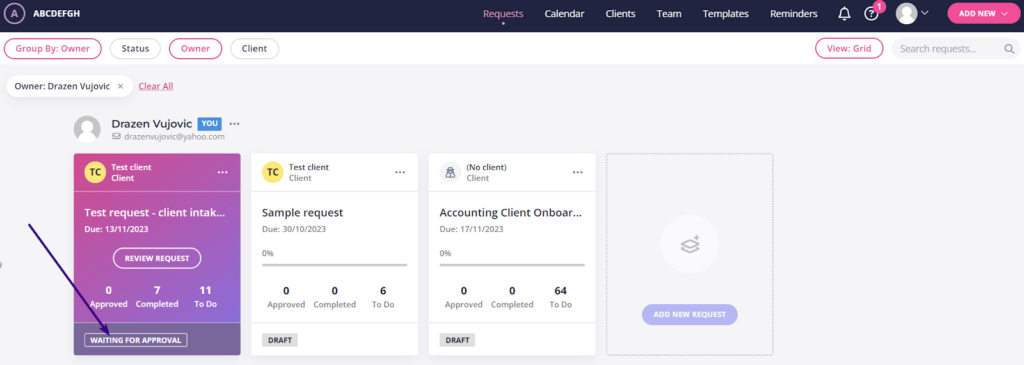
Click Review request to see your client’s answers.
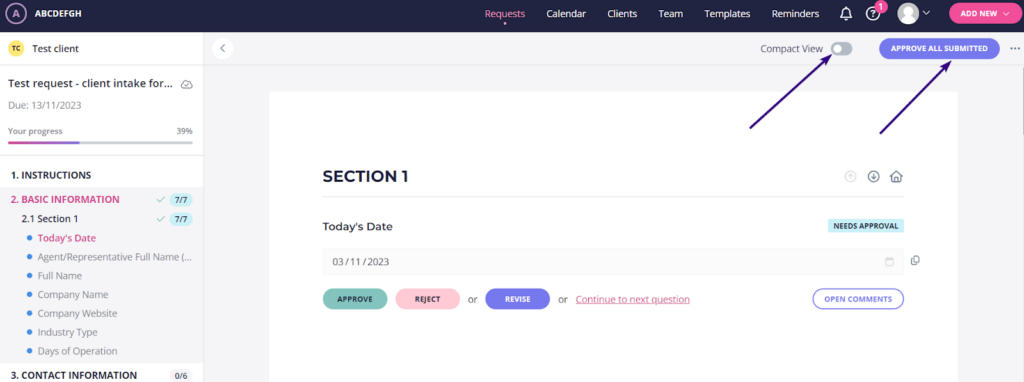
When reviewing the request, your view is similar to what your client sees. Everything works the same way, but you’ll notice a few extra controls: Approve, Reject, or Revise.
If you wish to speed up the work by viewing more than one question at a time, click Compact View in the upper-right corner of the interface. Another option is to Approve all submitted, which allows you to confirm all answers in a single click.
Approve
To approve an answer, click the Approve button. When you do that, clients can no longer make changes to this answer.
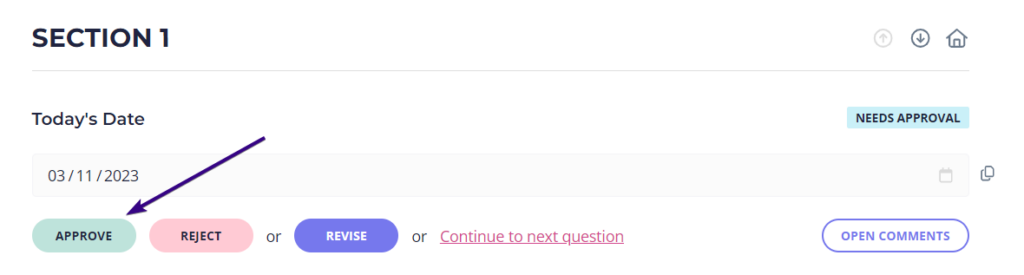
If for some reason you change your mind, click Remove approval to take it back to the same state it was in before.
Reject or revise
To reject an answer, click Reject and explain what your client should do to fix it. For the sake of this tutorial, we asked a client to write down their full name:
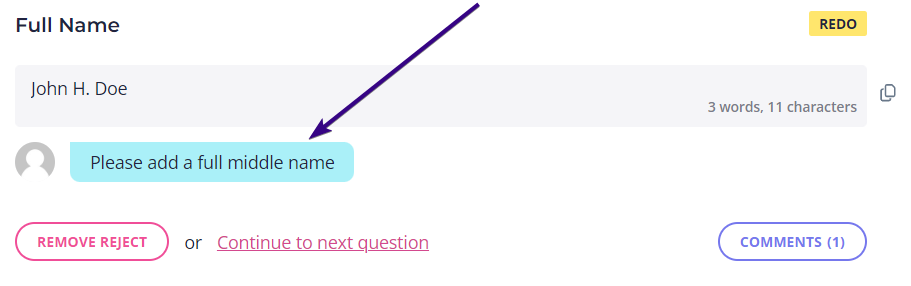
As soon as you reject a field, your client will receive an email asking them to return to the request and change the answer. The field will display your comment and the Redo mark in the upper-right corner. If you change your mind for some reason, click Remove reject to take it back to the same state it was in before.
| Note: Clients don’t see the word “reject”. Instead, they receive an email saying that you have a comment on one of their answers, and the question is highlighted in yellow with the term Redo. |
The Revise button enables you to make changes to the client’s answer, but make sure to re-submit it when you’re done.
Comment
You can reply to the client’s questions in your request. When they ask a question, you’ll receive an email like this:
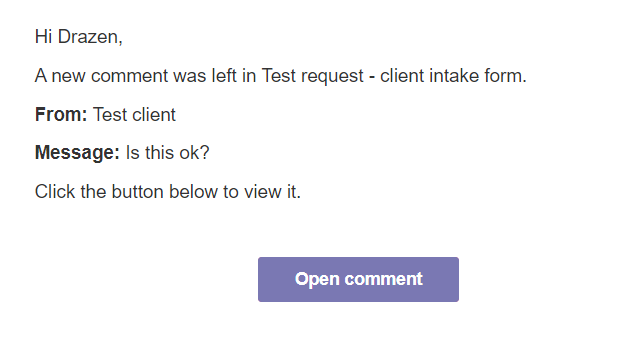
Click the Open comment button and it will take you straight to the request field that your client commented on — you’ll see a dialogue box on the right. After that, you can type in your comment and click Add comment:
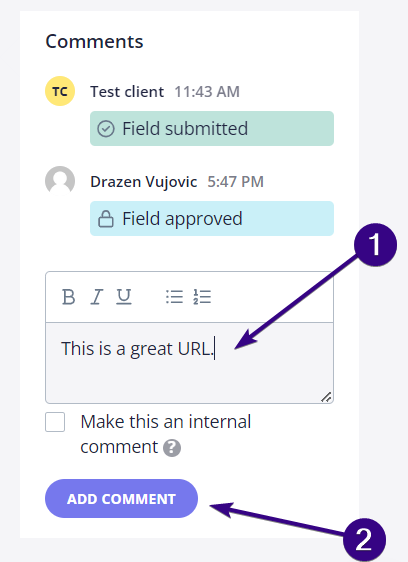
The dialogue box also shows you other field-related activities like when it was completed, approved, or revised.
You’ll also see a check box Make this an internal comment. By ticking the box, you’ll make an internal comment that is visible only to other team members as it won’t be shown to your client.