The best way to learn about how to bulk create and/or bulk send requests using the Zapier integration is by watching the tutorial below.
Still not sure of how it’s done? Don’t worry, within the following written explanation (accompanied by screenshots from the above video), you’ll be taken through this process one step at a time:
Firstly, let’s take a look at Content Snare on Zapier.
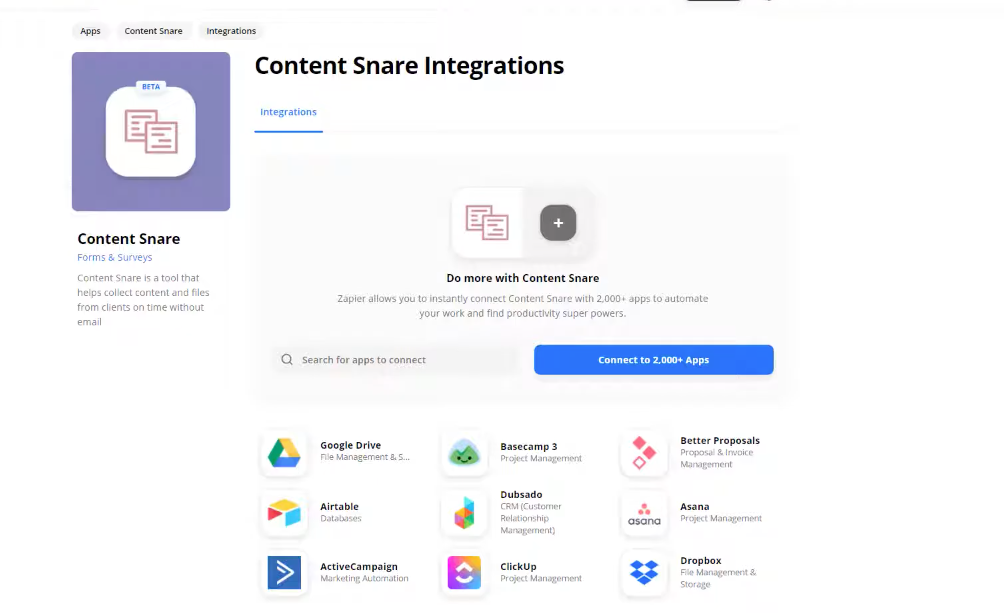
As you can see from the integration details, Zapier supports a certain number of Content Snare triggers and actions.
When it comes to this process, only the actions are concerned. For this example, you’re going to learn how to bulk create and send requests which involves using the Create Request action. However, the same steps are applicable when it comes to creating new clients using the Create Client action.
Step 1: Log into your Zapier account and hit that Make a Zap button in the top left-hand corner.
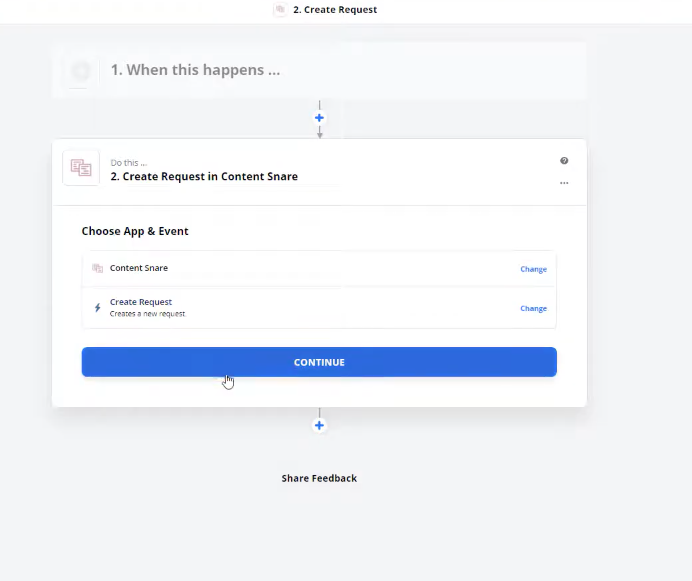
Normally, you would begin a Zap with a trigger. However, for this, as you need to figure out what information you’re going to import first, you’ll need to skip straight to the action.
Search for Content Snare within the apps, select the Create Request action and sign into your Content Snare account.
Step 2: Now, this is where you’re going to work out what information you’re going to need to import.
To proceed onto this part of the process, it would be useful to go ahead and create a new Google Spreadsheet.
For the purpose of this example, we’ve called our new spreadsheet “Temp – Content Snare Import“. Once you’ve created that, open it alongside Zapier so that you can see both windows simultaneously.
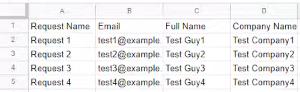
Next, you’ll see that, in order to create a request, you need a certain amount of information. Within our example, we’ve essentially selected the bare minimum:
- The Request Name (to be entered into the new spreadsheet as shown below)
- The Request Template (to be selected within Zapier)
- The recipient’s email address (to be entered into the new spreadsheet as shown below)
- The recipient’s full name (to be entered into the new spreadsheet as shown below)
- The name of the recipient’s company (to be entered into the new spreadsheet as shown below)
- The status of the request (to be selected within Zapier)
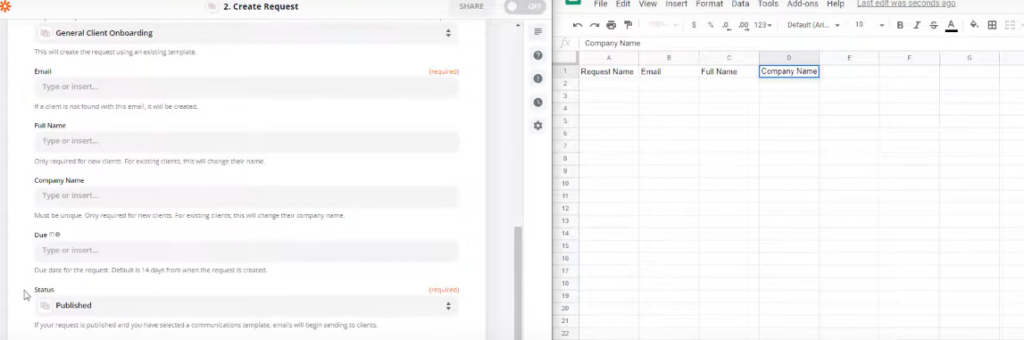
Once you’ve done that, within your spreadsheet, you can go ahead and create an example to import, much like the ours below:

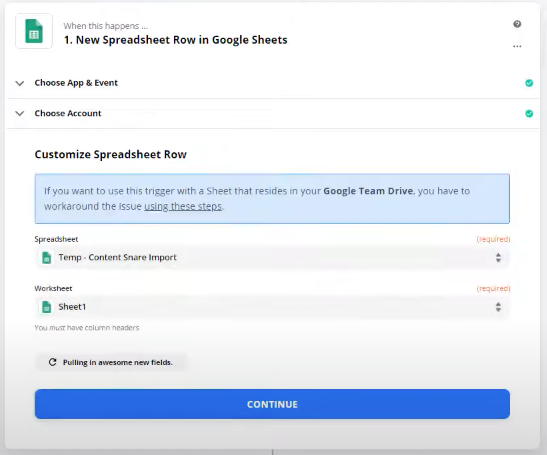
Step 3: From here, let’s go back up to the trigger for this Zap. You’re now going to want to select Google Sheets as the desired app, choose the New Spreadsheet Row trigger and sign in/select your account if you’re already signed in.
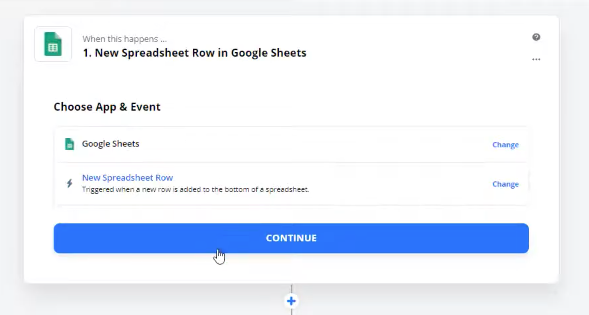
Now, select the spreadsheet you’ve just created (it should be visible within the drop-down menu) as well as your desired worksheet, which is usually just Sheet1 if the spreadsheet is brand new.
At this point, you’ll be able to test your trigger and, if you’ve followed the steps correctly so far, the message “We found a spreadsheet row!” will appear on the screen and you’ll be ready to move onto the next step!
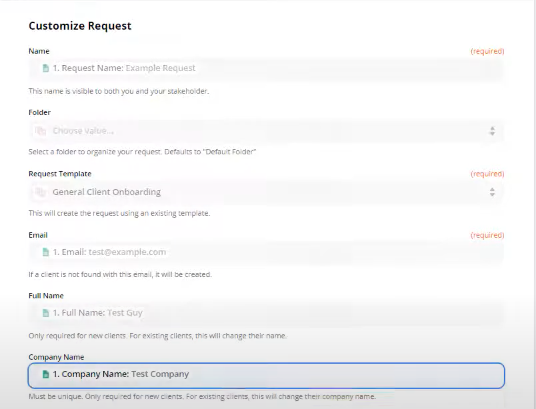
Step 4: Returning to the action, it’s time to pick up where we left off within the Customize Request area.
As we’ve now created those 4 spreadsheet headings (Request Name, Email, Full Name and Company Name), we’re free to select those from the corresponding drop-down menus, as shown below:
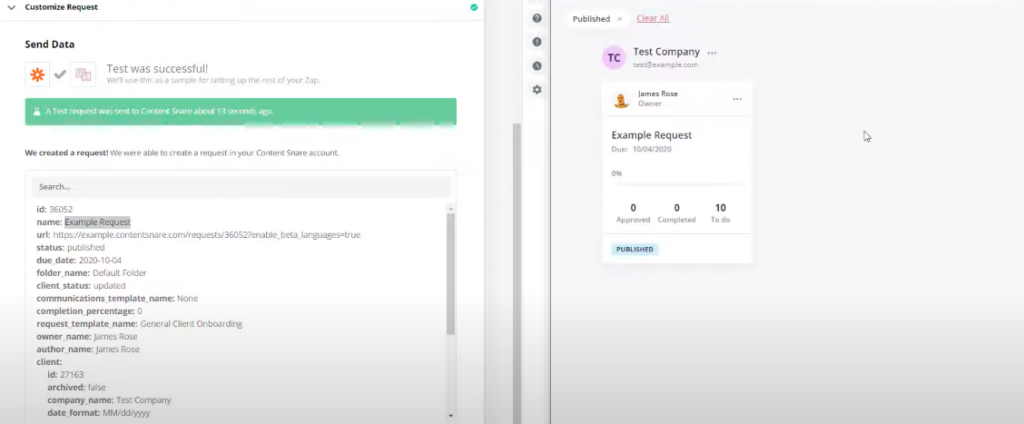
Step 5: Excitement awaits: you can now test your zap!
Before you do so, open up Content Snare and display that window on the other side of your screen. When the test runs, you’ll hopefully see the “Test was successful!” message appear following this which means, upon searching for the test request within Content Snare, it’ll now appear!
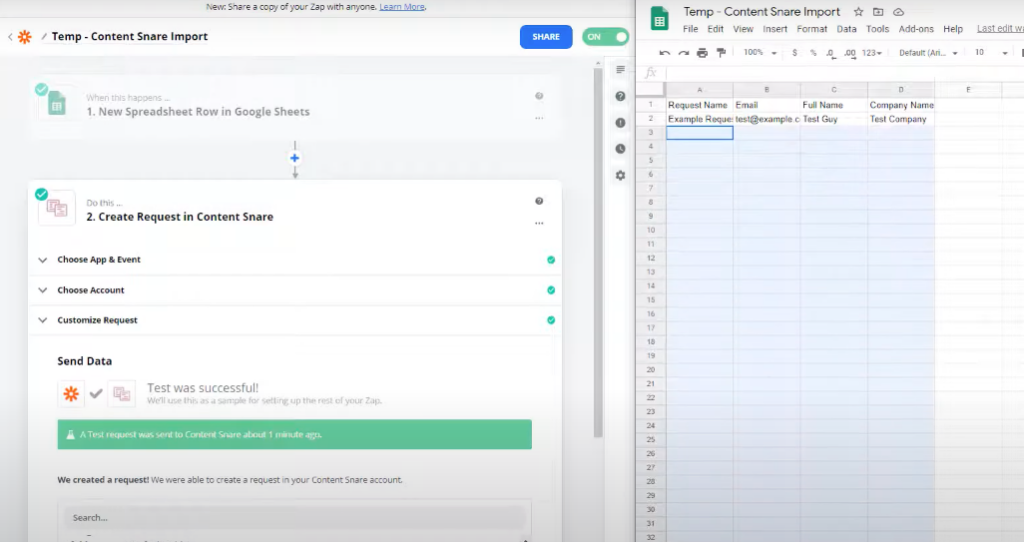
Once you’re happy with that, you can turn the Zap on, choose a name for it and move onto learning how to bulk create and send requests.

Step 6: Seeing as our Zap is on, from that this point onwards, every single time a row is added within that worksheet, a request will automatically be created within Content Snare. This means that, essentially, in order to bulk import and create requests, all we need to do is paste in the the desired amount of data.
Due to how quick and efficient Zapier is, it is not recommended that you type data directly into the sheet you’ve selected to trigger that Create Request action.
For example, if you were to type data into the Request Name and Email columns and leave for just a second to look for the recipient’s full name, the automation will have already happened using just those first two columns, making the request incomplete.
All data needs to be entered at once, which is why we recommend creating a second worksheet (Sheet2), preparing everything required within that one and copying and pasting it into the first worksheet to trigger the workflow correctly.
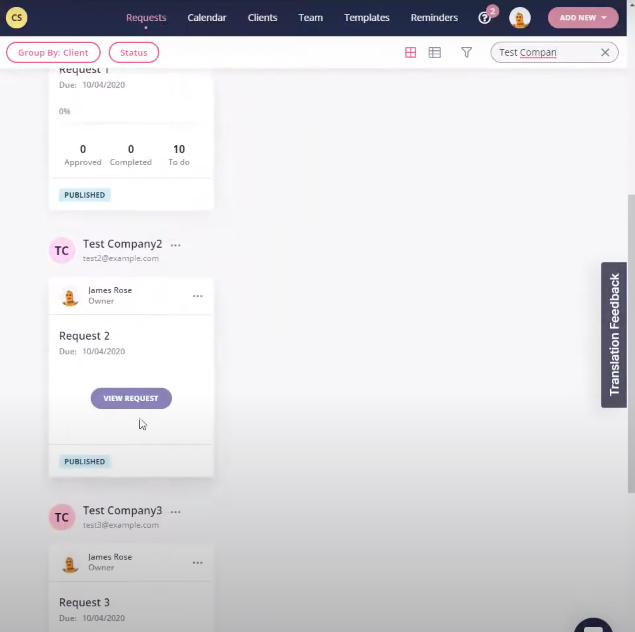
Here’s an example of some “dummy data” we created within our second worksheet and pasted back into the first one, all at once:
As you can see, upon searching for these requests seconds after their creation, they’re already published and active.
That’s all there is to it – you’re ready to bulk create and send your own requests!
Note: Zapier allows you to automate as many tasks as you like at once, meaning you can bulk create hundreds of requests at the same time using the above method.
However, occasionally, if the situation concerns a particularly large amount of tasks, Zapier may hold those instead of running them, just in case it wasn’t intentional on your part. If this occurs, you will receive an email resembling the following:
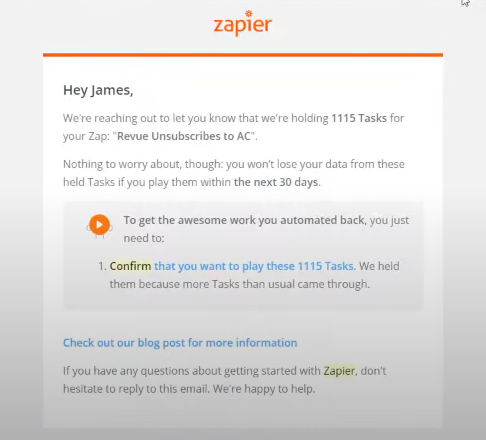
From here, you can simply click through to confirm those tasks if they were intentional and they’ll run smoothly.
If you’re still struggling to figure out how to set this up after following the video and/or written tutorial, don’t hesitate to email us at support@contentsnare.com or leave a message using the chat widget for some additional guidance.