Website design projects can be very rewarding. You get to create beautiful designs and create happy, proud clients in the process.
But communicating ideas to your clients can be tricky in the web design process. While your web designers might be able to visualize your solution early on, sometimes it takes clients a while to understand how the final product will look. You might find yourself in meetings with clients who have very blank looks on their faces!
A great way to get everyone on the same page for your next project is to use website wireframes to map out content that will go on each page and explain how the website will look.
In this post, we’ll:
- Go over why website wireframes are so critical in the web design process
- Share website wireframe examples of common website pages for inspiration
- Explain how to use wireframes to present your ideas to clients more effectively
- Share a tip for collecting content from clients for your website design.
Get website content templates
Content Snare helps you speed up your web design process by collecting content from your clients faster. The built-in website wireframes templates help your clients visualize where all the content will go.
What is a website wireframe?
A website wireframe is a prototype, a mockup, or a blueprint of your website design. It’s a basic framework that visually represents the content and elements that will live on the pages, and the user flow, or options for navigating to and from it.
In some ways, they’re closer to a site map than they are to final designs. They show the information architecture of the site but go one step further sharing design elements to give us a more visual idea of what the pages will eventually look like. Wireframes tell us whether the page will include images, media, buttons, panels, or blocks of text.
The thing about website wireframes though is that…. they’re not pretty! They’re extremely basic, skeletal, and usually in black and white. Heck, some agencies even just hand draw them in and scan them. This is why clients have a hard time being awed so early in the web design process.

Speaking of not pretty, you might have heard the terms high fidelity wireframe and low fidelity wireframe tossed around.
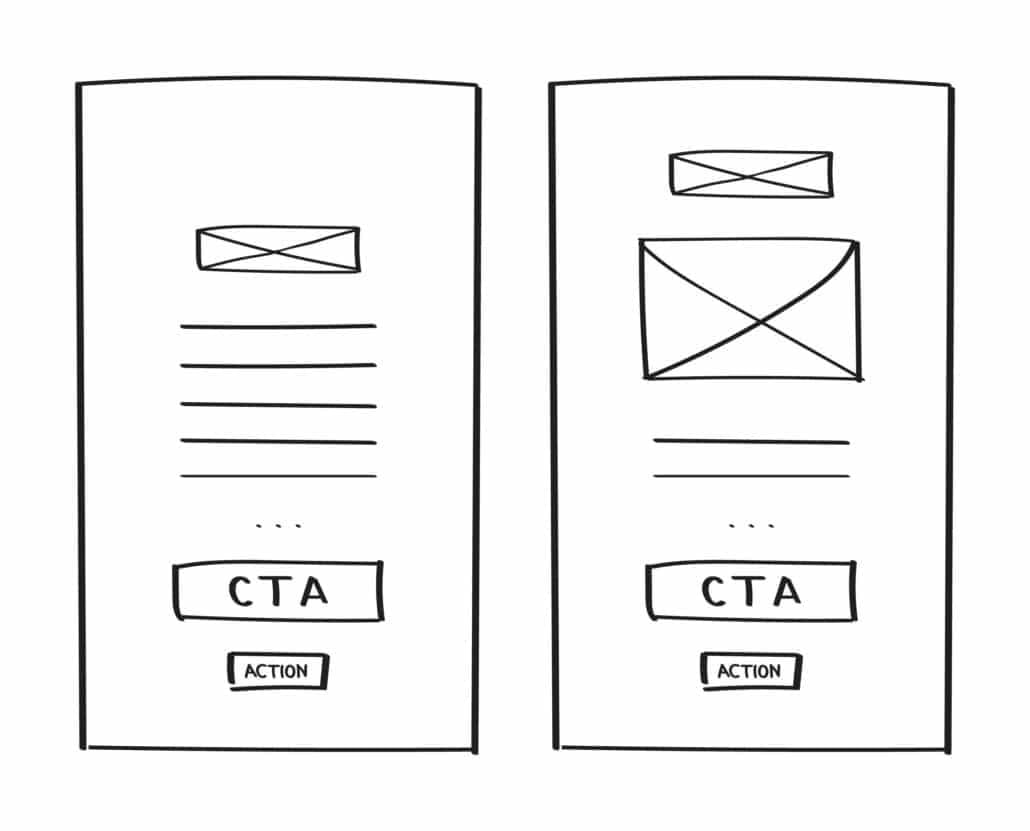
A low fidelity wireframe is basically just a quick sketch on pen and paper. It’s what your creative director might draw on a scrap piece of paper. These wireframes help bring an idea to life but are usually in black and white without much detail.
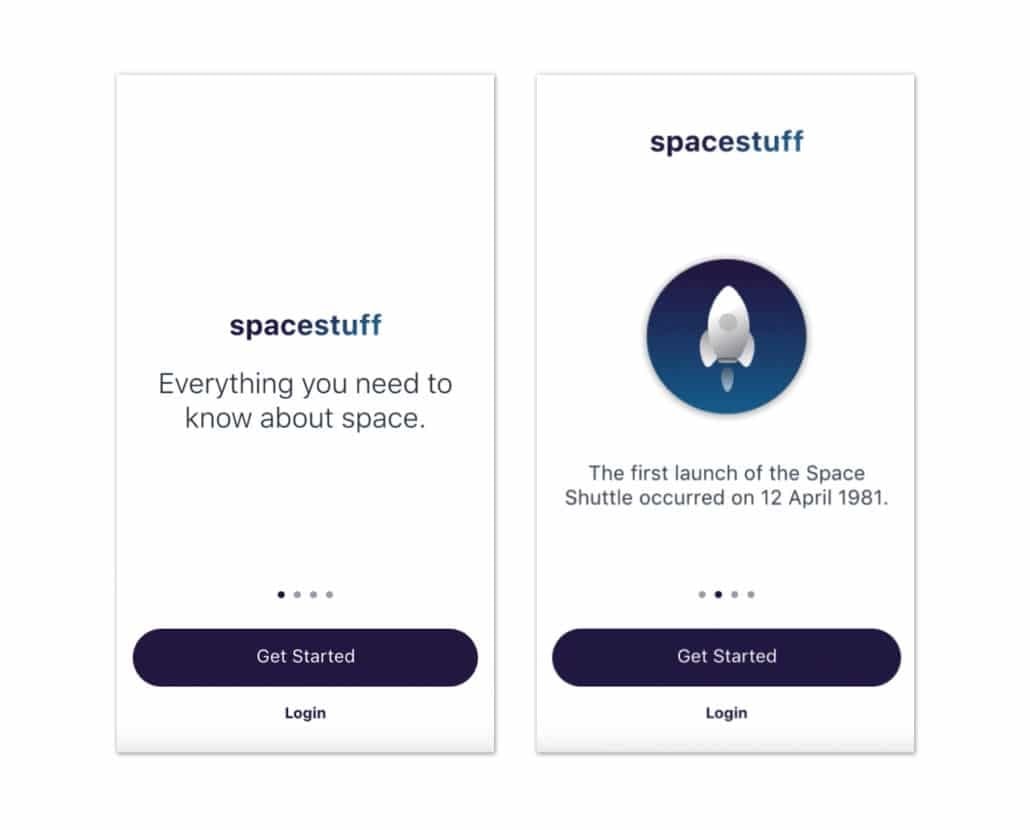
A high fidelity wireframe sits on the other end of the spectrum. They’re usually created by your UI designer using a digital tool and involve the use of colour. High fidelity wireframes are meant to look as close to the final version of the website as you can get.
If you don’t want to create wireframes from scratch, you can purchase pre-made website wireframes or UI kits for programs like Figma, Sketch, Adobe Xd and Bootstrap through Platforma 2 or within the programs themselves. These come pre-loaded with some web design best practices.
How do website wireframes help web design?
- They help you focus entirely on the user experience, user interface, and website functionality first, before the distraction of visual design. This helps you uncover any major user experience (UX) issues early on.
- They’re a great tool for discussing ideas with your design team and with your client before moving forward on design.
- They help you make less errors. When you use wireframes, you avoid having to make major revisions and changes to the site once the site it’s been designed.
Website wireframe examples for inspiration
Below you’ll find some wireframes for some of the most common website pages and sections you’re likely to design for your client along with some tips for each.
Site Navigation
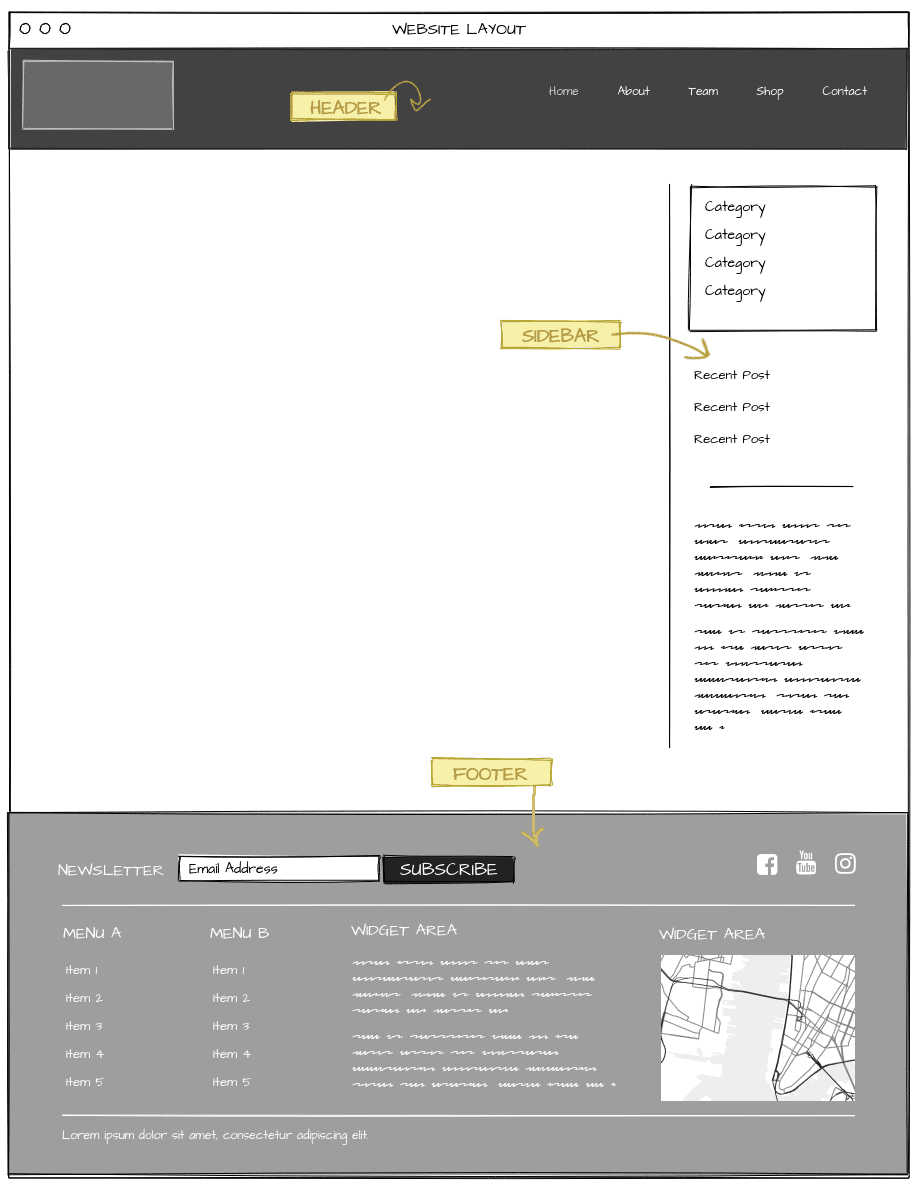
Here’s some inspiration for designing your header, footer, sidebar, and site layout. We recommend figuring this bit out first as it will determine how the rest of the site pages will look.
About Us Page
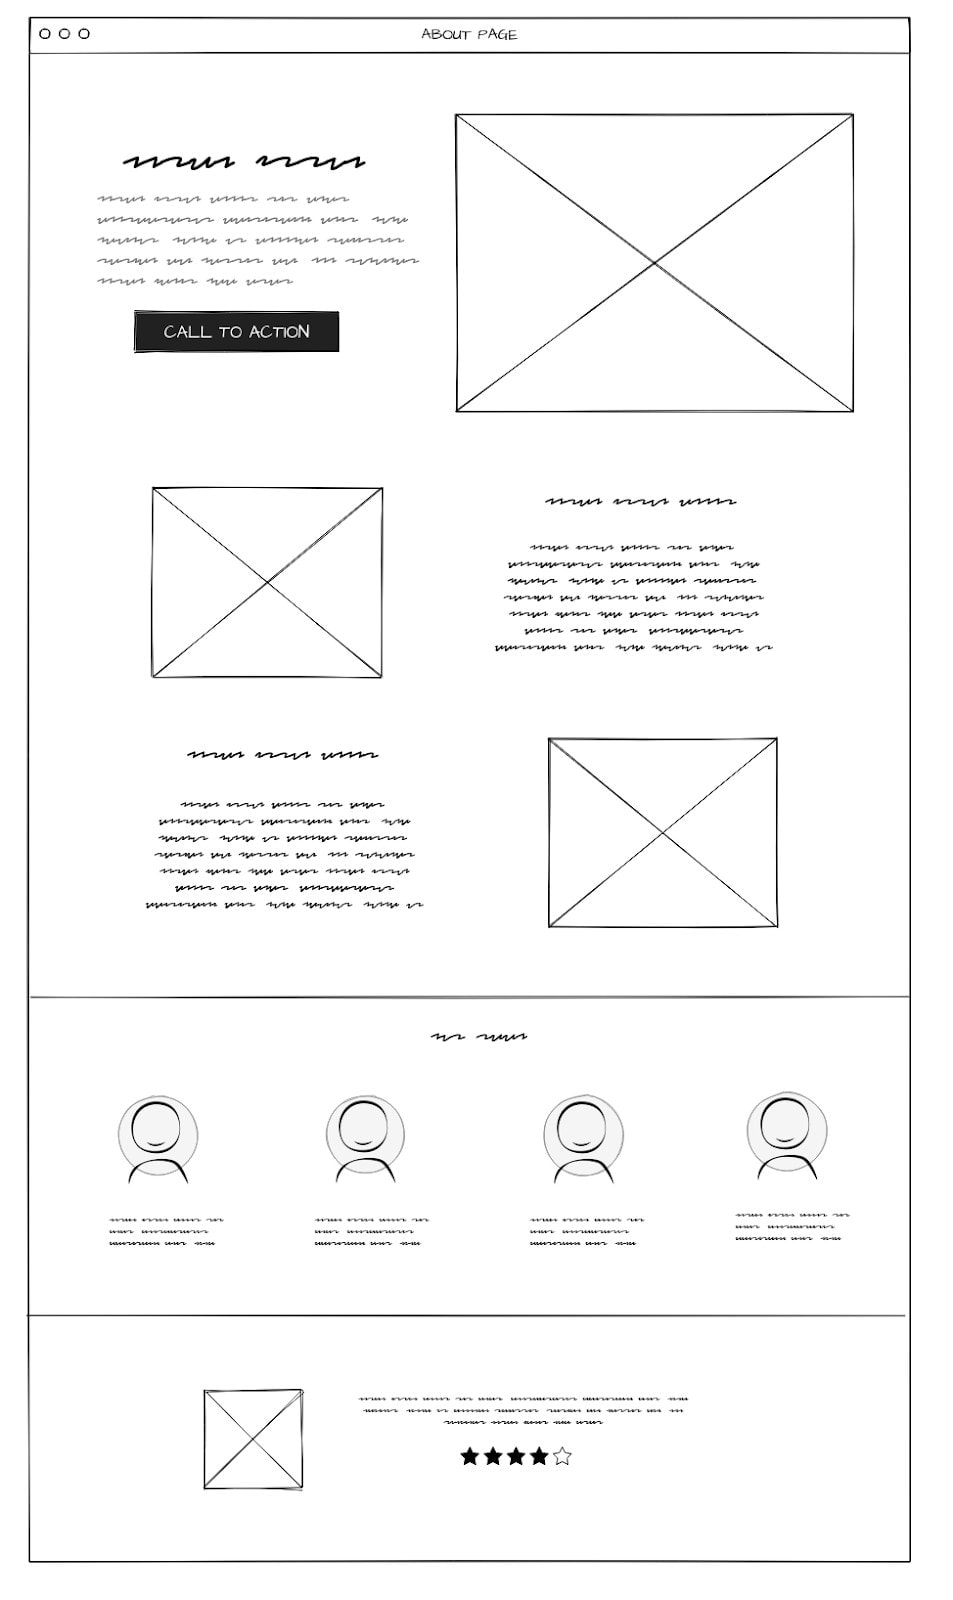
There are tons of different ways you can set up your About Us page. This example includes a few images, short blurbs, along with an introduction to your team members and a testimonial.
You might choose to leave out your team members section and reserve that for a dedicated Team page instead to keep your About Us page more specific and high-level.
We definitely recommend having a clear Call To Action on your About Us page (and basically every page), or at least link to some further pages for exploration so that the user doesn’t run into any dead ends and bounce.
Team Page
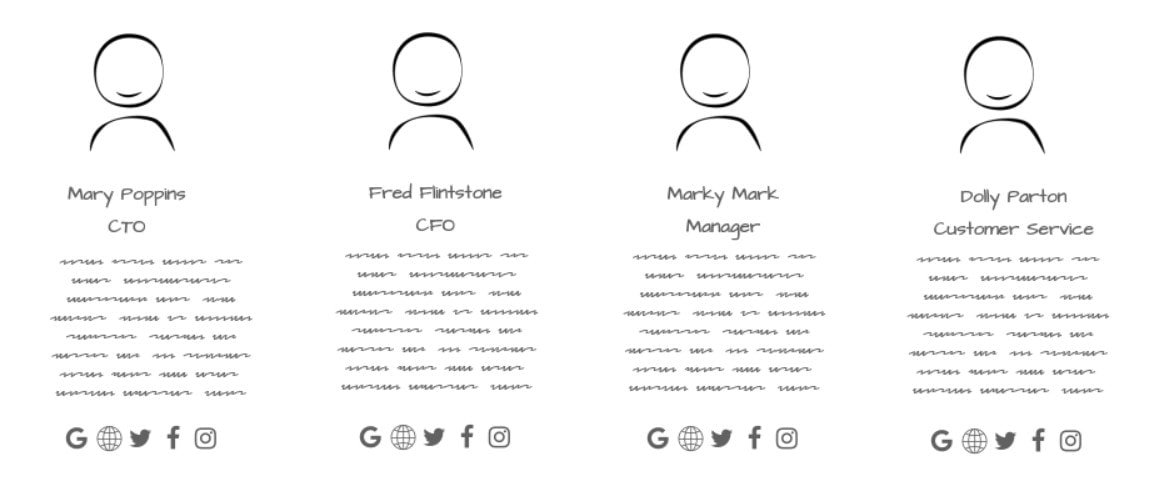
Here’s one way you can display team members either on your About Us page or own your Team page. This wireframe leaves space for an image, a short blurb about them, and links to their relevant socials. Be sure to make any of those links open in their own window though, to discourage bouncing away from your site.
If you have some vertical space to fill out on your Teams page, you can go with something like this instead:

Products & Services Page
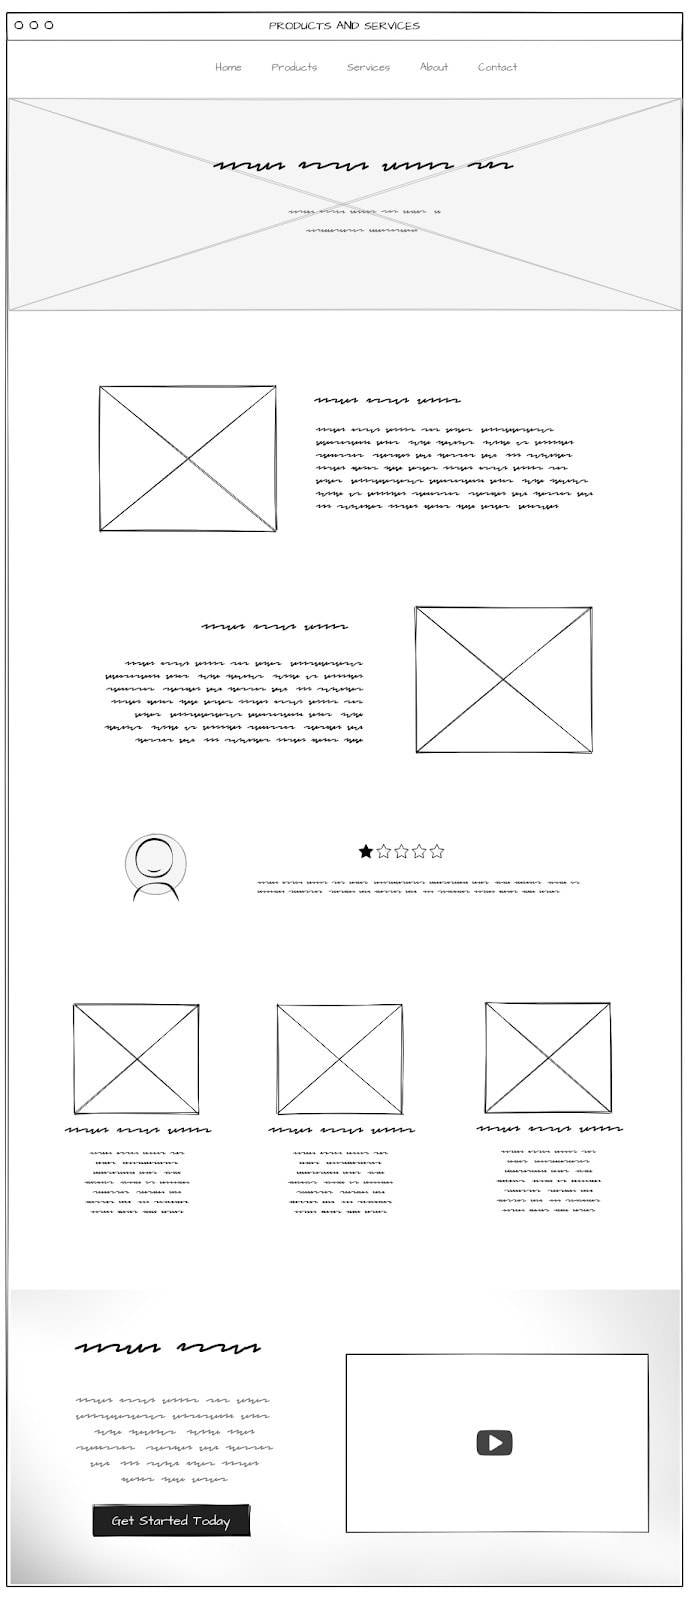
Ok, so this is a big one and it will largely depend on how many products or services you’re offering. Sometimes you need to break these down into further pages.
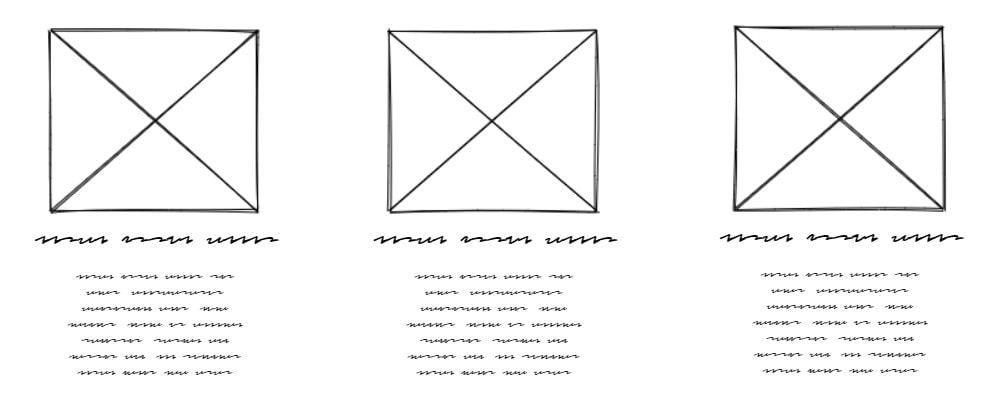
This snippet shows one way you can display each product or service. Include high-quality images of your products and services with short descriptions on what they’re all about.
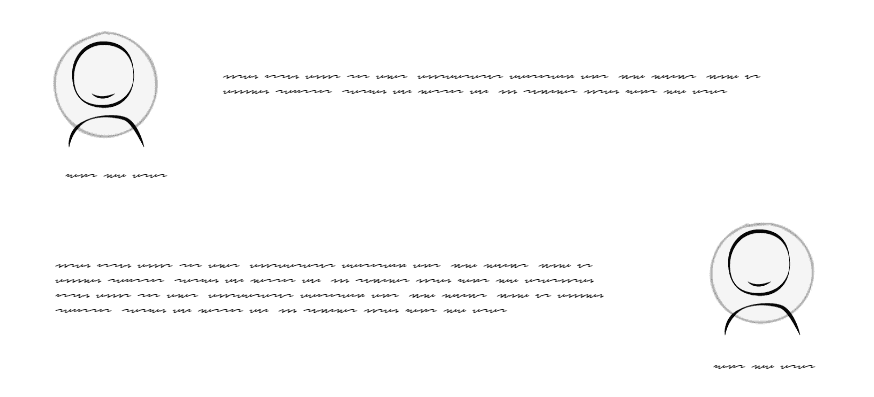
Your products and services page can be a great place to include some testimonials. Leave space for images of your customers and a couple of lines for their quotes.

You can also use star ratings in your testimonials too or pull these from Google reviews.
Contact Us Page
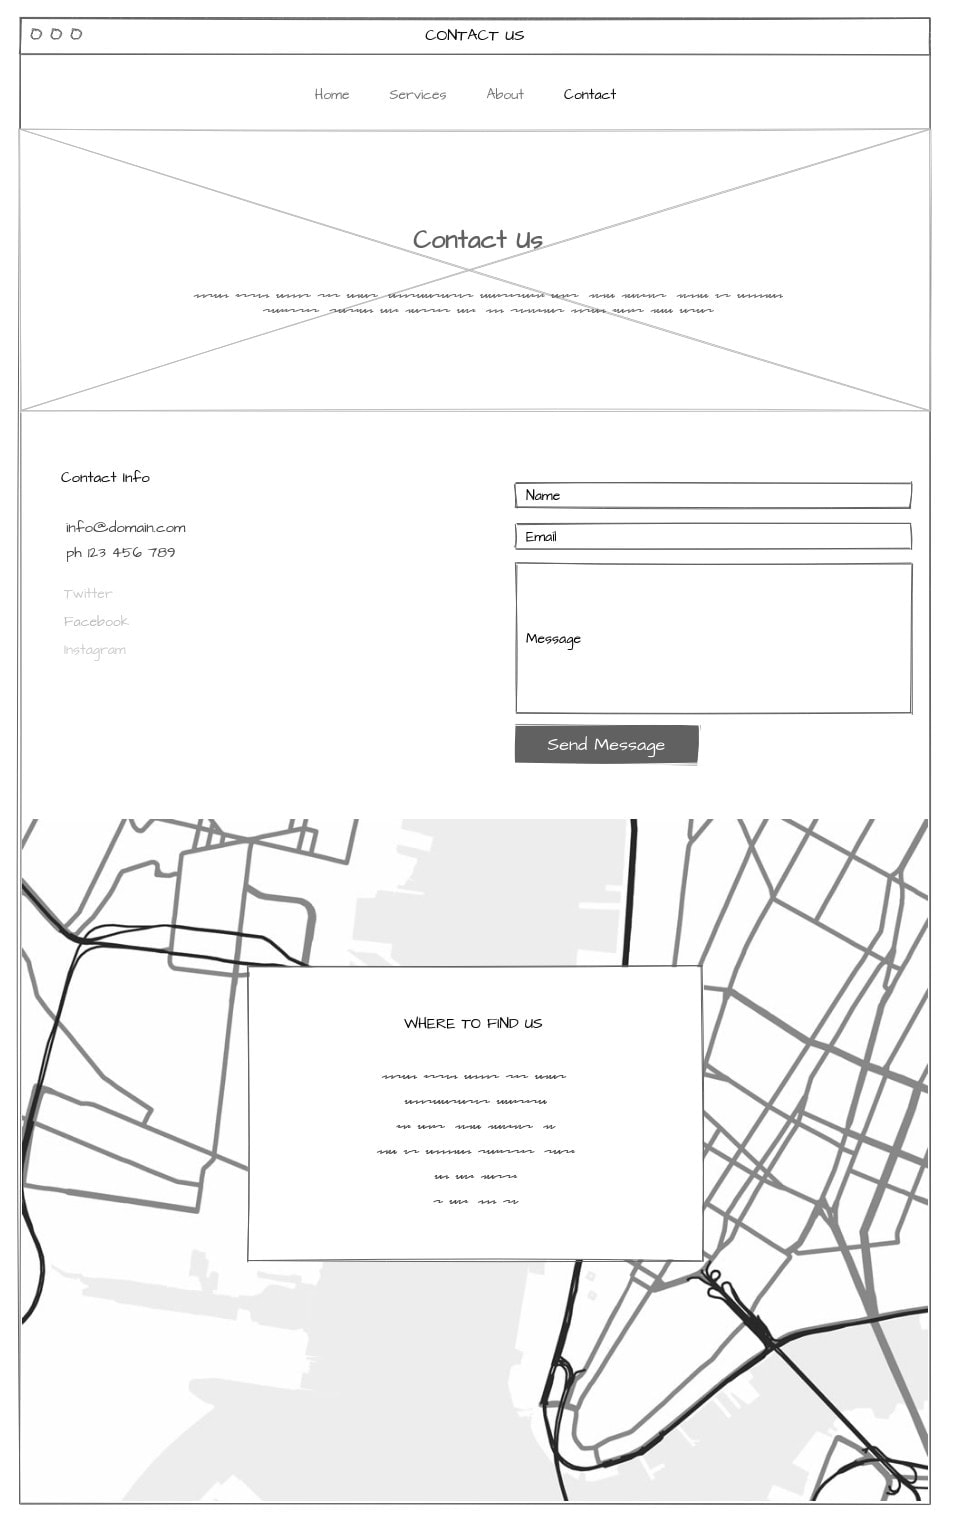
Here’s a fairly typical Contact Us page wireframe design you see on tons of sites. It includes space for a contact form (if that’s your preferred way of being contacted) as well as space for all other contact information.
Showing your location on Google Maps is also very handy on this page. You can do this as displayed above as a background image, or contained as an image itself.
FAQ Page
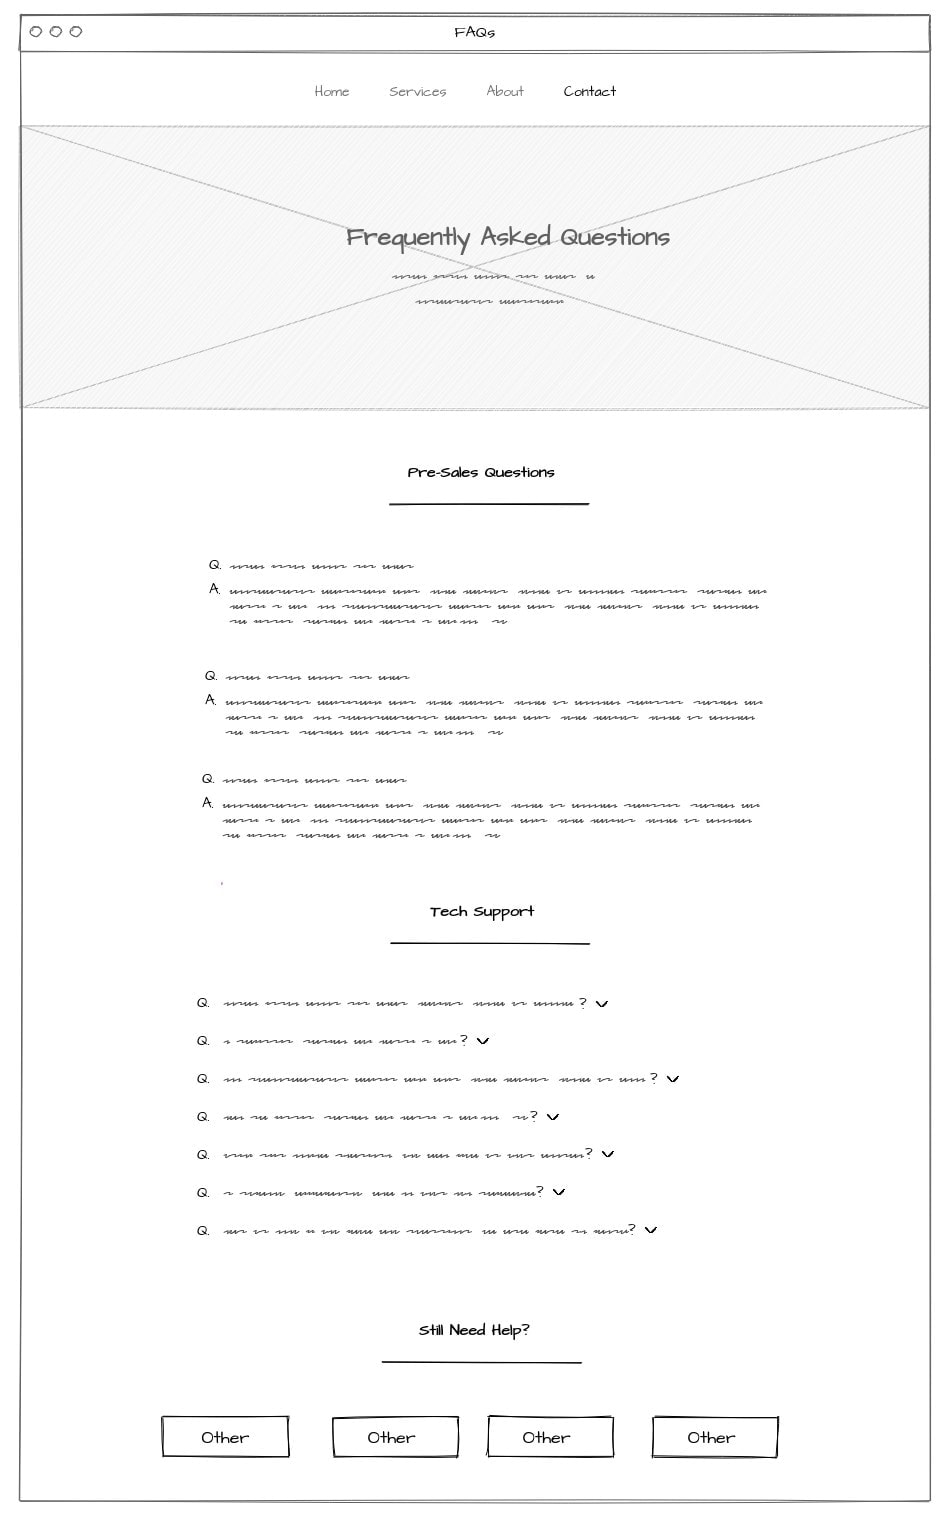
To avoid a page that requires endless scrolling, this FAQ page wireframe helps you hide rows sections of copy by making them collapsible and expandable with arrows. Consider how long you want your copy to be on the page then use this trick to hide away the less important bits.
The “still need help” section helps direct the user to other areas they might find answers in, again avoiding bounce rates and dead ends.
How to present website wireframes to clients
Now you have a few wireframing examples to run with as you tackle your next project.
Here are a few things you can do to present your website ideas to your clients and other team members as effectively as possible.
1. Collect feedback by showing examples of existing sites
The best way to give your client an idea of what their site can look like is to pull up examples of sites that you think look great (and even sites that you think aren’t so great to point out the flaws).
Walk them through the main features of your selected sites and point out specific sections so that they understand how it’s done. As you get their feedback, make a list of the features they like, and what they want to stay away from.
2. Do a complete walkthrough of your created wireframes
After you create your wires, whether by sketch on a program, sit down with your client to walk them through the pieces. Explain your reasoning for every section you have on the page, and where each section navigates to within the site.
If you’ve uncovered some new examples as you were creating your website wireframes, have those ready to go so you can pull them out and show a real-life example.
3. Send over high-fidelity wireframes for the client to experience
Send your client your high-fidelity wireframes so that they have the best idea of what their site is going to look like. Collect additional feedback at this stage and incorporate as many changes as needed before landing on the final version.
How to collect content for website wireframes
So once you have your final website wireframes nailed down, you’ll have to spend the time collecting content from your client on what needs to go in each section.
You might be thinking of doing this over shared folders like Google Drive, Dropbox, or OneDrive but you can make the whole process go a lot smoother if you use Content Snare!
Here’s how to collect content for your clients’ website wireframes using Content Snare:
1. Create a Content Snare request using a design template
Create a new request.
Choose “Design” within templates.
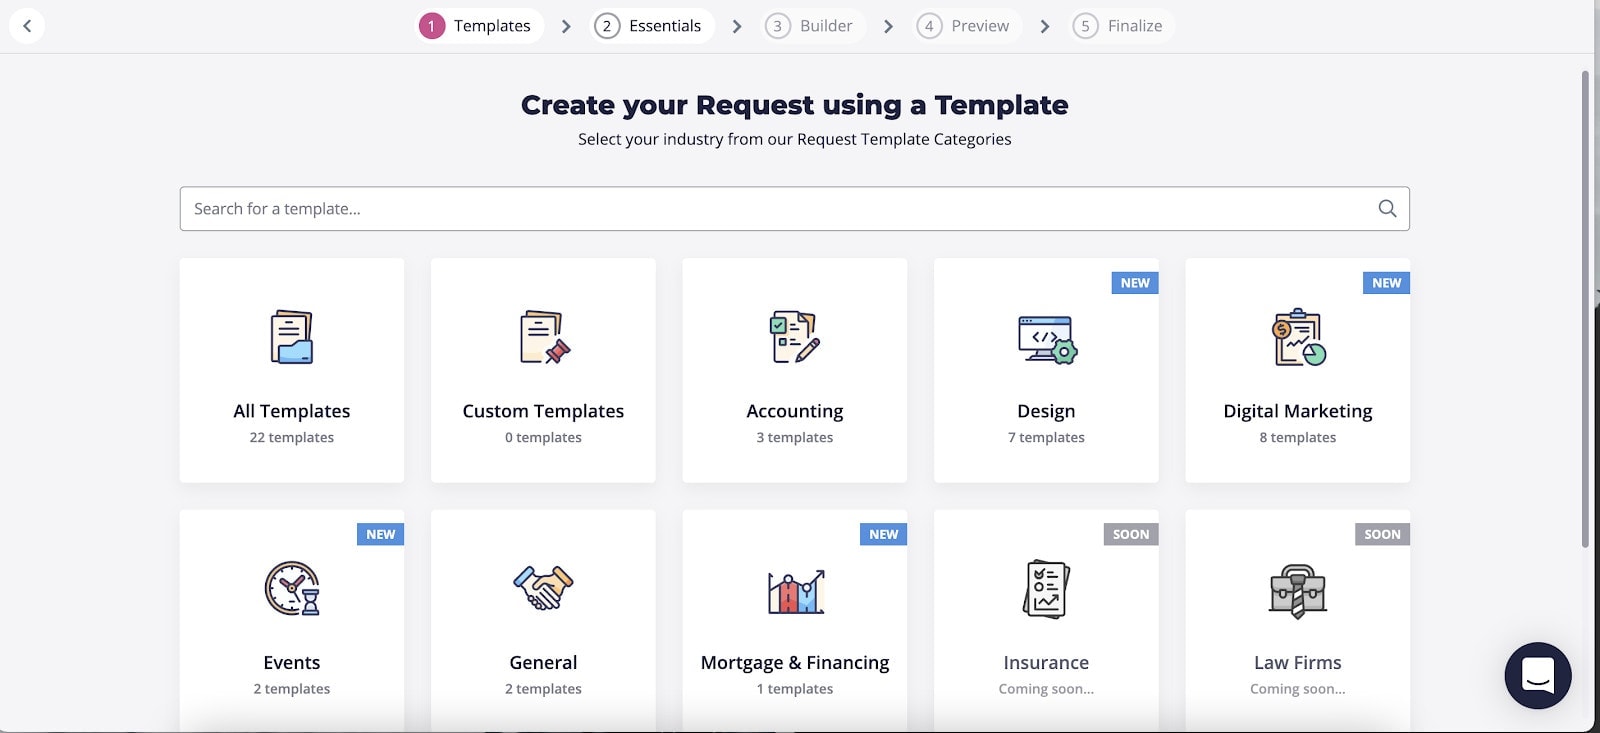
Head to “Standard starter site” under design options in the left panel.
Click the blue “Use template” button.
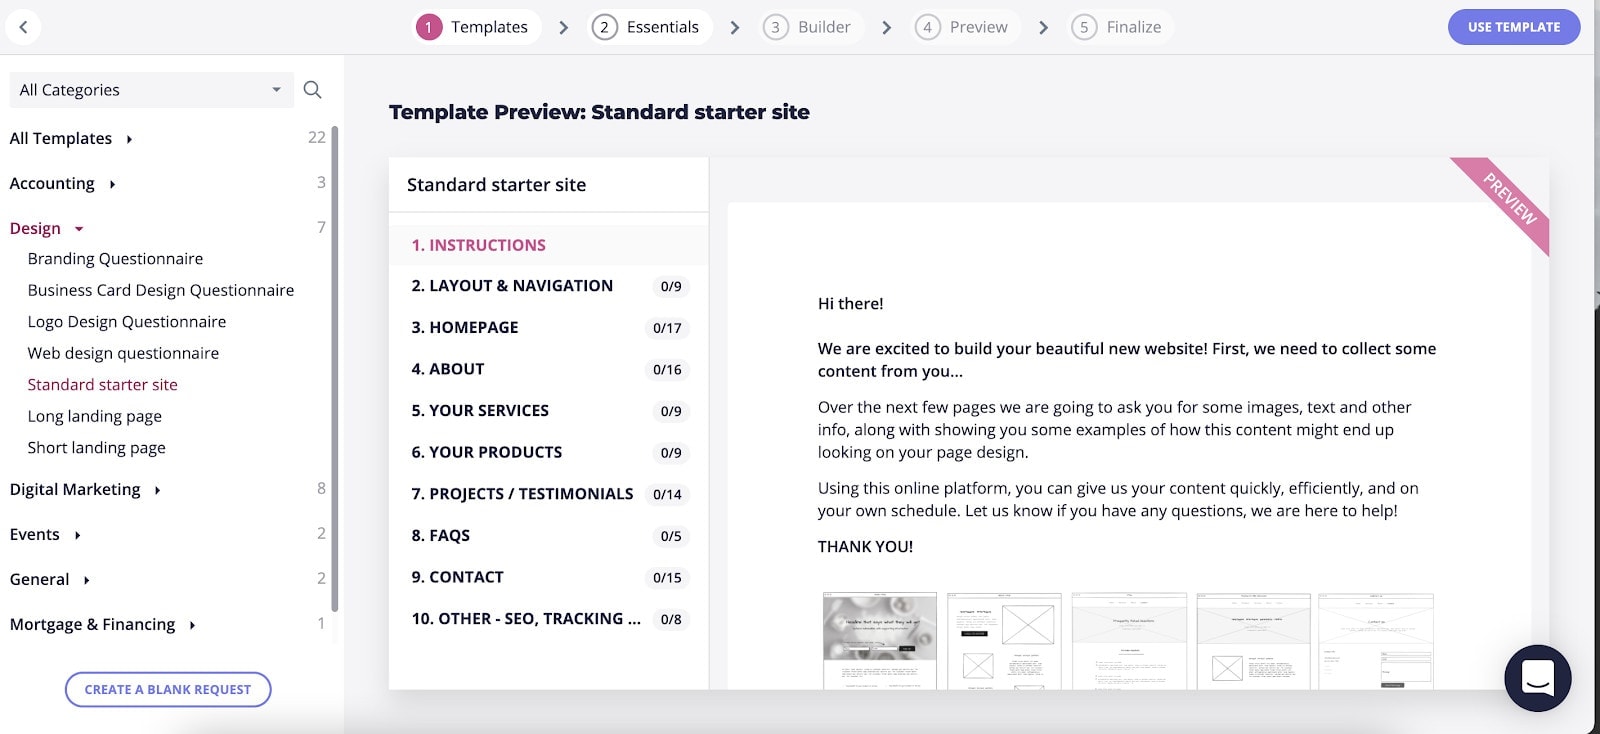
NOTE: You can also choose to create your own blank template from scratch if you’d like. You might prefer to create one request per section of the site if you prefer to break down the project into chunks.
2. Name your request and edit your request instructions or message
Name your request i.e - [Client name - website rebrand] and either leave the pre-loaded message that comes up or edit the text to sound more like your agency.
Hit the blue “Save and continue”.
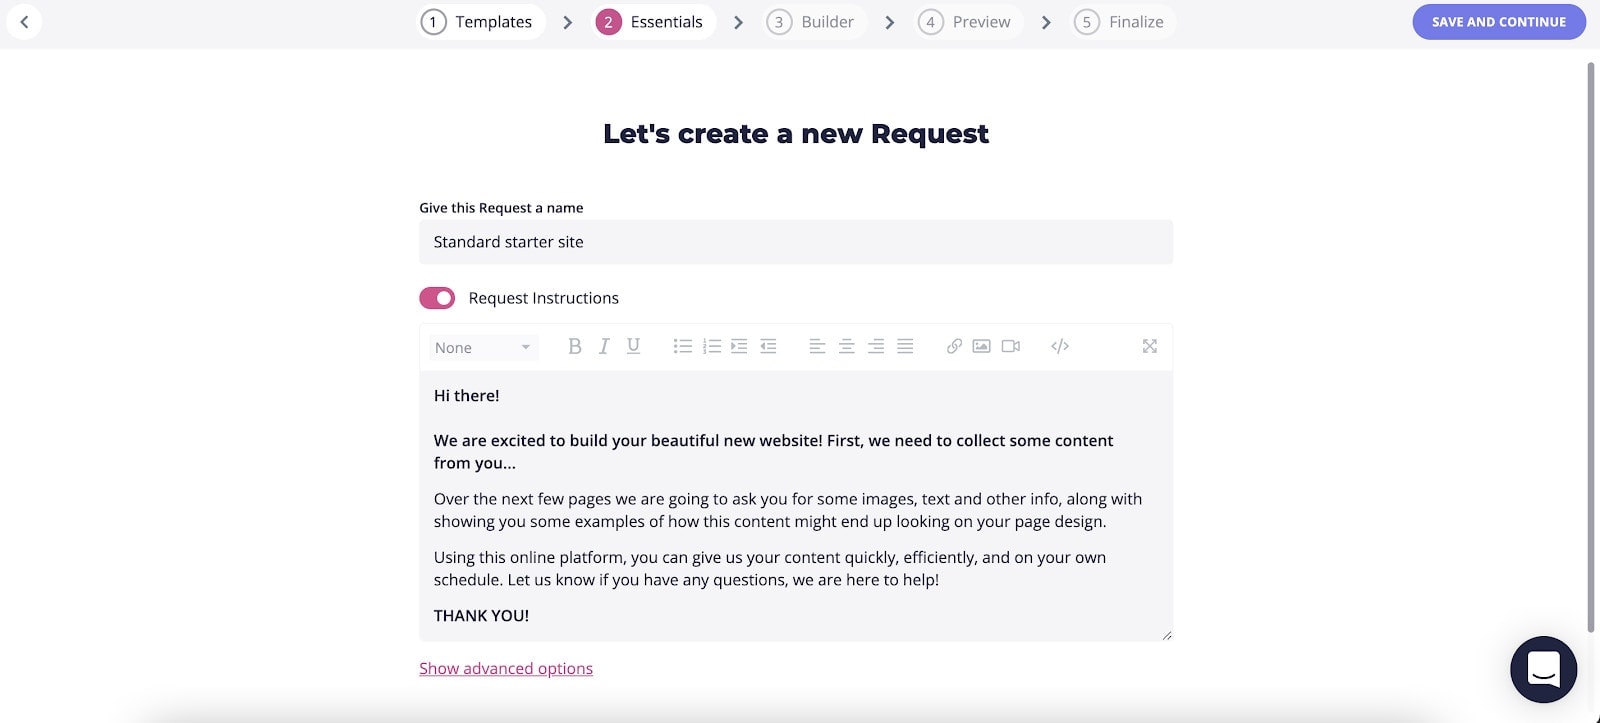
3. Edit your questions and sections as needed on the next “Builder” page.
The template will pre-load instructions for your client for filling out the request. Questions will be broken down into sections for each website page. The questions will help you gather text, logo, images, and section titles.
Click into each question to edit the content, or click the gear icon or three dots to rename, duplicate, delete the section, or add in a new section.
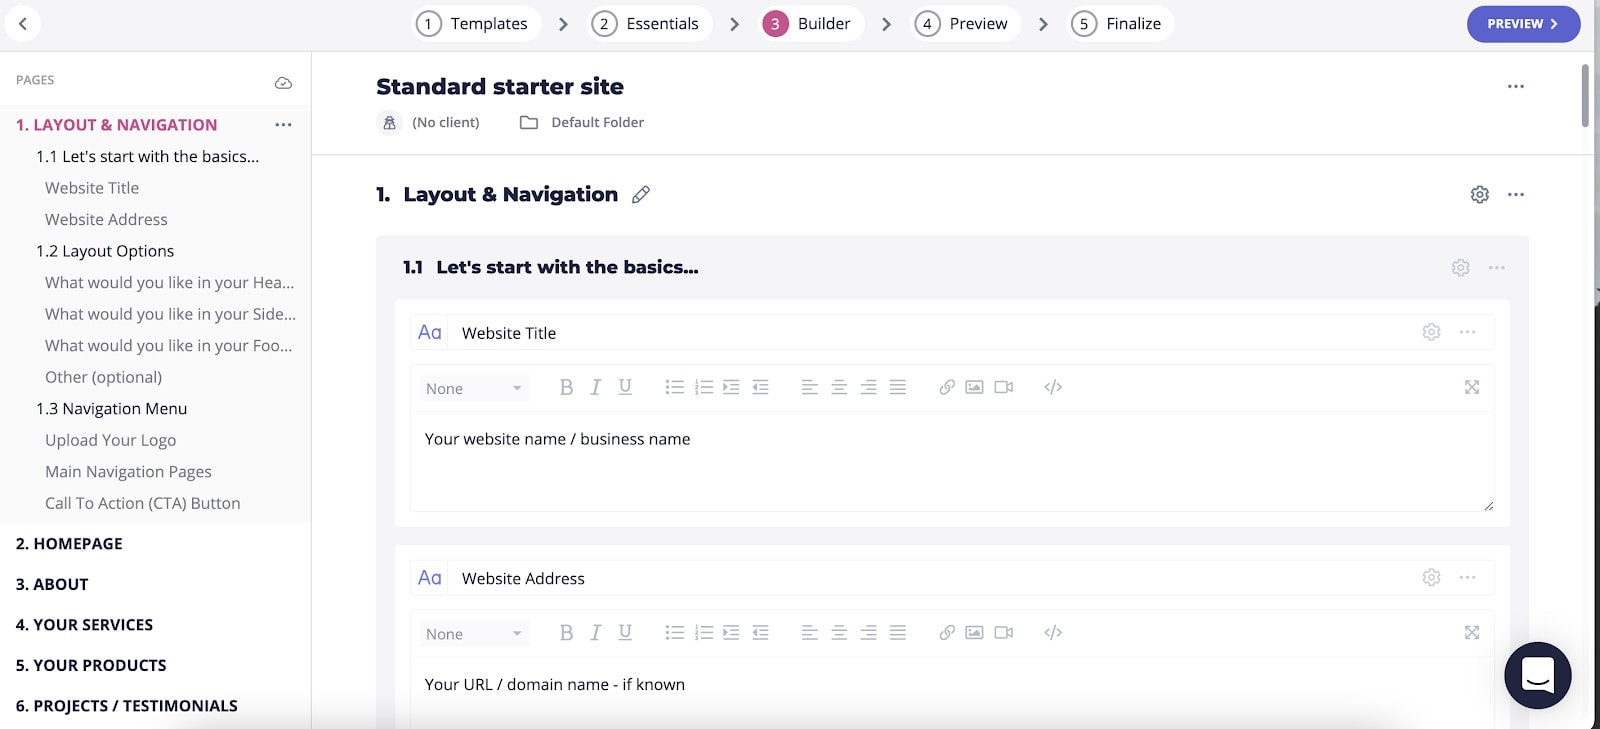
4. Once you’re happy with your request, hit the blue “Preview” button.
You’ll now be able to view your request as the client will see it.
Make any adjustments if you need to then hit the blue “Finalize” button.
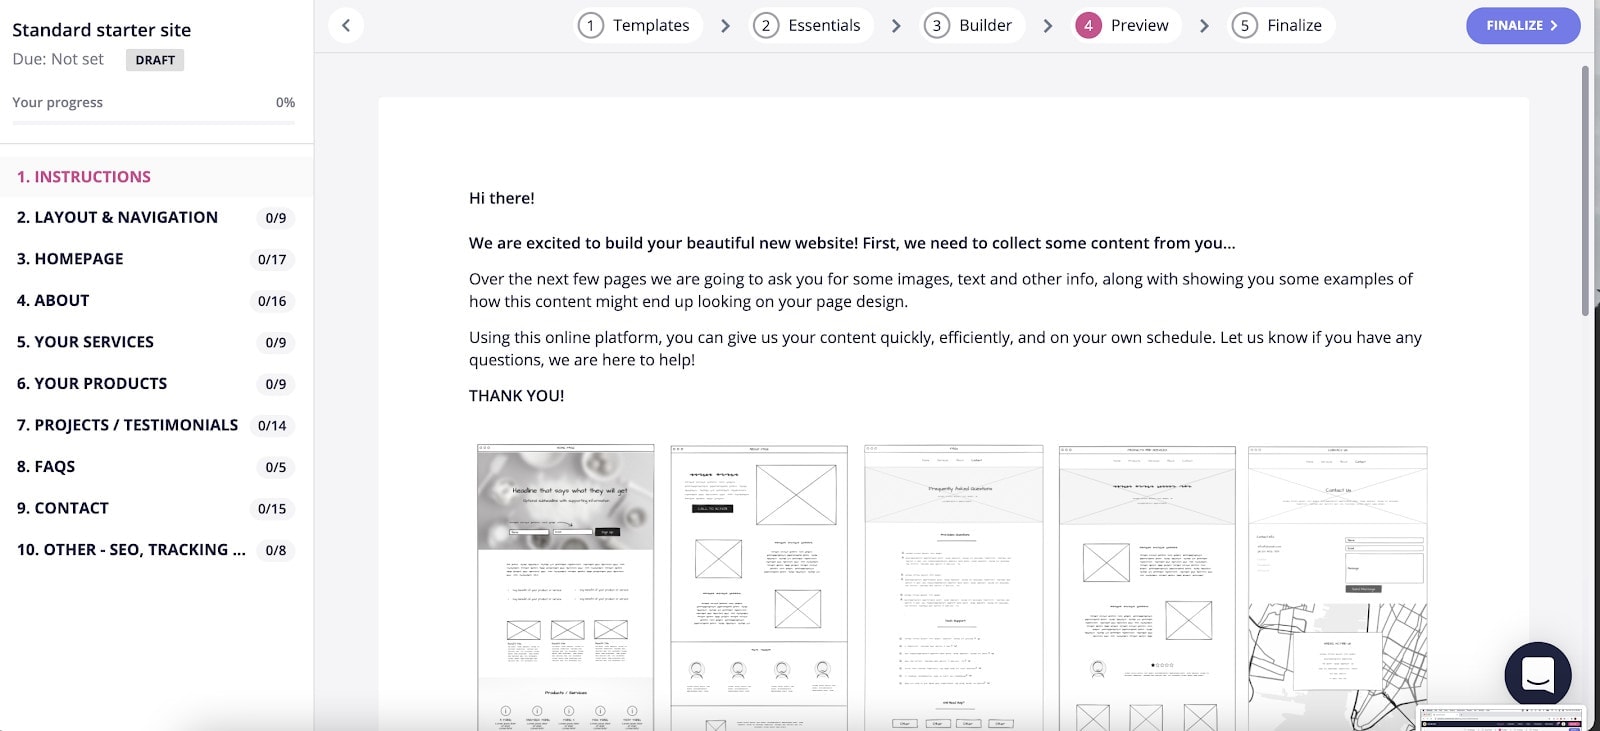
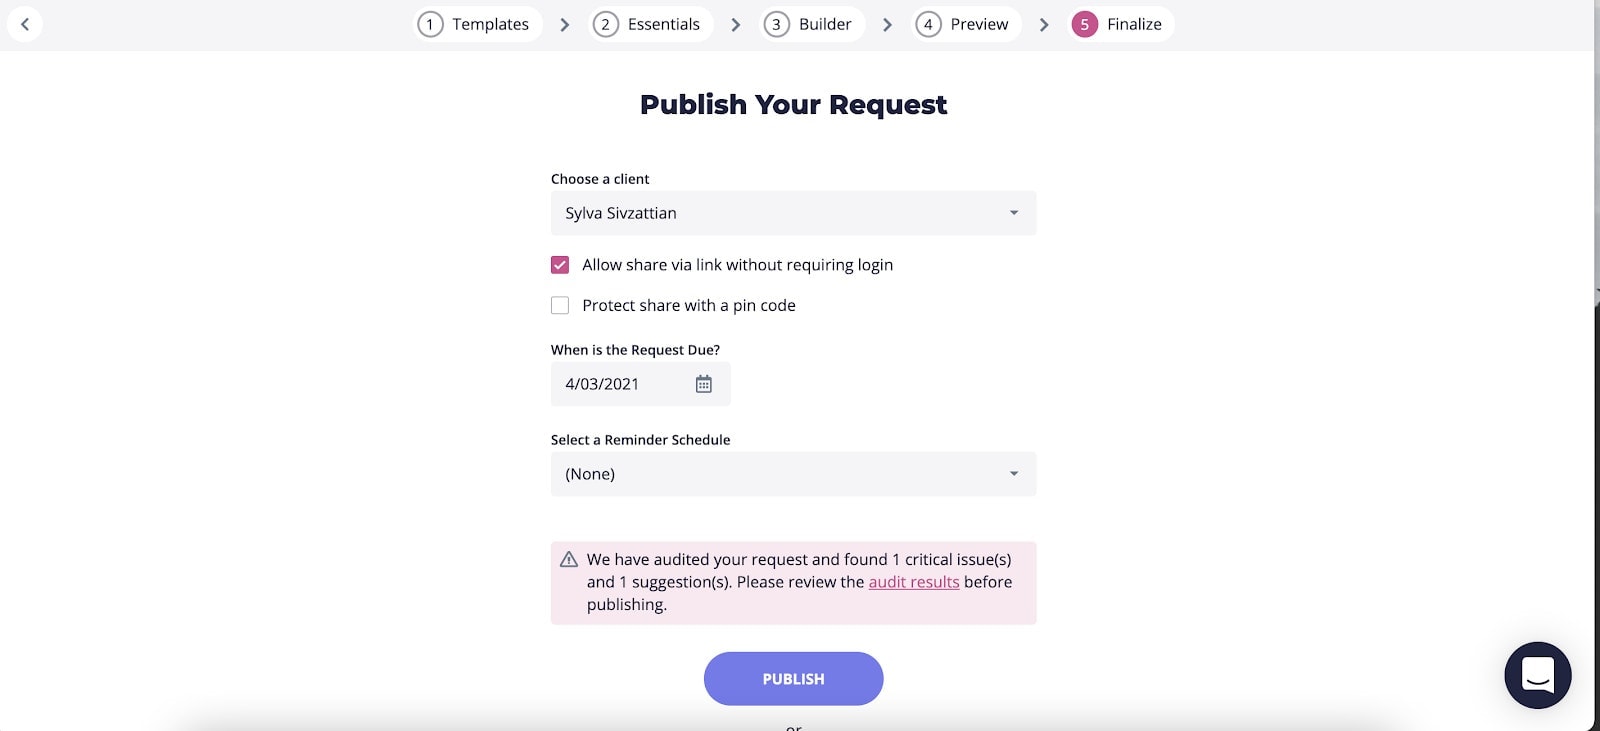
5. Publish your request and reminder schedule
Content snare will give you a few options for getting your request to your client.
If you have your clients set up in Content Snare already, just choose them in the “Choose a client” dropdown field. Or use this space to create a new client.
Check the “Allow share via link without requiring login” box if you want to make this process barrier-free for them (they won’t need a Content Snare account to complete your request.)
If you want to add a level of security, check the “Protect share with a pin code” box and add a pin code.
Set your deadline in the calendar field.
Choose your reminder schedule so that Content Snare can send out reminder emails to your client at appropriate times. If you don’t want the tool to send email reminders, select “None”.
Hit “Publish”.
* If there are any issues with your request, Content Snare will notify you in the red box. Click on audit results to review what might be wrong before sending.
6. Sit back and watch your client’s content roll in!
It’s really that easy. Once your client completes their request, you’ll get notified by email and be able to view the completed questionnaire in your requests.
We hope this post helps give you some inspiration and guidance for upcoming website designs. We’re curious, what’s the biggest issue you run into in the web design process or with wireframing? Let us know in the comments!
